

In today’s fast-paced world, staying connected is paramount. Whether you’re a busy professional juggling multiple responsibilities or simply someone who values efficient communication, the Outlook mobile app has become an indispensable tool. But beyond its core functionalities of sending and receiving emails, managing your calendar, and keeping track of contacts, have you ever considered the impact of your email signature? It’s more than just a formality; it’s a digital handshake, a subtle branding opportunity, and a quick way to share your essential contact information. This comprehensive guide will walk you through the process of adding a professional signature, complete with your logo, to your Outlook mobile app, ensuring you leave a lasting impression with every email you send.
Why Your Outlook Mobile Signature Matters
Before we dive into the “how,” let’s briefly touch upon the “why.” Why is a well-crafted signature so crucial, especially on a mobile platform? Here’s a breakdown:
- Professionalism: A signature adds an air of professionalism to your emails. It demonstrates that you’ve taken the time to present yourself and your brand in a polished manner.
- Branding: Your signature is a mini-advertisement for yourself or your company. Including your logo, name, title, and contact information helps reinforce your brand identity.
- Convenience: It eliminates the need to manually type out your contact details every time you send an email. Recipients can quickly find your phone number, website, or social media links.
- Consistency: Maintaining a consistent signature across all your emails, regardless of the device you’re using, ensures a cohesive brand experience.
- Mobile-First World: With the increasing use of mobile devices for email communication, having a mobile-optimized signature is more important than ever.
Understanding the Limitations of Outlook Mobile Signatures
While the Outlook mobile app offers signature customization, it’s important to acknowledge its limitations. Unlike the desktop version of Outlook, the mobile app doesn’t provide the same level of advanced formatting options. You might not be able to achieve the same intricate designs or incorporate complex HTML elements. However, you can still create a professional and effective signature using the available tools.
Step-by-Step Guide: Adding a Signature in Outlook Mobile
Now, let’s get to the main event: adding your signature. Follow these simple steps to create and customize your signature in the Outlook mobile app:
Step 1: Open the Outlook Mobile App and Access Settings
- Launch the Outlook mobile app on your smartphone or tablet.
- Tap on the menu icon (usually represented by three horizontal lines) in the top-left corner.
- Scroll down and tap on the “Settings” icon (usually a gear or cogwheel).
Step 2: Navigate to Mail Settings
Within the Settings menu, you’ll find various options related to your Outlook account. Look for the “Mail” or “Accounts” section. The exact wording may vary slightly depending on your device and the app version. Tap on the relevant option to access your email account settings.
Step 3: Select Your Email Account
If you have multiple email accounts set up in Outlook, you’ll need to select the account for which you want to create a signature. Tap on the email address associated with the account you wish to customize.
Step 4: Access the Signature Settings
Once you’ve selected your email account, you should see a list of settings specific to that account. Scroll down until you find the “Signature” option. It might be labeled as “Signature,” “Email Signature,” or something similar. Tap on it to proceed.
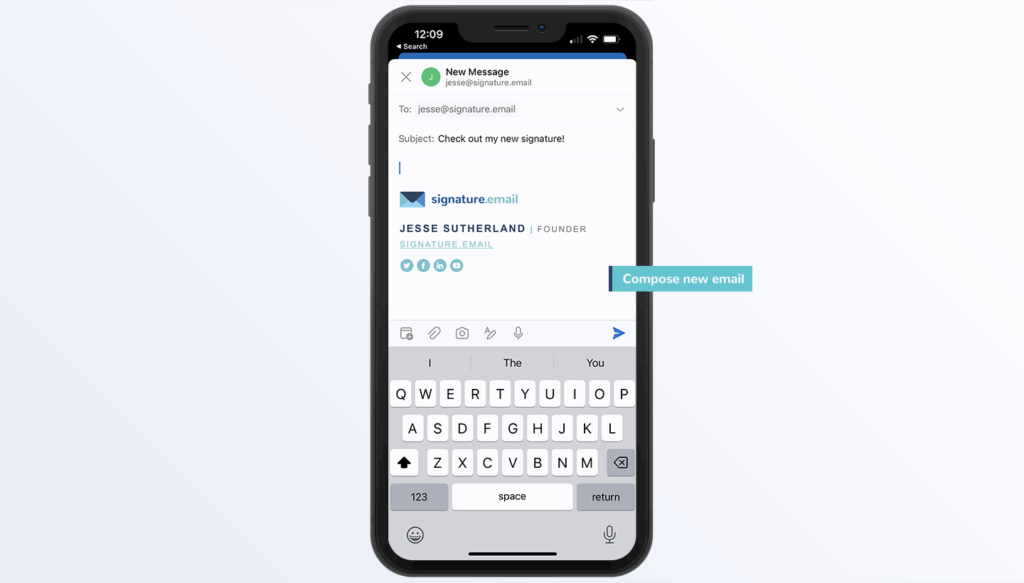
Step 5: Create Your Signature
This is where the magic happens! You’ll be presented with a text box where you can type in your desired signature. Here’s what to consider:
- Basic Information: Include your name, title, company (if applicable), and any relevant contact information, such as your phone number or website address.
- Formatting: While the options are limited, you can use basic formatting like bold or italics to emphasize certain elements. Use these sparingly to avoid clutter.
- Keep it Concise: Aim for a signature that is clear, concise, and easy to read on a mobile screen. Avoid overly long or complex signatures.
- Consider a Default: You can often choose whether the signature is automatically added to all new emails or only to replies and forwards.
Step 6: Adding Your Logo (The Trickier Part)
Adding a logo to your Outlook mobile signature requires a slightly different approach due to the app’s limitations. Here’s the most common and effective method:
- Create a Logo Image: Prepare your logo as a small, appropriately sized image file (e.g., a JPG or PNG). Aim for a width of around 150-200 pixels to ensure it displays well on mobile screens.
- Host Your Image Online: You’ll need to host your logo image online. You can use a free image hosting service (like Imgur or Google Photos) or upload it to your website’s server if you have one. Get the direct URL (web address) of your logo image.
- Compose Your Signature (Part 1 – On Desktop or Web): Because the Outlook mobile app lacks the ability to insert images directly, you’ll need to use a workaround. Log into your Outlook account on a desktop computer or via the Outlook web app (outlook.com).
- Compose a New Email: Create a new email message.
- Insert the Image: In the email body, insert your logo image using the “Insert” or “Picture” function.
- Copy the Image and Other Content: Copy the entire content of the email, including the logo and your desired signature text.
- Compose Your Signature (Part 2 – On Mobile): Return to your Outlook mobile app and paste the copied content into the signature field.
- Adjust and Save: Your logo and text should now appear in the signature field. You may need to adjust the formatting slightly to ensure everything looks perfect. Save your signature.
Important Note: The image might not always display perfectly in all email clients. It’s a limitation of using HTML-based signatures on mobile devices. Test your signature by sending yourself an email to see how it appears on different devices and email apps.
Tips for Crafting a Compelling Outlook Mobile Signature
Now that you know how to add a signature, let’s explore some best practices for creating a signature that effectively represents you and your brand:
- Keep it Short and Sweet: Mobile screens are small. Avoid lengthy signatures that require recipients to scroll.
- Prioritize Key Information: Focus on the most important details, such as your name, title, company, and primary contact information (phone number, website).
- Use a Professional Font: Stick to standard, readable fonts like Arial, Helvetica, or Calibri. Avoid overly stylized or decorative fonts.
- Maintain Consistent Branding: Use the same colors, fonts, and logo that you use across your other marketing materials to reinforce your brand identity.
- Include a Call to Action (Optional): If relevant, you can include a subtle call to action, such as a link to your website or a promotional offer. However, avoid making your signature overly promotional.
- Test Your Signature: Send test emails to yourself and to colleagues to ensure your signature looks good on different devices and email clients.
- Update Regularly: Keep your signature up-to-date with any changes to your contact information or branding.
- Consider Mobile Optimization: Ensure your signature is responsive and displays well on mobile devices. Avoid using overly large images or complex formatting.
Troubleshooting Common Issues
Sometimes, things don’t go as planned. Here are some common issues you might encounter when adding a signature to your Outlook mobile app and how to resolve them:
- Image Not Displaying: If your logo isn’t showing up, double-check the image URL to make sure it’s correct and that the image is publicly accessible. Also, consider using a smaller image size to improve compatibility.
- Formatting Issues: The Outlook mobile app may not always render formatting perfectly. Keep your signature simple and avoid complex formatting to minimize these issues.
- Signature Not Saving: Ensure you’ve saved your signature after making changes. Sometimes, the app might not save your changes if you navigate away too quickly.
- Signature Appearing Twice: If your signature is appearing twice, check your settings to see if you’ve accidentally created two signatures or if there’s a conflict with a signature set up on another device.
- Signature Not Showing on Replies/Forwards: In the signature settings, make sure you’ve selected the option to include the signature on replies and forwards.
- Image Distorted: Your image might appear distorted if the dimensions are not suitable. Try adjusting the size of the image when inserting it in the desktop/web version of Outlook.
Alternative Methods and Considerations
While the method outlined above is the most common and effective way to add a logo to your Outlook mobile signature, here are a few alternative approaches and considerations:
- Third-Party Signature Apps: Some third-party apps specialize in creating email signatures. These apps often offer more advanced features and customization options. However, they might require a subscription or have limitations.
- HTML Signature Generators: You can use online HTML signature generators to create a more complex signature with images and formatting. However, you’ll still need to use the copy-and-paste method to transfer the signature to your Outlook mobile app.
- Business Email Platforms: If you’re using a business email platform like Microsoft 365, you might have more control over your email signatures through the platform’s admin settings.
- User Experience: Always prioritize the user experience. A cluttered or overly complex signature can be off-putting. Keep it clean, concise, and easy to read.
- Accessibility: Consider accessibility guidelines when designing your signature. Use sufficient contrast between text and background colors, and ensure that the font size is readable.
Staying Compliant with Email Signature Regulations
Depending on your industry and location, you might be required to include certain information in your email signature to comply with legal or regulatory requirements. This could include:
- Company Information: Your company’s registered name, address, and registration number (if applicable).
- Disclaimer: A disclaimer stating that the email is confidential or that the views expressed are those of the sender and not necessarily those of the company.
- Legal Notices: Any other legal notices required by your industry or location.
Make sure you’re aware of any relevant regulations and include the necessary information in your signature.
Conclusion: Elevate Your Email Communication
Adding a well-designed signature to your Outlook mobile app is a simple yet impactful way to enhance your professional image, reinforce your brand, and streamline your communication. By following the steps outlined in this guide, you can effortlessly create a signature that reflects your professionalism and leaves a lasting impression. Remember to keep it concise, prioritize key information, and test your signature on different devices to ensure it looks its best. With a little effort, you can transform your email signature from a mere formality into a powerful tool for building your brand and connecting with others.
So, go ahead and take control of your digital handshake. Your Outlook mobile signature is waiting to be crafted into a powerful statement that speaks volumes about you and your brand. Embrace the opportunity to make a positive impression with every email you send, and watch as your professional communication reaches new heights.
