

Introduction: Why Blur a JPG Image?
In the ever-evolving digital landscape, images are ubiquitous. They’re the visual language of the internet, used to convey information, evoke emotions, and capture moments in time. But sometimes, a perfectly captured image needs a little something extra. That’s where blurring comes in. Blurring a JPG image isn’t just a cosmetic effect; it’s a versatile tool with a range of practical and creative applications. From protecting sensitive information to enhancing artistic expression, the ability to blur an image is a valuable skill for anyone working with digital media.
Perhaps you’re a photographer wanting to create a dreamy bokeh effect in the background of a portrait. Or maybe you’re a blogger who needs to obscure faces or license plates in a photograph before sharing it online. Perhaps you’re simply looking to add a touch of mystery or focus to an image. Whatever the reason, understanding how to blur a JPG image opens up a world of possibilities.
This comprehensive guide will walk you through the various methods and tools available for blurring JPG images. We’ll explore techniques for achieving different blurring effects, from subtle Gaussian blurs to more dramatic motion blurs. Whether you’re a seasoned graphic designer or a complete beginner, you’ll find the information you need to master this essential image editing skill. So, let’s dive in and unlock the secrets of blurring JPG images!
Understanding the Basics: What is Blurring?
Before we delve into the how-to, let’s establish a solid understanding of what blurring actually is. At its core, blurring is a process that reduces the sharpness of an image by averaging the colors of neighboring pixels. This averaging effect creates a smooth transition between areas of different colors, resulting in a softened or hazy appearance.
Think of it like smudging a drawing with your finger. The sharp lines become less defined, and the colors blend together. Blurring achieves a similar effect in the digital realm. The specific type of blurring effect depends on the algorithm used to average the pixel colors. Different algorithms produce different visual results.
Here are some common types of blurring techniques:
- Gaussian Blur: This is the most common type of blur, creating a soft, natural-looking effect. It’s often used for background blurring and creating a sense of depth.
- Motion Blur: This effect simulates the blur that occurs when an object is moving quickly in a photograph. It’s often used to create a sense of speed or action.
- Box Blur: This is a simpler type of blur that averages the colors of pixels within a rectangular area. It’s less sophisticated than a Gaussian blur but can be useful for certain applications.
- Radial Blur: This effect blurs the image outward from a central point, creating a swirling or zooming effect.
The degree of blurring is typically controlled by a parameter, such as the radius or strength of the blur. A larger radius or higher strength will result in a more pronounced blur, while a smaller radius or lower strength will produce a more subtle effect. Understanding these basics is crucial for choosing the right blurring technique and achieving the desired visual outcome.
Methods for Blurring JPG Images: A Step-by-Step Guide
Now, let’s get down to the practicalities. There are several methods you can use to blur a JPG image, each with its own advantages and disadvantages. We’ll explore the most popular and effective techniques, providing step-by-step instructions to guide you through the process.
1. Using Online Image Editors
Online image editors offer a convenient and accessible way to blur JPG images. They require no software downloads and can be used directly in your web browser. Here’s how to blur an image using a popular online editor:
- Choose an Online Editor: There are many free online image editors available, such as Canva, BeFunky, and Photopea. Select one that suits your needs and is easy to use.
- Upload Your Image: Once you’ve opened the online editor, upload your JPG image from your computer or cloud storage.
- Locate the Blur Tool: In most online editors, the blur tool is located in the “Effects,” “Filters,” or “Adjustments” section. Look for options like “Blur,” “Gaussian Blur,” or “Blur Filter.”
- Apply the Blur: Select the blur tool and adjust the settings, such as the radius or strength of the blur. Experiment with different settings to achieve the desired effect.
- Save Your Image: Once you’re satisfied with the blur, save the modified image to your computer in the JPG format (or any other format supported by the editor).
Pros of Using Online Editors:
- No software installation required.
- User-friendly interfaces, often ideal for beginners.
- Accessible from any device with an internet connection.
- Often free or offer free versions with basic features.
Cons of Using Online Editors:
- Limited advanced features compared to dedicated software.
- May require an internet connection to function.
- Privacy concerns with uploading images to third-party servers.
2. Using Desktop Image Editing Software (e.g., Photoshop, GIMP)
For more advanced blurring options and greater control, desktop image editing software is the way to go. Programs like Adobe Photoshop and the free and open-source GIMP offer a wide range of blurring tools and customization options.
Here’s how to blur an image using Adobe Photoshop:
- Open Your Image: Launch Photoshop and open your JPG image by going to “File” > “Open.”
- Select the Area to Blur (Optional): If you only want to blur a specific area of the image, use the selection tools (e.g., Lasso Tool, Magic Wand Tool) to select that area. If you want to blur the entire image, skip this step.
- Apply the Blur Filter: Go to “Filter” > “Blur.” You’ll find a variety of blur filters to choose from, such as “Gaussian Blur,” “Motion Blur,” and “Radial Blur.”
- Adjust the Settings: Select the desired blur filter and adjust the settings, such as the radius or angle of the blur, to achieve the desired effect. A preview window will usually show you how the blur will look before you apply it.
- Apply the Blur: Click “OK” to apply the blur filter.
- Save Your Image: Save the modified image by going to “File” > “Save” or “File” > “Save As.”
GIMP offers a similar workflow, with slightly different menu layouts and tool names. The core principles, however, remain the same. You’ll find the blur filters under the “Filters” menu.
Pros of Using Desktop Software:
- More advanced features and customization options.
- Greater control over the blurring process.
- Offline access, no internet connection required.
- Often more powerful and versatile than online editors.
Cons of Using Desktop Software:
- Requires software installation.
- Can be more complex for beginners to learn.
- May require a paid subscription (e.g., Photoshop) or a donation (e.g., GIMP).
3. Using Mobile Apps
Mobile apps provide a convenient way to blur images on the go. Many photo editing apps are available for both iOS and Android devices, offering a range of blurring tools and effects.
Here’s a general guide to blurring images using a mobile app:
- Download and Install a Photo Editing App: Search your app store (Google Play Store or Apple App Store) for a photo editing app with blurring capabilities. Popular options include Snapseed, PicsArt, and Adobe Lightroom Mobile.
- Open Your Image: Launch the app and open your JPG image from your device’s gallery or camera roll.
- Locate the Blur Tool: The blur tool is often found in the “Effects,” “Filters,” or “Adjustments” section of the app. Look for options like “Blur,” “Gaussian Blur,” or “Focus.”
- Apply the Blur: Select the blur tool and adjust the settings, such as the blur intensity or radius. Some apps also allow you to apply the blur selectively by using a brush or other selection tools.
- Save Your Image: Once you’re satisfied with the blur, save the modified image to your device’s gallery.
Pros of Using Mobile Apps:
- Convenient for on-the-go editing.
- User-friendly interfaces designed for touchscreens.
- Often free or offer free versions with basic features.
- Easy to share edited images on social media.
Cons of Using Mobile Apps:
- Limited features compared to desktop software.
- Smaller screen size can make precise editing more challenging.
- May contain ads or require in-app purchases for advanced features.
Advanced Techniques and Tips for Blurring JPG Images
Once you’ve mastered the basics of blurring, you can explore more advanced techniques to achieve even more impressive results. Here are some tips and tricks to elevate your image blurring skills:
1. Selective Blurring
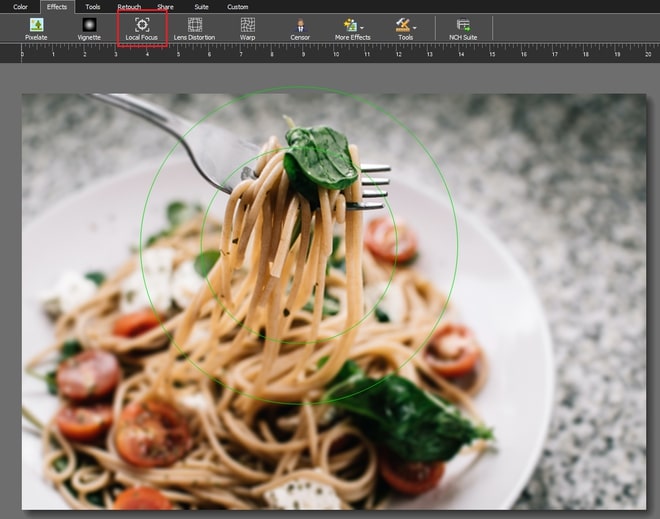
Instead of blurring the entire image, consider selectively blurring specific areas. This technique allows you to draw attention to the main subject of your image while blurring the background or distracting elements. You can use selection tools (e.g., lasso tool, magic wand tool, brush tool) to select the area you want to blur, and then apply the blur filter. This technique is particularly useful for creating a shallow depth of field effect, common in portrait photography.
2. Combining Blurring with Other Effects
Don’t be afraid to experiment with combining blurring with other image editing effects. For example, you can combine a Gaussian blur with a color adjustment to create a dreamy, ethereal look. You can also use blurring to soften the edges of a photo and blend it with other elements in a composite image.
3. Using Layer Masks
Layer masks are a powerful tool for controlling the visibility of different parts of an image. They allow you to apply blurring selectively and non-destructively. In Photoshop and GIMP, you can create a layer mask and use a brush tool to paint in the areas where you want the blur to be applied. This gives you precise control over the blurring effect and allows you to make adjustments without permanently altering the original image.
4. Understanding the Impact of Resolution
The resolution of your JPG image can affect the quality of the blur effect. Blurring a low-resolution image may result in a pixelated or blurry appearance. It’s generally best to work with high-resolution images to ensure the best possible results. If you need to blur a low-resolution image, try increasing the blur radius slightly to compensate for the lack of detail.
5. Fine-Tuning the Blur Settings
Experiment with the different blur settings to achieve the desired effect. The radius or strength of the blur will determine how pronounced the blur is. The angle of the blur (in the case of motion blur) will determine the direction of the motion. Pay attention to the preview window in your image editing software to see how the blur will look before you apply it. Sometimes, a subtle blur can be more effective than a heavy blur.
Common Uses of Blurring JPG Images
Blurring JPG images is a versatile technique with a wide range of applications. Here are some common uses:
1. Protecting Privacy
One of the most common uses of blurring is to protect privacy. Blurring faces, license plates, or other identifying information in photographs is essential before sharing images online. This helps to prevent the unauthorized use of personal information and protects individuals from potential harm.
2. Creating a Shallow Depth of Field
Blurring the background of a photograph can create a shallow depth of field, which is a photographic technique that isolates the subject and draws attention to it. This effect is often used in portrait photography to make the subject stand out against a blurred background. It can also be used to create a sense of depth and dimension in other types of photography.
3. Enhancing Artistic Expression
Blurring can be used as a creative tool to enhance artistic expression. You can use blurring to create a dreamy, ethereal look, add a sense of mystery, or simulate motion. Blurring can also be used to abstract an image and transform it into something new.
4. Reducing Distractions
Blurring can be used to reduce distractions in an image. If a photograph has distracting elements in the background, blurring can help to soften those elements and draw attention to the main subject. This is particularly useful in product photography, where the focus should be on the product itself.
5. Improving Composition
Blurring can be used to improve the composition of an image. By blurring certain areas, you can guide the viewer’s eye and create a more visually appealing composition. This can be particularly effective when used in conjunction with other compositional techniques, such as leading lines or rule of thirds.
Troubleshooting Common Blurring Issues
Even with the best techniques, you may encounter some issues when blurring JPG images. Here are some common problems and how to solve them:
1. Pixelation
If your image appears pixelated after blurring, it may be due to the low resolution of the original image or excessive blurring. Try reducing the blur radius or using a higher-resolution image. If the image is already low resolution, consider using a sharpening filter after blurring to restore some of the detail.
2. Unnatural-Looking Blurs
If the blur effect looks unnatural, it may be due to the type of blur you’ve chosen or the settings you’ve used. Experiment with different blur filters (e.g., Gaussian blur, motion blur) and adjust the settings to achieve a more natural-looking effect. Sometimes, a subtle blur is more effective than a heavy blur.
3. Difficulty Selecting the Area to Blur
If you’re having trouble selecting the area you want to blur, try using different selection tools (e.g., lasso tool, magic wand tool, brush tool). You may also need to adjust the tolerance or feathering settings of the selection tools to achieve the desired result. In some cases, it may be easier to select the area you *don’t* want to blur and then invert the selection.
4. File Size Issues
Applying a blur can sometimes increase the file size of your JPG image. To reduce the file size, you can try saving the image with a lower quality setting. However, be aware that reducing the quality setting can also reduce the image’s visual quality. Find a balance that suits your needs.
Conclusion: Embrace the Power of Blurring
In conclusion, blurring JPG images is a valuable skill for anyone working with digital media. Whether you’re protecting privacy, enhancing artistic expression, or simply improving the composition of your images, the ability to blur is a powerful tool to have at your disposal.
By understanding the basics of blurring, exploring different methods and techniques, and troubleshooting common issues, you can master this essential skill and unlock a world of creative possibilities. So, go ahead, experiment with different blur effects, explore the various tools and techniques, and unleash your creativity. The world of blurred images awaits!
Remember to practice and experiment to find what works best for you. The more you practice, the more comfortable you’ll become with the different blurring techniques and the more creative you’ll become. So, embrace the power of blurring and start transforming your images today!
