

Introduction: Mastering Page Management in Microsoft Word
Microsoft Word is a powerful tool for creating documents of all sizes, from simple letters to complex reports. As documents grow, effective page management becomes crucial. The Navigation Pane in Word provides a convenient way to navigate and organize your document. However, sometimes you need to delete a page, and knowing how to do it efficiently through the Navigation Pane can save you time and frustration. This comprehensive guide will walk you through various methods to delete pages in Word using the Navigation Pane, ensuring your documents are perfectly structured and polished.
Whether you’re dealing with accidental blank pages, outdated content, or simply reorganizing your document, mastering page deletion is a valuable skill. This guide covers everything from basic techniques to more advanced troubleshooting tips, enabling you to maintain a clean and professional document.
Understanding the Navigation Pane in Word
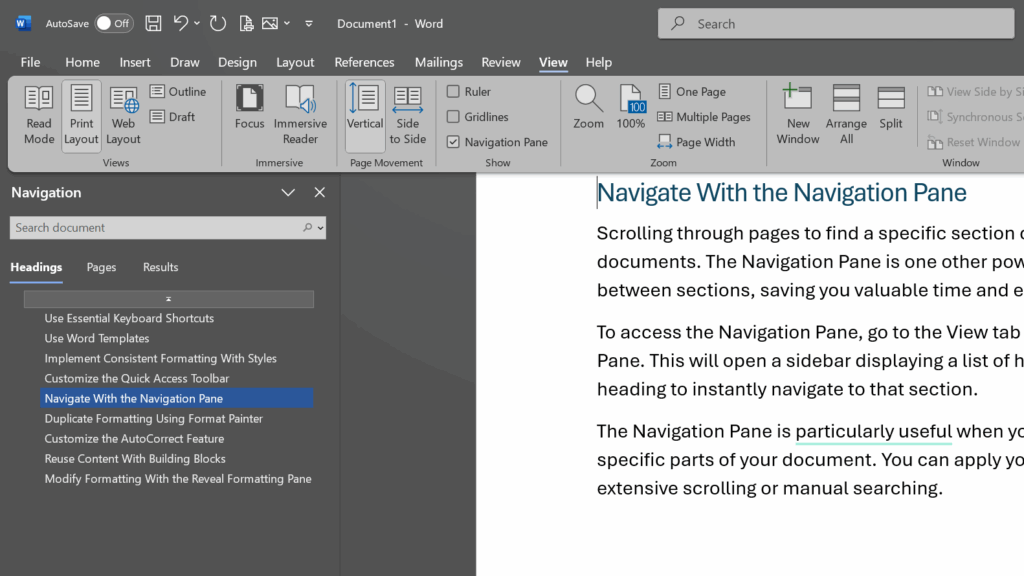
The Navigation Pane is a feature in Microsoft Word that allows you to quickly navigate through your document. It displays headings, bookmarks, and pages, providing a visual outline of your document’s structure. This tool is particularly useful for large documents where scrolling through numerous pages can be cumbersome.
Accessing the Navigation Pane
To access the Navigation Pane in Word, follow these simple steps:
- Open Microsoft Word and load your document.
- Click on the “View” tab in the ribbon.
- In the “Show” group, check the box next to “Navigation Pane.”
The Navigation Pane will appear on the left side of your Word window. It typically displays the headings in your document, allowing you to click on a heading to jump directly to that section. It also offers a page view, which lets you see thumbnails of each page in your document.
Benefits of Using the Navigation Pane
The Navigation Pane offers several benefits for document management:
- Easy Navigation: Quickly jump to specific sections or pages in your document.
- Document Structure: Visualize the hierarchy of headings and subheadings.
- Organization: Rearrange sections by dragging and dropping headings.
- Page Management: Delete, insert, and move pages with ease.
By leveraging the Navigation Pane, you can streamline your workflow and maintain better control over your document’s organization.
Deleting Pages in Word Using the Navigation Pane: Step-by-Step Guide
Deleting pages in Word using the Navigation Pane is a straightforward process. Here’s a detailed guide to help you accomplish this task efficiently:
Method 1: Deleting a Page by Selecting its Content
- Open the Navigation Pane: Follow the steps mentioned above to open the Navigation Pane in Word.
- Switch to Page View: In the Navigation Pane, click on the “Pages” tab to display thumbnails of each page in your document.
- Select the Page: Click on the thumbnail of the page you want to delete. This will take you to that page in the main document view.
- Select the Content: Once on the page, select all the content on the page. You can do this by pressing
Ctrl + A(orCmd + Aon a Mac) or by manually dragging your cursor to highlight all text, images, and other elements on the page. - Delete the Content: Press the
Deletekey on your keyboard, or right-click and select “Cut.” This will remove all the content from the page. - Remove the Blank Page: If deleting the content leaves a blank page, ensure there are no remaining paragraph marks or section breaks. If present, select and delete them.
This method is effective for deleting pages with text, images, and other content. However, it’s important to ensure you select all the content on the page to avoid leaving behind unwanted elements.
Method 2: Using Section Breaks to Delete Pages
Section breaks can sometimes cause unwanted blank pages in Word. Here’s how to use them to your advantage when deleting pages:
- Show Formatting Marks: Click on the “Home” tab in the ribbon. In the “Paragraph” group, click the “Show/Hide ¶” button (the pilcrow symbol). This will display all formatting marks, including section breaks.
- Locate the Section Break: Scroll through your document to find the section break that is causing the unwanted page. Section breaks are typically indicated by a double line across the page.
- Select the Section Break: Click and drag your cursor to select the section break.
- Delete the Section Break: Press the
Deletekey on your keyboard. This will remove the section break and merge the content before and after the break. - Check for Blank Pages: After deleting the section break, check if the blank page is gone. If not, there may be other formatting issues causing the blank page.
This method is particularly useful for removing blank pages caused by section breaks. It’s important to be cautious when deleting section breaks, as they can affect the formatting and layout of your document.
Method 3: Deleting Pages with Tables or Complex Formatting
Pages with tables or complex formatting may require a slightly different approach to ensure complete deletion:
- Select the Page: As with the previous methods, start by selecting the page you want to delete using the Navigation Pane.
- Select the Table or Complex Elements: If the page contains a table, click on the table to select it. For other complex elements, ensure you select the entire element, including any surrounding paragraph marks.
- Delete the Table or Elements: Press the
Deletekey on your keyboard to remove the selected table or elements. - Remove Remaining Formatting: After deleting the table or elements, check for any remaining formatting marks or empty paragraphs that may be causing a blank page. Select and delete these as needed.
When dealing with tables or complex formatting, it’s crucial to ensure you select the entire element to avoid leaving behind fragments that can cause formatting issues.
Troubleshooting Common Issues When Deleting Pages
Sometimes, deleting pages in Word can be more challenging than expected. Here are some common issues and how to troubleshoot them:
Issue 1: Blank Pages Persist After Deletion
Cause: This is often caused by lingering paragraph marks, section breaks, or other formatting elements.
Solution:
- Show Formatting Marks: Click the “Show/Hide ¶” button to display formatting marks.
- Identify Remaining Elements: Look for any paragraph marks, section breaks, or other formatting elements on the blank page.
- Delete Remaining Elements: Select and delete these elements to remove the blank page.
Issue 2: Content from the Next Page Moves Up
Cause: This can happen when deleting content from a page that is followed by a section break or other formatting boundary.
Solution:
- Undo the Deletion: Press
Ctrl + Z(orCmd + Zon a Mac) to undo the deletion. - Adjust Section Breaks: Review the section breaks around the page you want to delete. Ensure that deleting the content will not disrupt the flow of the document.
- Manually Adjust Content: If necessary, manually move content from the next page to fill the gap before deleting the page.
Issue 3: Navigation Pane Not Displaying Pages Correctly
Cause: This can occur if the document structure is complex or if there are issues with the heading styles.
Solution:
- Refresh the Navigation Pane: Close and reopen the Navigation Pane to refresh its display.
- Check Heading Styles: Ensure that your headings are correctly formatted using Word’s built-in heading styles (Heading 1, Heading 2, etc.).
- Update Table of Contents: If you have a table of contents, update it to reflect the current document structure.
Issue 4: Deleting a Page Deletes Multiple Pages
Cause: This is rare but can happen if there are underlying issues with the document’s structure or if multiple pages are inadvertently selected.
Solution:
- Undo the Deletion: Immediately press
Ctrl + Z(orCmd + Zon a Mac) to undo the deletion. - Review the Selection: Carefully review your selection to ensure you are only deleting the intended page.
- Save a Backup: Before attempting to delete the page again, save a backup copy of your document.
Advanced Tips for Page Management in Word
Beyond basic page deletion, there are several advanced techniques you can use to manage pages in Word more effectively:
Using Section Breaks for Precise Control
Section breaks allow you to divide your document into sections with different formatting. This can be useful for creating documents with varying page layouts, headers, and footers.
- Types of Section Breaks: Word offers several types of section breaks, including Next Page, Continuous, Even Page, and Odd Page.
- Inserting Section Breaks: To insert a section break, click on the “Layout” tab in the ribbon. In the “Breaks” group, choose the type of section break you want to insert.
- Managing Section Breaks: Use section breaks to control the formatting of individual sections, such as page orientation, margins, and headers/footers.
Creating and Managing Headers and Footers
Headers and footers are areas at the top and bottom of each page that can contain information such as page numbers, titles, and dates.
- Inserting Headers and Footers: To insert a header or footer, click on the “Insert” tab in the ribbon. In the “Header & Footer” group, choose the type of header or footer you want to insert.
- Customizing Headers and Footers: You can customize headers and footers by adding text, images, and fields. Use the “Header & Footer Tools” tab to access formatting options.
- Different First Page: Use the “Different First Page” option to create a unique header or footer for the first page of your document or section.
Using Page Numbers Effectively
Page numbers are essential for navigating and referencing pages in a document.
- Inserting Page Numbers: To insert page numbers, click on the “Insert” tab in the ribbon. In the “Header & Footer” group, click on “Page Number” and choose the location and format of the page numbers.
- Formatting Page Numbers: You can format page numbers to start at a specific number, use different numbering styles (e.g., Roman numerals), and include chapter numbers.
- Removing Page Numbers: To remove page numbers, go to the “Header & Footer” group and select “Remove Page Numbers.”
Working with Tables of Contents
A table of contents (TOC) provides a structured overview of your document, listing headings and their corresponding page numbers.
- Creating a Table of Contents: To create a TOC, click on the “References” tab in the ribbon. In the “Table of Contents” group, choose the type of TOC you want to insert.
- Updating a Table of Contents: To update a TOC after making changes to your document, right-click on the TOC and select “Update Field.” Choose whether to update page numbers only or the entire table.
- Customizing a Table of Contents: You can customize the appearance and formatting of your TOC by modifying the TOC styles in the Styles pane.
Best Practices for Document Organization in Word
Effective document organization is key to creating professional and easy-to-navigate documents. Here are some best practices to follow:
Use Heading Styles Consistently
Using Word’s built-in heading styles (Heading 1, Heading 2, etc.) ensures consistent formatting and allows you to easily create a table of contents.
Employ Section Breaks Strategically
Use section breaks to divide your document into logical sections and control the formatting of each section independently.
Leverage the Navigation Pane
The Navigation Pane is a powerful tool for navigating and organizing your document. Use it to quickly jump to specific sections, rearrange content, and manage pages.
Regularly Update Your Table of Contents
Keep your table of contents up-to-date to reflect the current structure of your document. This makes it easier for readers to navigate your document.
Proofread and Review Your Document
Before finalizing your document, proofread and review it carefully to ensure there are no errors in grammar, spelling, or formatting.
Conclusion: Achieving Seamless Page Deletion in Word
Deleting pages in Word using the Navigation Pane is a valuable skill that can save you time and frustration. By understanding the Navigation Pane, mastering the various methods for deleting pages, and troubleshooting common issues, you can maintain a clean and professional document. Whether you’re dealing with accidental blank pages, outdated content, or simply reorganizing your document, the techniques outlined in this guide will help you achieve seamless page deletion in Word.
Remember to use heading styles consistently, employ section breaks strategically, and leverage the Navigation Pane to effectively organize your documents. With these best practices, you can create well-structured and easy-to-navigate documents that meet your specific needs.
By following the steps and tips outlined in this guide, you’ll be well-equipped to handle any page deletion task in Microsoft Word with confidence and efficiency.
