

Mastering iPhone Screen Recording: A Comprehensive Guide to the New Update
The iPhone, a ubiquitous tool in our modern lives, continually evolves with each software update. One of its most useful features, screen recording, allows users to capture everything happening on their screen, be it for creating tutorials, documenting gameplay, or simply sharing a funny moment with friends. With each iOS update, the process might slightly change or new features might be added. This comprehensive guide will walk you through how to add and effectively use the screen recording feature on your iPhone, particularly focusing on the nuances introduced in the latest iOS update.
Why Screen Recording is a Must-Have Feature
Before diving into the ‘how-to,’ let’s explore why screen recording has become an indispensable feature for iPhone users:
- Creating Tutorials: Whether you’re explaining how to use a specific app or demonstrating a complex process, screen recording offers a visual aid that words alone can’t match.
- Gameplay Recording: Gamers can record their sessions to share highlights, create walkthroughs, or analyze their performance.
- Troubleshooting: When facing technical issues, recording your screen can help you show the problem to tech support or friends who can offer assistance.
- Preserving Moments: Capture ephemeral content like disappearing messages or live streams to relive them later.
- Documentation: Record important video calls or online meetings for future reference.
Adding Screen Recording to Your Control Center: A Step-by-Step Guide
The screen recording feature is conveniently accessible through the Control Center. If it’s not already there, adding it is a breeze. Here’s how:
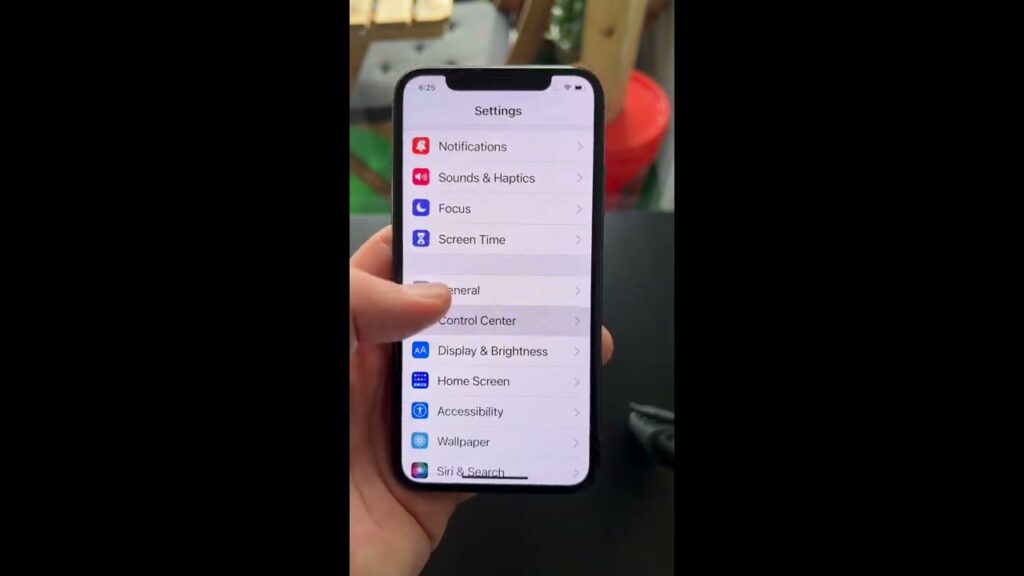
Step 1: Open Settings
First, locate the Settings app on your iPhone’s home screen. It’s usually represented by a gear icon. Tap on it to open.
Step 2: Navigate to Control Center
Scroll down in the Settings menu until you find “Control Center.” Tap on it. The Control Center settings allow you to customize which features are readily available when you swipe down from the top-right corner of your screen (or swipe up from the bottom on older iPhones).
Step 3: Customize Controls
In the Control Center settings, you’ll see two sections: “Included Controls” and “More Controls.” The “Included Controls” are the features already present in your Control Center. The “More Controls” section lists the features you can add.
Step 4: Add Screen Recording
Scroll through the “More Controls” section until you find “Screen Recording.” It’s usually represented by a circular icon with a dot inside. Tap the green “+” button next to “Screen Recording” to add it to your Control Center.
Step 5: Verify Addition
After tapping the “+” button, “Screen Recording” will move from the “More Controls” section to the “Included Controls” section. This confirms that it has been successfully added to your Control Center.
Using the Screen Recording Feature
Now that you’ve added screen recording to your Control Center, let’s explore how to use it effectively:
Accessing the Control Center
To access the Control Center, swipe down from the top-right corner of your iPhone’s screen (on iPhones with Face ID) or swipe up from the bottom of the screen (on iPhones with a Home button).
Starting a Recording
In the Control Center, you’ll see the Screen Recording icon (the circular icon with a dot inside). Tap it to start recording. A three-second countdown will appear on the button before the recording begins, giving you time to prepare.
Microphone Option
By default, the screen recording feature records the audio from your iPhone’s microphone. If you want to record without audio or if you want to use an external microphone, long-press (or 3D Touch, if your iPhone supports it) on the Screen Recording icon in the Control Center. This will bring up a menu with the option to toggle the microphone on or off. You can also select a different audio source if you have one connected.
Stopping a Recording
There are a few ways to stop a screen recording:
- Tap the Red Status Bar: When you’re recording, a red status bar appears at the top of your screen. Tap on this bar, and a prompt will appear asking if you want to stop the recording. Tap “Stop” to end the recording.
- Access the Control Center: Swipe down from the top-right corner (or up from the bottom) to access the Control Center. Tap the Screen Recording icon again to stop the recording.
Finding Your Recordings
All screen recordings are automatically saved to your Photos app. They’ll be located in the “Recents” album or the “Videos” album. From there, you can view, edit, and share your recordings just like any other video.
New Features and Changes in the Latest iOS Update
Each iOS update brings improvements and changes to existing features, and screen recording is no exception. Here are some of the noteworthy changes introduced in the latest update:
Enhanced Audio Control
The latest iOS update provides more granular control over audio recording. You can now adjust the microphone level directly from the Control Center menu. This is particularly useful for ensuring optimal audio quality when recording in noisy environments.
Improved Recording Quality
Apple has optimized the screen recording feature to deliver higher-quality recordings with reduced file sizes. This means you can capture more detailed visuals without consuming excessive storage space.
Integration with Third-Party Apps
The new update allows for seamless integration with third-party apps. You can now directly initiate screen recordings from within supported apps, streamlining the workflow for content creators and developers.
Live Broadcasting Capabilities
One of the most exciting additions is the ability to live broadcast your screen to various platforms. This feature is perfect for gamers who want to stream their gameplay or presenters who need to share their screen with a remote audience.
Troubleshooting Common Issues
While the screen recording feature is generally reliable, you might encounter occasional issues. Here are some common problems and their solutions:
No Sound
If your screen recording has no sound, make sure the microphone is enabled. Long-press on the Screen Recording icon in the Control Center and ensure the microphone toggle is switched on. Also, check if any other apps are using the microphone, as this can sometimes interfere with screen recording.
Laggy Recording
If your screen recording is laggy or choppy, try closing unnecessary apps running in the background. A full storage can also impact performance, so ensure you have enough free space on your device.
Screen Recording Icon Missing
If the Screen Recording icon is missing from your Control Center, revisit the Control Center settings and ensure it’s added to the “Included Controls” section. Sometimes, a software glitch can cause it to disappear, but re-adding it usually resolves the issue.
Recording Stops Unexpectedly
If your screen recording stops unexpectedly, it could be due to a software crash or memory issue. Try restarting your iPhone and attempting the recording again. If the problem persists, consider updating to the latest iOS version, as updates often include bug fixes and performance improvements.
Tips and Tricks for Better Screen Recordings
To make the most of the screen recording feature, here are some helpful tips and tricks:
Minimize Notifications
Before starting a recording, enable “Do Not Disturb” mode to prevent notifications from popping up and interrupting your recording. This ensures a clean and distraction-free video.
Clean Your Screen
Wipe your screen clean to remove any smudges or fingerprints. This will improve the visual quality of your recordings.
Plan Your Recording
Before you hit record, plan what you want to demonstrate or capture. This will help you create a more focused and concise recording.
Edit Your Recordings
Use the built-in editing tools in the Photos app to trim the beginning and end of your recordings. You can also add filters, adjust brightness, and make other enhancements to improve the overall quality.
Use a Screen Recording App for Advanced Features
While the built-in screen recording feature is sufficient for basic needs, consider using a third-party screen recording app for more advanced features like adding annotations, custom watermarks, or real-time editing.
The Future of Screen Recording on iPhone
As technology continues to evolve, the screen recording feature on iPhone is likely to become even more sophisticated. We can anticipate further enhancements in audio and video quality, more seamless integration with other apps, and the introduction of new features like augmented reality recording and AI-powered editing tools.
Conclusion
The screen recording feature on iPhone is a powerful tool that can be used for a variety of purposes, from creating tutorials to documenting gameplay. By following this comprehensive guide, you can master the art of screen recording and unlock its full potential. Whether you’re a seasoned content creator or a casual user, the ability to capture and share your screen is an invaluable asset in today’s digital world. With each iOS update, Apple continues to refine and enhance this feature, making it an essential part of the iPhone experience. So, go ahead, explore the possibilities, and start recording your world!
