

Introduction: Unlocking the Secrets to Drawing Realistic and Dynamic Legs
Drawing the human figure can be both incredibly rewarding and immensely challenging. Among the various body parts, legs often pose a significant hurdle for artists, regardless of their skill level. The complex anatomy, subtle curves, and dynamic poses require a keen eye and a solid understanding of fundamental principles. This comprehensive guide aims to demystify the process of drawing legs, providing you with the knowledge and techniques to create realistic and compelling depictions. Whether you are a beginner just starting your artistic journey or an experienced artist seeking to refine your skills, this article will equip you with the tools you need to master the art of leg drawing.
We’ll delve into the underlying anatomy, explore different approaches to construction, and provide practical tips for capturing the essence of movement and form. By breaking down the process into manageable steps and focusing on key anatomical landmarks, you’ll gain the confidence to tackle even the most challenging leg poses. So, grab your pencils, sharpen your focus, and prepare to embark on a journey of artistic discovery as we unlock the secrets to drawing legs with precision and flair.
Understanding Leg Anatomy: The Foundation for Realistic Drawings
Before diving into the practical drawing techniques, it’s crucial to establish a solid understanding of the underlying anatomy. The leg is a complex structure comprised of bones, muscles, and tendons, all working together to enable movement and support the body’s weight. Familiarizing yourself with these anatomical components will not only enhance the realism of your drawings but also provide a deeper appreciation for the human form.</p
Key Bones of the Leg
The leg’s skeletal structure is composed of several key bones, each playing a vital role in its overall shape and function:
- Femur (Thigh Bone): The longest and strongest bone in the human body, the femur extends from the hip to the knee. Its prominent ball-shaped head articulates with the hip socket, allowing for a wide range of motion. The femur’s shape influences the overall contour of the thigh.
- Patella (Knee Cap): A small, triangular bone located in front of the knee joint. The patella protects the knee and improves the leverage of the quadriceps muscles.
- Tibia (Shin Bone): The larger of the two bones in the lower leg, the tibia bears most of the weight and extends from the knee to the ankle. Its prominent anterior crest, the shin, is a key landmark for drawing the lower leg.
- Fibula: The thinner of the two bones in the lower leg, the fibula runs parallel to the tibia and provides stability to the ankle joint. While not as weight-bearing as the tibia, the fibula plays a crucial role in maintaining balance and supporting the ankle.
Major Muscle Groups of the Leg
The muscles of the leg are responsible for a wide range of movements, from walking and running to jumping and kicking. Understanding the major muscle groups and their influence on the leg’s shape is essential for creating realistic and dynamic drawings:
- Quadriceps: Located on the front of the thigh, the quadriceps are a group of four muscles that extend the knee. These muscles contribute significantly to the bulk of the thigh and play a key role in movements like walking and running.
- Hamstrings: Located on the back of the thigh, the hamstrings are a group of three muscles that flex the knee and extend the hip. They counterbalance the quadriceps and contribute to the overall shape of the thigh.
- Calf Muscles (Gastrocnemius and Soleus): Located on the back of the lower leg, the calf muscles are responsible for plantar flexion of the foot, which is essential for walking, running, and jumping. These muscles create a prominent bulge on the back of the lower leg.
- Tibialis Anterior: Located on the front of the lower leg, the tibialis anterior dorsiflexes the foot, which is the opposite of plantar flexion. This muscle helps to lift the foot and plays a role in walking and running.
Key Anatomical Landmarks
Identifying key anatomical landmarks on the leg can greatly simplify the drawing process. These landmarks serve as reference points for establishing proportions, defining muscle shapes, and creating a sense of realism:
- Greater Trochanter: A bony prominence located on the upper part of the femur, near the hip joint.
- Lateral and Medial Epicondyles: Bony prominences located on either side of the knee joint.
- Anterior Tibial Crest (Shin): The sharp, bony ridge running down the front of the tibia.
- Medial and Lateral Malleoli: Bony prominences located on either side of the ankle joint.
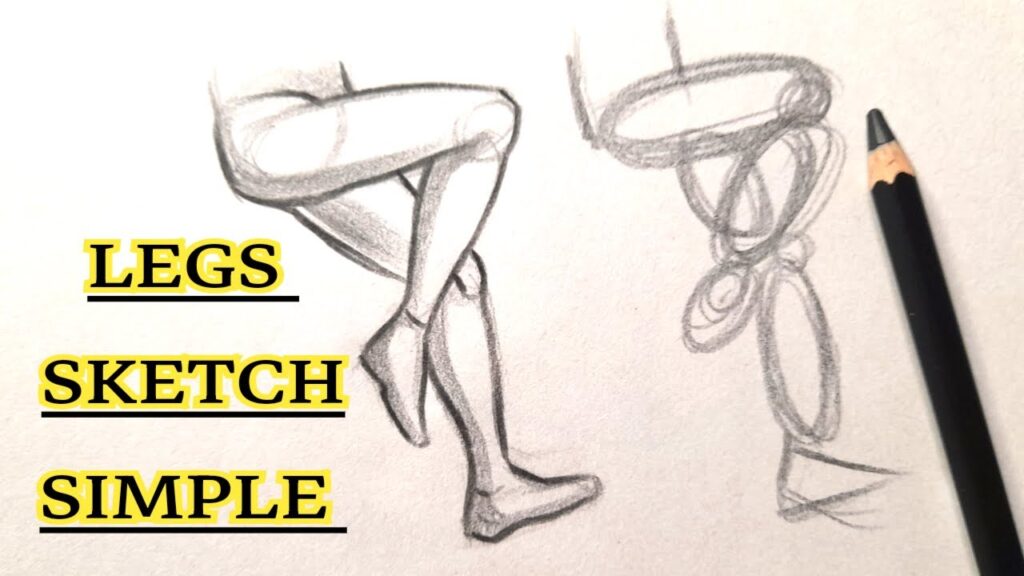
Construction Techniques: Building the Leg from Basic Shapes
Now that we have a solid understanding of the leg’s anatomy, let’s explore different construction techniques for building the leg from basic shapes. This approach allows us to simplify the complex anatomy and create a solid foundation for our drawings.
Using Cylinders and Cones
One of the most common and effective construction techniques involves using cylinders and cones to represent the major segments of the leg. The thigh can be represented by a cylinder, tapering slightly towards the knee. The lower leg can also be represented by a cylinder, widening slightly towards the calf muscles. Cones can be used to represent the feet, with the point of the cone representing the toes.
This approach allows us to establish the overall proportions and form of the leg without getting bogged down in the details. We can then refine the shapes and add details as we progress.
Using Simplified Muscle Masses
Another approach involves representing the major muscle groups as simplified masses. The quadriceps can be represented by a large, rounded mass on the front of the thigh, while the hamstrings can be represented by a smaller mass on the back of the thigh. The calf muscles can be represented by a prominent bulge on the back of the lower leg.
This technique helps us to visualize the underlying muscle structure and create a more dynamic and realistic depiction of the leg. It’s particularly useful for drawing legs in motion, where the muscle shapes are more pronounced.
Using Lines of Action
Lines of action are imaginary lines that represent the overall direction and flow of the pose. They can be used to establish the dynamism and energy of the leg. By drawing a line of action that follows the curve of the leg, we can create a sense of movement and rhythm.
This technique is particularly useful for drawing legs in dynamic poses, such as running or jumping. It helps us to capture the essence of the pose and create a more compelling and engaging drawing.
Drawing Legs in Different Poses: Practical Tips and Techniques
Now that we have explored the anatomy and construction techniques, let’s delve into the practical tips and techniques for drawing legs in different poses. Each pose presents its own unique challenges, but by understanding the underlying principles, we can approach them with confidence.
Standing Pose
The standing pose is a fundamental pose for drawing legs. When drawing a standing leg, it’s important to pay attention to the weight distribution and the subtle curves of the leg. The weight-bearing leg will typically be straighter, while the other leg may be slightly bent. The hip will also tilt slightly towards the weight-bearing leg.
Pay attention to the alignment of the bones and the position of the key anatomical landmarks. The greater trochanter, lateral epicondyle, and lateral malleolus should all be aligned on the weight-bearing leg.
Walking Pose
The walking pose is a dynamic pose that requires a good understanding of anatomy and perspective. When drawing a walking leg, it’s important to capture the sense of movement and momentum. The leg that is swinging forward will be bent at the knee, while the leg that is pushing off the ground will be extended. The arms should also be coordinated with the legs to maintain balance.
Use lines of action to capture the flow of the pose and pay attention to the foreshortening of the leg that is moving away from the viewer.
Running Pose
The running pose is an even more dynamic pose than the walking pose. When drawing a running leg, it’s important to capture the sense of speed and energy. The legs will be more bent and the arms will be swinging more vigorously. The body will also be leaning forward to maintain balance.
Use exaggerated lines of action to emphasize the dynamism of the pose and pay attention to the compression and extension of the muscles as the leg moves through its range of motion.
Sitting Pose
The sitting pose presents its own unique challenges due to the compression and distortion of the leg muscles. When drawing a sitting leg, it’s important to pay attention to the folds and creases in the skin and clothing. The thigh will be compressed against the chair, and the calf muscles will be relaxed.
Use soft shading to depict the subtle changes in form and pay attention to the way the light interacts with the surface of the leg.
Common Mistakes to Avoid When Drawing Legs
Even with a solid understanding of anatomy and technique, it’s easy to fall into common traps when drawing legs. Here are some mistakes to avoid:
- Incorrect Proportions: Pay close attention to the proportions of the leg, relative to the rest of the body. The leg should be approximately half the height of the body.
- Lack of Anatomical Knowledge: A lack of understanding of the underlying anatomy can lead to unrealistic and unnatural drawings.
- Ignoring Perspective: Perspective plays a crucial role in depicting the leg accurately. Failure to consider perspective can result in distorted and unnatural drawings.
- Over-Reliance on Reference: While reference photos are helpful, relying too heavily on them can stifle your creativity and prevent you from developing your own unique style.
- Not Practicing Enough: Like any skill, drawing legs requires practice. The more you practice, the better you will become.
Tips for Improving Your Leg Drawings
Here are some additional tips to help you improve your leg drawings:
- Study Anatomy: Continue to study the anatomy of the leg, using books, diagrams, and online resources.
- Practice Regularly: Set aside time each day or week to practice drawing legs.
- Use Reference Photos: Use reference photos to study the anatomy and proportions of the leg.
- Experiment with Different Techniques: Try different construction techniques, shading styles, and drawing mediums.
- Seek Feedback: Share your drawings with other artists and ask for feedback.
- Be Patient: Learning to draw legs well takes time and effort. Don’t get discouraged if you don’t see results immediately.
Advanced Techniques: Adding Detail and Realism
Once you have mastered the fundamentals, you can start to explore advanced techniques for adding detail and realism to your leg drawings.
Rendering Muscle Tone
Rendering muscle tone involves using shading and highlights to depict the subtle variations in the surface of the leg. This can be achieved by using a variety of shading techniques, such as hatching, cross-hatching, and blending.
Pay attention to the direction of the light and the way it interacts with the different muscle groups. Use darker values to represent the shadows and lighter values to represent the highlights.
Depicting Skin Texture
Depicting skin texture involves adding subtle details to the surface of the skin, such as wrinkles, pores, and blemishes. This can be achieved by using a variety of techniques, such as stippling, scumbling, and hatching.
Pay attention to the age and health of the person you are drawing. Younger people will typically have smoother skin, while older people will have more wrinkles and blemishes.
Drawing Clothing
Drawing clothing involves understanding how fabric drapes and folds over the body. Pay attention to the way the fabric stretches and compresses as the leg moves. Use soft shading to depict the folds and creases in the fabric.
Consider the type of fabric you are drawing. Different fabrics will have different properties and will drape differently over the body.
Conclusion: Embrace the Journey and Keep Drawing
Drawing legs, like any artistic skill, is a journey of continuous learning and improvement. By understanding the underlying anatomy, mastering the construction techniques, and practicing regularly, you can unlock your potential and create stunning depictions of the human form. Don’t be afraid to experiment, make mistakes, and learn from your experiences. The most important thing is to embrace the process and enjoy the journey. So, grab your pencils, keep practicing, and watch your leg drawings come to life!
