

Introduction: Why Removing Pages in Google Docs Matters
Google Docs has become an indispensable tool for creating, editing, and sharing documents. Its collaborative features and accessibility make it a favorite among students, professionals, and casual users alike. However, there comes a time when you need to tidy up your document, and that often involves deleting unwanted pages. Whether it’s a blank page, a duplicate section, or simply content that no longer fits, knowing how to efficiently remove pages in Google Docs is a crucial skill. This comprehensive guide will walk you through various methods, tips, and tricks to ensure your document is always polished and professional.
Understanding Page Breaks and Section Breaks
Before diving into the deletion process, it’s important to understand page breaks and section breaks, as they often play a significant role in how pages are structured. A page break forces the content to move to the next page, while a section break allows you to format different parts of your document independently.
What are Page Breaks?
A page break is a formatting feature that ends the current page and starts a new one. It’s useful when you want to ensure that a specific piece of content always begins on a fresh page. In Google Docs, you can insert a page break by going to Insert > Break > Page break.
What are Section Breaks?
A section break divides your document into sections, each of which can have its own formatting (e.g., margins, headers, footers, and column layouts). There are two types of section breaks:
- Next page: Starts the new section on the next page.
- Continuous: Starts the new section on the same page.
You can insert a section break by going to Insert > Break > Section break (Next page) or Insert > Break > Section break (Continuous).
Methods to Delete a Page in Google Docs
There are several methods to delete a page in Google Docs, each suited to different scenarios. Let’s explore these in detail.
Method 1: Deleting Content to Remove a Page
The most straightforward way to delete a page is to remove all the content on it. This is particularly effective for blank pages or pages with minimal content.
- Identify the Page: Scroll through your document to find the page you want to delete.
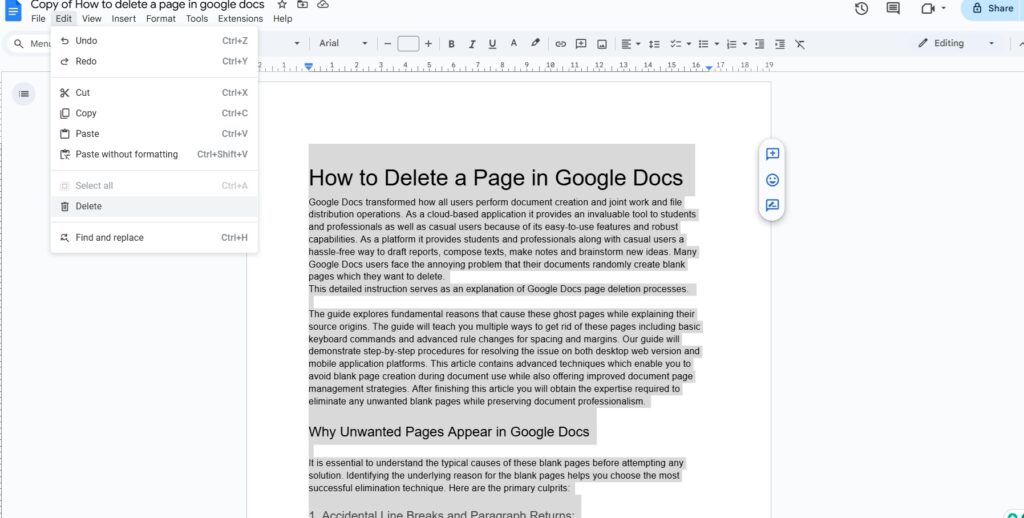
- Select All Content: Click and drag your mouse to select all the text, images, and other elements on the page. Alternatively, you can use the keyboard shortcut Ctrl+A (Windows) or Cmd+A (Mac) to select all content, then carefully deselect the content you want to keep.
- Delete the Content: Press the Delete or Backspace key to remove the selected content.
- Check for Blank Space: Sometimes, even after deleting content, a blank page might remain due to lingering formatting or hidden characters. In such cases, place your cursor at the end of the previous page and press the Delete key until the blank page disappears.
Method 2: Deleting a Page Break
If a page break is causing an unwanted page, deleting the page break will merge the content and remove the extra page.
- Show Non-Printing Characters: To see page breaks and other formatting marks, go to View > Show non-printing characters. This will display symbols for spaces, tabs, paragraph marks, and breaks.
- Locate the Page Break: Look for the “Page break” marker on the page you want to remove.
- Select the Page Break: Click to place your cursor just before the page break marker.
- Delete the Page Break: Press the Delete or Backspace key to remove the page break. The content will now flow continuously, eliminating the extra page.
Method 3: Adjusting Margins and Spacing
Sometimes, a page might appear because of excessive margins or spacing. Adjusting these settings can consolidate the content and remove the extra page.
- Adjust Margins: Go to File > Page setup. In the “Page setup” dialog, adjust the top, bottom, left, and right margins to smaller values. Click OK to apply the changes.
- Reduce Line Spacing: Select the text on the page you want to adjust. Go to Format > Line spacing and choose a smaller spacing option, such as “Single” or “1.15”. You can also customize the spacing by selecting “Custom spacing” and entering a specific value.
- Remove Extra Paragraph Spacing: Sometimes, extra space before or after paragraphs can cause content to spill over to the next page. Select the text and go to Format > Line spacing > Remove space before paragraph or Format > Line spacing > Remove space after paragraph.
Method 4: Deleting a Section Break
If a section break is causing an unwanted page, deleting the section break can resolve the issue. This is similar to deleting a page break, but it affects the formatting of the sections involved.
- Show Non-Printing Characters: Go to View > Show non-printing characters to see the section break marker.
- Locate the Section Break: Find the “Section break” marker on the page you want to remove.
- Select the Section Break: Click to place your cursor just before the section break marker.
- Delete the Section Break: Press the Delete or Backspace key to remove the section break. Be aware that deleting a section break will merge the formatting of the adjacent sections, so ensure this is what you intend.
Method 5: Using the Outline Tool to Navigate and Delete
Google Docs has an outline tool that can help you navigate through your document and quickly identify sections or pages you want to delete.
- Open the Outline Tool: Go to Tools > Document outline. This will display a sidebar with a hierarchical view of your document, based on headings.
- Navigate to the Page: Use the outline to quickly jump to the section or page you want to delete.
- Delete Content: Once you’ve located the page, use the methods described above (deleting content, page breaks, etc.) to remove it.
Method 6: Copying and Pasting Content to a New Document
If you’re struggling to delete a specific page due to complex formatting issues, a workaround is to copy and paste the content you want to keep into a new Google Docs document.
- Create a New Document: Open a new Google Docs document.
- Select Content to Keep: In your original document, select all the content you want to retain, excluding the unwanted page.
- Copy the Content: Press Ctrl+C (Windows) or Cmd+C (Mac) to copy the selected content.
- Paste into New Document: In the new document, press Ctrl+V (Windows) or Cmd+V (Mac) to paste the content.
- Review and Format: Review the pasted content and make any necessary formatting adjustments.
Troubleshooting Common Issues
Sometimes, deleting a page in Google Docs can be more challenging than expected. Here are some common issues and how to troubleshoot them.
Issue: Blank Page Remains After Deleting Content
Solution: This often happens due to hidden characters or formatting marks. Try the following:
- Show Non-Printing Characters: Go to View > Show non-printing characters and look for any remaining spaces, tabs, or paragraph marks. Delete them.
- Adjust Paragraph Spacing: Reduce the space before and after paragraphs by going to Format > Line spacing > Remove space before paragraph and Format > Line spacing > Remove space after paragraph.
- Check for Empty Paragraphs: Sometimes, an empty paragraph can push content to the next page. Place your cursor at the end of the previous page and press the Delete key to remove any empty paragraphs.
Issue: Content Refuses to Move Up After Deleting a Page
Solution: This can occur if there are conflicting formatting settings or if a table or image is causing the issue. Try these steps:
- Clear Formatting: Select the content after the deleted page and go to Format > Clear formatting. This will remove any conflicting styles and allow the content to flow more naturally.
- Adjust Table Settings: If a table is causing the problem, click on the table and adjust its settings. Ensure that the table is not set to “Keep with next” or “Allow row to break across pages.”
- Resize Images: Large images can sometimes push content to the next page. Resize the image to fit within the margins and see if that resolves the issue.
Issue: Deleting a Section Break Messes Up Formatting
Solution: Deleting a section break merges the formatting of the adjacent sections, which can lead to unexpected results. To avoid this:
- Review Section Formatting: Before deleting the section break, review the formatting of both sections. Note any differences in margins, headers, footers, and column layouts.
- Adjust Formatting Manually: After deleting the section break, manually adjust the formatting of the merged section to match your desired style.
- Consider Using a Different Break: If you need to maintain different formatting for certain parts of your document, consider using a continuous section break instead of a next-page section break.
Advanced Tips and Tricks
Here are some advanced tips and tricks to help you manage pages in Google Docs more effectively.
Using Keyboard Shortcuts
Keyboard shortcuts can significantly speed up the process of deleting pages and content:
- Ctrl+A (Windows) or Cmd+A (Mac): Select all content on the page.
- Delete or Backspace: Delete selected content or remove formatting marks.
- Ctrl+Z (Windows) or Cmd+Z (Mac): Undo the last action. Useful if you accidentally delete something you didn’t intend to.
Customizing Page Setup
Understanding page setup options can help you control how content flows within your document:
- Margins: Adjust the margins to fit more or less content on each page. Smaller margins can reduce the number of pages, while larger margins can improve readability.
- Orientation: Change the page orientation from portrait to landscape or vice versa, depending on the type of content you’re working with.
- Page Size: Select a different page size (e.g., A4, Letter) to accommodate different types of content.
Leveraging Styles and Templates
Using styles and templates can help you maintain consistent formatting and avoid unnecessary pages:
- Styles: Apply predefined styles to headings, paragraphs, and other elements to ensure consistent formatting throughout your document.
- Templates: Start with a pre-designed template that suits your needs. This can save you time and effort in formatting your document from scratch.
Best Practices for Document Management
Here are some best practices to keep in mind when managing documents in Google Docs:
- Regularly Review Your Document: Take the time to review your document periodically to identify and remove any unwanted pages or content.
- Use Headings and Subheadings: Organizing your document with headings and subheadings makes it easier to navigate and manage.
- Backup Your Work: Regularly back up your document to prevent data loss. Google Docs automatically saves your work, but it’s always a good idea to have a backup copy.
- Collaborate Effectively: When working with others, communicate clearly about formatting and page management to avoid conflicts.
Real-World Examples
Let’s look at some real-world examples of how these methods can be applied.
Scenario 1: Removing a Blank Page in a Report
Imagine you’re working on a report and you notice a blank page at the end. You’ve already deleted all the visible content, but the page persists. Here’s how to resolve it:
- Show Non-Printing Characters: Go to View > Show non-printing characters.
- Identify Hidden Characters: Look for any remaining spaces, tabs, or paragraph marks on the blank page.
- Delete Hidden Characters: Place your cursor at the end of the previous page and press the Delete key until the blank page disappears.
- Adjust Paragraph Spacing: If the blank page still remains, reduce the space after the last paragraph on the previous page by going to Format > Line spacing > Remove space after paragraph.
Scenario 2: Removing a Page with Duplicate Content
Suppose you accidentally duplicated a section of your document and now have an extra page with the same content. Here’s how to fix it:
- Identify the Duplicate Page: Scroll through your document and locate the page with the duplicate content.
- Select All Content: Click and drag your mouse to select all the text, images, and other elements on the duplicate page.
- Delete the Content: Press the Delete or Backspace key to remove the selected content.
- Review Formatting: Check the surrounding pages to ensure that the formatting is consistent and that no content has been inadvertently affected.
Scenario 3: Removing a Page Caused by a Page Break
Sometimes, an unnecessary page break can cause an extra page in your document. Here’s how to remove it:
- Show Non-Printing Characters: Go to View > Show non-printing characters.
- Locate the Page Break: Look for the “Page break” marker on the page you want to remove.
- Select the Page Break: Click to place your cursor just before the page break marker.
- Delete the Page Break: Press the Delete or Backspace key to remove the page break. The content will now flow continuously, eliminating the extra page.
Conclusion: Mastering Page Deletion in Google Docs
Deleting pages in Google Docs is a fundamental skill that can significantly improve the quality and professionalism of your documents. By understanding the different methods, troubleshooting common issues, and implementing best practices, you can efficiently manage your content and ensure that your documents are always polished and error-free. Whether you’re removing blank pages, dealing with formatting conflicts, or simply tidying up your work, the techniques outlined in this guide will empower you to take control of your Google Docs experience.
From understanding the nuances of page breaks and section breaks to leveraging keyboard shortcuts and advanced formatting options, mastering page deletion in Google Docs is an investment in your productivity and the overall quality of your work. So, go ahead and apply these techniques to your documents, and watch as you transform them into well-structured, professional-looking masterpieces.
