

Introduction: Elevating Your Professionalism with Digital Signatures on Your MacBook
In today’s fast-paced digital world, the ability to seamlessly incorporate signatures into your documents is more crucial than ever. Whether you’re a student submitting assignments, a professional finalizing contracts, or simply managing personal correspondence, having a digital signature readily available can save you valuable time and enhance your overall efficiency. For MacBook users, Microsoft Word offers a convenient and user-friendly platform to achieve this. This comprehensive guide will walk you through every step of how to add a signature in Word on your MacBook, ensuring a smooth and successful experience. We’ll explore different methods, from the simplest techniques to more advanced customization options, empowering you to master this essential skill.
Why Adding a Signature in Word on Your MacBook Matters
Before we dive into the ‘how,’ let’s briefly touch upon the ‘why.’ Digital signatures in Word on your MacBook offer several key advantages:
- Professionalism: A signature instantly elevates the credibility and professionalism of your documents. It demonstrates attention to detail and a commitment to presenting polished work.
- Efficiency: No more printing, signing, scanning, and re-uploading documents. Digital signatures streamline your workflow, saving you time and effort.
- Security: Digital signatures can provide a level of security, verifying the authenticity of the document and ensuring it hasn’t been tampered with.
- Convenience: Sign documents from anywhere, at any time, as long as you have access to your MacBook.
- Environmental Friendliness: Reduce paper consumption by opting for digital signatures.
Method 1: Inserting a Signature Line – The Simplest Approach
This is arguably the easiest and most straightforward method for adding a signature placeholder in your Word document. It’s ideal when you want to leave space for a physical signature or create a digital signature field.
Step-by-Step Guide:
- Open Your Word Document: Launch Microsoft Word on your MacBook and open the document where you want to add the signature.
- Navigate to the ‘Insert’ Tab: In the Word ribbon at the top of the screen, click on the ‘Insert’ tab.
- Locate the ‘Signature Line’ Option: In the ‘Text’ group (usually located towards the right side of the ‘Insert’ tab), you’ll find the ‘Signature Line’ button. Click on it.
- Customize the Signature Setup: A ‘Signature Setup’ dialog box will appear. Here, you can customize the signature line’s details. Fill in the following fields as needed:
- Suggested Signer: Enter the name of the person who will sign the document.
- Suggested Signer’s Title: Specify the signer’s job title or role.
- Suggested Signer’s E-mail Address: Optionally, include the signer’s email address.
- Instructions to the Signer: Add any specific instructions or notes for the signer (e.g., “Please sign and return by [date]”).
- Allow Signer to Add Comments in the Sign Dialog: Check this box if you want to allow the signer to add comments when they sign.
- Show sign date in signature line: Check this box if you want to show the date the signature was added.
- Click ‘OK’: Once you’ve filled in the necessary information, click the ‘OK’ button. A signature line will be inserted into your document.
- Sign the Document (If Applicable): If you’re the signer and using a digital signature, double-click the signature line. A dialog box will appear, allowing you to add your digital signature (more on this in Method 3). If you intend to print the document and sign it physically, the line serves as a placeholder.
This method is perfect for quickly adding a signature placeholder. It’s simple, efficient, and works seamlessly across various Word versions on your MacBook.
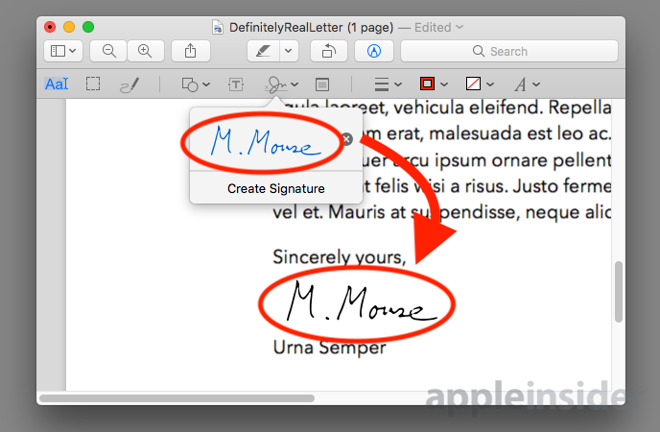
Method 2: Inserting an Image of Your Signature
This method involves scanning or photographing your handwritten signature and inserting it as an image into your Word document. It’s a straightforward way to add a personalized touch, although it lacks the security features of a digital signature.
Step-by-Step Guide:
- Sign Your Name: Sign your name on a clean, white piece of paper using a dark pen.
- Scan or Photograph Your Signature: Use a scanner or your iPhone/iPad’s camera (or any other smartphone) to capture a clear image of your signature. Ensure good lighting to avoid shadows.
- Transfer the Image to Your MacBook: If you scanned the signature, the image will likely already be on your MacBook. If you used your phone, transfer the image via AirDrop, email, or a USB cable.
- Open Your Word Document: Launch Word on your MacBook and open the document where you want to add your signature.
- Navigate to the ‘Insert’ Tab: Click on the ‘Insert’ tab in the Word ribbon.
- Insert the Picture: In the ‘Illustrations’ group, click the ‘Pictures’ button. Choose ‘Picture from File…’ or ‘Picture from Online…’ depending on where your image is stored.
- Select Your Signature Image: Browse your files and select the image of your signature. Click ‘Insert.’
- Resize and Position Your Signature: The image will be inserted into your document. Click and drag the corners of the image to resize it. Click and drag the image to position it where you want your signature to appear.
- Consider Transparency (Optional): To make the background of your signature image transparent (e.g., if it’s on a white background), select the image, go to the ‘Picture Format’ tab (which appears when the image is selected), and click on ‘Remove Background’ or ‘Color’ and then ‘Set Transparent Color.’ This can make your signature blend more seamlessly into the document.
This method is quick and easy for adding a personalized signature. Remember that it’s not a secure digital signature, so use it with caution, especially for sensitive documents.
Method 3: Creating and Using a Digital Signature (Advanced)
This method provides the most secure and professional way to add a signature in Word on your MacBook. It involves creating a digital signature, which is an encrypted electronic mark that verifies your identity and ensures the document’s integrity. This is the equivalent of a digitally notarized signature.
Understanding Digital Signatures
A digital signature is more than just an image of your signature. It’s a cryptographic mechanism that:
- Verifies Identity: It confirms that the signer is who they claim to be.
- Ensures Integrity: It guarantees that the document hasn’t been altered since it was signed.
- Provides Non-Repudiation: It prevents the signer from denying that they signed the document.
Step-by-Step Guide:
This process is a bit more involved, as it requires getting a digital certificate. There are two main ways to obtain one:
- Option 1: Purchase a Digital Certificate from a Certificate Authority (CA): This is the most secure and reliable option. CAs like DigiCert, GlobalSign, and Sectigo provide digital certificates that are trusted by most software and organizations. You’ll typically need to pay a fee for the certificate.
- Option 2: Create a Self-Signed Digital Certificate (For Testing Purposes Only): Word allows you to create a self-signed certificate. This is free and easy to do, but it’s not as secure as a certificate from a CA, as it’s not verified by a trusted third party. Self-signed certificates are generally only recommended for testing and personal use, not for official or legally binding documents.
Let’s walk through the process using a self-signed certificate (as it’s the most common starting point for MacBook users):
- Open Your Word Document: Launch Word on your MacBook and open the document you want to sign.
- Navigate to the ‘Insert’ Tab: Click the ‘Insert’ tab.
- Locate the ‘Signature Line’ Option: In the ‘Text’ group, click the ‘Signature Line’ button. (As described in Method 1).
- Customize the Signature Setup: Fill in the details in the ‘Signature Setup’ dialog box as described in Method 1. Click ‘OK’.
- Double-Click the Signature Line: Double-click the signature line you just inserted.
- The ‘Sign’ Dialog Box Appears: This is where you’ll add your digital signature. If you haven’t already created one, you’ll be prompted to do so. If you already have a digital certificate, you can select it from the list.
- Create a Self-Signed Certificate (If Needed): If you don’t have a certificate, you’ll need to create one. Click on “Sign” in the dialog box, and then click “Get a Digital ID…” or “More Signatures…” (the exact wording may vary slightly depending on your Word version). This will usually lead you to the option to create a self-signed digital ID. Follow the on-screen prompts to create a certificate. You’ll be asked to enter your name and email address.
- Sign the Document: Once you have a digital certificate (either self-signed or purchased), select it in the ‘Sign’ dialog box. You may be prompted to enter a password if your certificate is password-protected. Click ‘Sign.’
- Save the Signed Document: Save the document. A small icon will appear next to the signature line, indicating that the document is digitally signed.
- Verify the Signature: To verify the signature, double-click the signature line. A dialog box will appear showing the signature details and whether the document has been tampered with since it was signed.
Important Considerations for Digital Signatures:
- Certificate Validity: Digital certificates have an expiration date. Make sure your certificate is valid before signing a document.
- Certificate Security: Protect your digital certificate and its associated private key. If someone gains access to your private key, they could potentially sign documents on your behalf.
- Trusted Root Certificates: For certificates from CAs, your MacBook needs to trust the CA’s root certificate. This is usually handled automatically, but you might need to manually trust a certificate in some cases.
- Legal Implications: Digital signatures are legally binding in many jurisdictions. However, the specific requirements for legal validity can vary. Consult with a legal professional if you have specific concerns.
Method 4: Using Third-Party Signature Apps and Services
Several third-party apps and online services offer advanced signature functionalities and integrations with Word on your MacBook. These services often provide features beyond what’s available natively in Word, such as cloud storage, collaboration tools, and advanced security options.
Popular Options:
- DocuSign: A widely used platform for electronic signatures, offering features such as document tracking, audit trails, and integration with various business applications.
- Adobe Sign: Adobe’s signature service, integrated with Adobe Acrobat, provides a secure and reliable way to sign and manage documents.
- SignNow: A user-friendly platform that offers a range of signature features, including mobile signing and custom branding options.
- HelloSign: A Dropbox company, HelloSign offers a simple and intuitive interface for signing and sending documents.
- PandaDoc: A platform that offers electronic signatures, document creation, and workflow automation.
How to Use a Third-Party Service:
- Sign Up for an Account: Create an account with your chosen service. Most services offer free trials or basic plans.
- Upload Your Document: Upload the Word document you want to sign to the platform.
- Add Signature Fields: The service will typically provide tools to add signature fields to your document. You can specify where the signature should appear.
- Send for Signature (If Applicable): If you need someone else to sign the document, send it to them through the service.
- Sign the Document: You’ll typically receive an email notification with a link to sign the document. Follow the on-screen instructions to add your signature. You might be able to draw your signature, upload an image, or use a digital signature.
- Download the Signed Document: Once all parties have signed, you can download the signed document.
Third-party services offer a streamlined and often more feature-rich experience, especially for businesses that require advanced signature workflows.
Troubleshooting Common Issues
Here are some common problems you might encounter when adding signatures in Word on your MacBook and how to solve them:
- Signature Line Not Appearing: Make sure you’ve correctly inserted the signature line. Check your Word settings for display options that might be hiding it.
- Image Not Inserting Correctly: Ensure the image file is compatible with Word (e.g., JPG, PNG, GIF). Check the file size and resolution. If the image is too large, resize it before inserting it.
- Digital Signature Errors: Verify that your digital certificate is valid and hasn’t expired. Check your computer’s date and time settings. Make sure your security software isn’t interfering with the signing process. If using a self-signed certificate, ensure it’s properly installed in your keychain.
- Problems with Third-Party Services: Check your internet connection. Contact the service’s support team for assistance if you encounter any issues. Make sure you’re using the latest version of the service’s app or website.
Best Practices and Tips for Effective Signature Management
To ensure a smooth and efficient signature process, consider the following best practices:
- Choose the Right Method: Select the signature method that best suits your needs and the level of security required.
- Maintain a Clear and Organized Signature: Whether you’re using a handwritten signature or a digital one, make sure it’s legible and professional-looking.
- Back Up Your Documents: Always back up your documents, especially those containing important signatures. Consider using cloud storage or an external hard drive.
- Protect Your Digital Certificates: Keep your digital certificates secure and password-protected. Don’t share your private key with anyone.
- Stay Updated: Keep your Word software and any third-party signature apps updated to the latest versions to benefit from the latest features and security enhancements.
- Test Your Signatures: Before sending a document with a signature, test it to ensure it’s working correctly.
- Consider a Dedicated Signature Pad: For frequent signing, consider using a signature pad or tablet to capture your signature digitally. This can improve accuracy and convenience.
- Train Your Team: If you’re managing signatures within a team, provide training on the proper procedures and best practices.
Conclusion: Mastering the Art of Signing in Word on Your MacBook
Adding a signature in Word on your MacBook is a straightforward process, offering various methods to suit your specific needs. From the simple signature line placeholder to the advanced security of digital signatures, you have the power to streamline your workflow, enhance professionalism, and protect your valuable documents. By following the steps outlined in this guide and embracing the best practices, you can confidently navigate the world of digital signatures and elevate your document management capabilities. Whether you’re a student, a professional, or simply someone looking to add a touch of personalization to your documents, mastering this skill will undoubtedly prove beneficial in today’s digital landscape. So, go ahead, experiment with the different methods, find the one that works best for you, and start signing with confidence!
