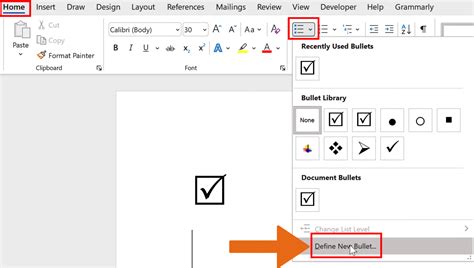
How to Add a Check Box in Word: A Comprehensive Guide
Adding check boxes to your Word documents can significantly enhance their functionality, making them perfect for forms, to-do lists, or questionnaires. This guide provides a step-by-step walkthrough, covering various methods and addressing common questions.
Method 1: Using the Developer Tab
This is the most straightforward method, offering direct access to the check box controls.
Step 1: Enable the Developer Tab
If you don't see the "Developer" tab in the ribbon at the top of your Word window, you'll need to enable it first. This is crucial for accessing the form controls.
- Go to File > Options > Customize Ribbon.
- In the right-hand pane, under "Main Tabs," check the box next to Developer.
- Click OK. The Developer tab should now be visible.
Step 2: Inserting the Check Box
- Navigate to the Developer tab.
- In the "Controls" group, click the Check Box Content Control icon (it usually looks like a small, empty square).
- Click where you want to insert the check box in your document.
Step 3: Customizing the Check Box (Optional)
- Properties: Right-click the check box and select "Properties." This allows you to change the check box's name (important for form processing), add a default value, and set other properties.
- Text: You can type text next to the check box to describe its purpose. Simply type to the right of the box.
Method 2: Using the Insert Symbols Method (for basic checkboxes)
While less versatile than the Developer tab method, this approach works if you need a simple checkbox and don't require advanced features.
- Go to the Insert tab.
- Click Symbols.
- Select the Wingdings or Webdings font.
- Choose the check box symbol (it might look like a filled or empty square). These symbols are not true checkboxes; they cannot be checked/unchecked programmatically and are simply visual placeholders.
Troubleshooting Common Issues
- Developer Tab Missing: Refer to Step 1 in Method 1 to enable the Developer tab.
- Check Box Not Working: Ensure the check box is a true content control (inserted via the Developer tab) and not just a symbol. Content controls are interactive; symbols are static.
- Form Filling Issues: Problems with form functionality might indicate issues with the document's properties or compatibility with different versions of Word.
Optimizing Your Word Document for SEO
While not directly related to adding check boxes, consider these SEO tips to improve the discoverability of your Word documents if they are shared online (e.g., as PDFs).
- Descriptive File Names: Use keywords related to your document's content in the file name (e.g.,
Project_Proposal_CheckList.docx). - Relevant Keywords: Include relevant keywords throughout your document text.
- Metadata: If uploading to a platform that allows it, add metadata (keywords, descriptions) to help search engines understand your document's content.
By following these steps, you can easily add check boxes to your Word documents and significantly improve their usability. Remember to choose the method that best suits your needs and always test your check boxes to ensure they function correctly.
