How to Add a Filter in Filmora: A Step-by-Step Guide
Want to elevate your videos with stunning filters? Filmora makes it easy! This guide will walk you through adding and customizing filters in Filmora, whether you're a beginner or a seasoned editor. We'll cover various filter types and offer tips for achieving professional-looking results.
Understanding Filmora's Filter Options
Filmora offers a wide array of filters, categorized for easy navigation. You'll find options for:
- Color Grading: Adjust the overall color tone and mood of your video. Think vibrant, muted, or vintage looks.
- Color Correction: Fine-tune specific color aspects to balance and improve your footage. This is crucial for correcting uneven lighting or color casts.
- Artistic Effects: Transform your videos with unique stylistic choices like film grain, lomo effects, or dreamy bokeh.
- LUTs (Look Up Tables): Import pre-set color profiles for consistent and professional-looking results. These are often used by filmmakers and photographers.
Adding a Filter to Your Filmora Project
Here's a step-by-step guide to adding filters in Filmora:
-
Import Your Footage: Begin by importing the video clip you want to edit into your Filmora project timeline.
-
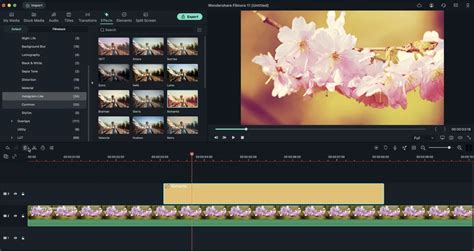
Locate the Filters Tab: In the Filmora interface, you'll find a dedicated tab or panel (often labeled "Effects" or similar) that houses all available effects, including filters.
-
Browse and Select Your Filter: Explore the filter categories. Click on the filter you want to apply. Filmora often provides previews so you can see how the filter will impact your footage before applying it.
-
Drag and Drop: Once you've chosen a filter, simply drag and drop it onto the video clip in your timeline.
-
Adjust Filter Settings: Most filters offer adjustable parameters. Experiment with the settings to fine-tune the intensity and other aspects of the filter. This is where you can really personalize the look.
Advanced Filter Techniques in Filmora
-
Keyframing: For dynamic effects, you can use keyframes to adjust the filter's intensity over time. This creates smooth transitions and avoids abrupt changes in your video's look.
-
Filter Blending: Experiment with blending different filters to achieve unique and complex effects. This often leads to unexpected and creative results.
-
Using LUTs: If you're working with LUTs, make sure to import them correctly into Filmora. Usually, there's a dedicated section for importing custom LUT files.
Troubleshooting Common Filter Issues
-
Filter Not Appearing: Ensure you've downloaded and installed the latest version of Filmora. Sometimes, outdated versions might lack certain features or filters.
-
Filter Looks Unnatural: Start with subtle adjustments. Applying a filter too heavily can make your video look unrealistic. Gradually increase the intensity until you achieve the desired effect.
Optimizing Your Videos for Online Platforms
Once you've applied your filters, consider optimizing your video for the platform where you'll share it. Different platforms have different recommended resolutions and compression settings. Filmora usually provides export settings optimized for various platforms like YouTube or Vimeo.
By following these steps and experimenting with Filmora's filter options, you can significantly enhance the visual appeal of your videos and create truly engaging content. Remember to practice and have fun exploring the possibilities!
