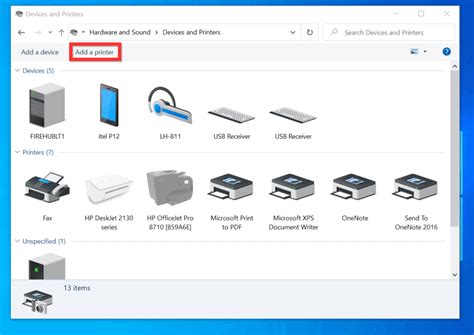
How to Add a Printer by Name on Your PC
Adding a printer by its name is a straightforward process, but the exact steps might vary slightly depending on your operating system (Windows or macOS) and network configuration. This guide will walk you through the process for both, focusing on finding and connecting to a printer using its name. We'll cover troubleshooting common issues as well.
Adding a Printer by Name on Windows
Windows typically discovers printers on your network automatically. However, if your printer isn't showing up, or you know the printer's network name and want to add it directly, follow these steps:
1. Open the Printers & Scanners Settings:
- Search for "Printers & scanners" in the Windows search bar and select the top result.
2. Add a Printer or Scanner:
- Click the "Add device" button. Windows will search for available printers on your network.
3. Select Your Printer by Name:
- If your printer appears in the list, select it and click "Add device." Windows will automatically install the necessary drivers.
- If your printer isn't listed: Click "The printer that I want isn't listed."
4. Choose "Add a local printer or network printer with manual settings":
- This option allows you to add a printer using its network name or IP address.
5. Select the correct port:
- Usually, this will be a network port (e.g., \<computer_name><printer_name> or an IP address like \192.168.1.100). If you know your printer's network name, use that here; if you have the IP address, use that instead. Incorrectly selecting the port is the most common cause of failure here. Make sure you are using the correct printer's network name or IP address and that your PC has network access to it.
6. Install the Printer Driver:
- Windows will prompt you to select a printer driver. You might need the printer's model number to find the appropriate driver. If you have the installation disc or downloaded the driver from the manufacturer's website beforehand, that will make this step easier. Windows may also automatically download the correct driver.
7. Test the Printer:
- Once the driver is installed, Windows will usually prompt you to test the printer connection. Follow the on-screen instructions.
Adding a Printer by Name on macOS
macOS also uses a similar method, leveraging its network discovery capabilities:
1. System Preferences:
- Open System Preferences (usually found in the Apple menu).
2. Printers & Scanners:
- Click on "Printers & Scanners".
3. Add Printer:
- Click the "+" button below the printer list.
4. Select Your Printer:
- A list of available printers will appear. If your printer is visible, simply select it and click "Add".
- If it's not listed: Select "Add Printer or Scanner..." You may need to choose "Add Printer" and then manually select the appropriate printer via its network name or IP address. You might need to provide the IP address or network path manually if discovery fails. This option allows adding a printer by its network name or IP address.
5. Select the correct port and driver:
- Similar to Windows, verify the correct port and ensure the proper driver is selected.
6. Test Print:
- Once added, test the printer connection by printing a test page.
Troubleshooting Tips
- Check Network Connectivity: Ensure both your PC and printer are connected to the same network and that the network connection is stable.
- Firewall/Antivirus: Temporarily disable your firewall or antivirus software to see if they are interfering with the printer connection. Remember to re-enable them afterward.
- Driver Issues: Make sure you are using the correct printer driver for your operating system. Download the latest driver from the manufacturer's website if necessary.
- IP Address/Network Name: Double-check the printer's IP address or network name. A simple typo can prevent the connection from working.
- Restart Devices: Restart both your PC and printer to resolve temporary glitches.
- Check Printer Status: Verify that your printer is powered on, online, and not experiencing any errors.
By following these steps and troubleshooting tips, you should be able to successfully add your printer to your PC by its name. Remember to always consult your printer's manual for specific instructions if needed.
