

Introduction: Safeguarding Your WhatsApp Memories
In today’s hyper-connected world, WhatsApp has evolved beyond a simple messaging app. It’s a digital repository of our lives, filled with cherished memories, important conversations, and crucial information. From family photos and voice notes to essential work documents, our WhatsApp chats hold immense value. Losing this data can be devastating. That’s why backing up your WhatsApp data regularly is absolutely essential.
But what if you find yourself in a situation where you need to backup your WhatsApp data, but your phone isn’t readily available or functional? Perhaps your phone is lost, stolen, broken, or simply out of reach. The good news is that there are ways to back up your WhatsApp data to your laptop even without direct access to your phone. This comprehensive guide will walk you through various methods, ensuring your precious WhatsApp conversations are safe and sound, regardless of your phone’s status.
Why Backup WhatsApp Data? The Importance of Data Security
Before we dive into the ‘how,’ let’s emphasize the ‘why.’ Backing up your WhatsApp data is not merely a technical task; it’s a crucial step in protecting your digital life. Here’s why it’s so important:
- Protection Against Data Loss: Phones get lost, stolen, or damaged all the time. A backup ensures that even if your phone meets an unfortunate end, your WhatsApp data remains safe.
- Seamless Device Transition: Upgrading to a new phone becomes hassle-free. You can easily restore your WhatsApp chats to your new device, picking up right where you left off.
- Accidental Deletion Recovery: We all make mistakes. Accidentally deleting important chats can be easily remedied if you have a recent backup.
- Peace of Mind: Knowing your data is safe provides invaluable peace of mind. You can rest assured that your conversations and memories are protected.
Methods to Backup WhatsApp on Laptop Without a Phone
Now, let’s explore the different methods you can use to back up your WhatsApp data to your laptop without needing your phone readily available. Each method has its own set of requirements and steps, so choose the one that best suits your situation.
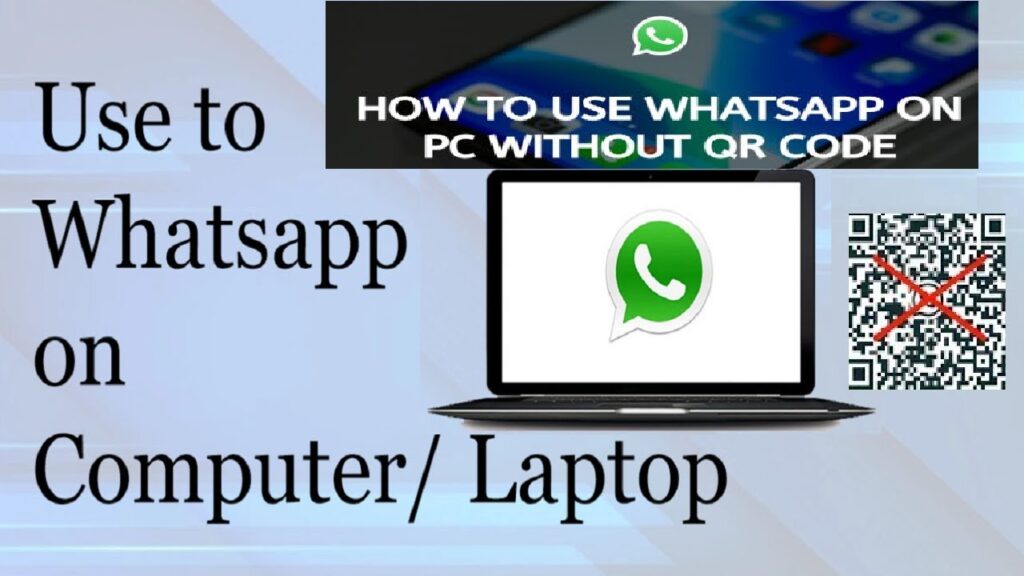
Method 1: Using WhatsApp Web (If You’ve Already Logged In)
This method works only if you have previously logged into WhatsApp Web on your laptop before losing access to your phone. WhatsApp Web mirrors the chats from your phone, so if you’re already logged in, you can potentially access and export your chats.
Step 1: Access WhatsApp Web
Open your web browser on your laptop and go to web.whatsapp.com.
Step 2: Verify You’re Still Logged In
If you’re still logged in, you’ll see your WhatsApp chats. If you’re not logged in, you’ll see a QR code, and this method won’t work without your phone.
Step 3: Exporting Your Chats
Unfortunately, WhatsApp Web doesn’t offer a direct “backup” feature. However, you can export individual chats as text files. Here’s how:
- Open the chat you want to export.
- Click on the three dots (menu) at the top right of the chat window.
- Select “Contact info” or “Group info.”
- Scroll down and click on “Export chat.”
- Choose whether to include media (photos, videos, etc.) or export without media.
- A .zip file containing a .txt file of your chat (and media, if you chose to include it) will be downloaded to your laptop.
Limitations: This method is time-consuming if you have many chats to export, as you have to do it one chat at a time. Also, it only works if you were already logged into WhatsApp Web before losing access to your phone.
Method 2: Using Third-Party WhatsApp Backup Software
Several third-party software solutions are designed to back up WhatsApp data from your phone to your computer. Some of these tools might offer the ability to access backups even if you don’t have your phone present, depending on how they store the data. However, proceed with caution when using third-party software, as data privacy and security are paramount.
Important Considerations Before Using Third-Party Software:
- Reputation and Reviews: Research the software thoroughly. Look for reviews and testimonials from other users to gauge its reliability and security.
- Security and Privacy: Ensure the software is from a reputable source and has strong security measures to protect your data. Read the privacy policy carefully to understand how your data is handled.
- Cost: Many of these tools are paid software. Consider the cost and whether the features justify the price.
Examples of Third-Party WhatsApp Backup Software (Use at Your Own Risk):
- iMyFone iTransor for WhatsApp: This software claims to allow you to back up, restore, and transfer WhatsApp data between devices.
- Dr.Fone – WhatsApp Transfer: Another popular option that offers similar features for backing up and restoring WhatsApp data.
- MobileTrans – WhatsApp Transfer: A comprehensive phone management tool that includes WhatsApp backup and restore capabilities.
General Steps for Using Third-Party Software:
The exact steps will vary depending on the software you choose, but here’s a general outline:
- Download and Install: Download and install the software on your laptop from the official website.
- Connect Your Phone (If Possible): If you have temporary access to your phone, connect it to your laptop using a USB cable. Some software might also offer Wi-Fi connectivity.
- Initiate Backup: Follow the software’s instructions to initiate a WhatsApp backup.
- Access Backup on Laptop: Once the backup is complete, the software should allow you to access the backup data on your laptop.
Disclaimer: We do not endorse any specific third-party software. Use these tools at your own risk and always prioritize your data security and privacy.
Method 3: Restoring from a Previous Google Drive Backup (If Applicable)
If you had previously enabled WhatsApp backups to Google Drive, you might be able to restore your chats to a new device, even without your old phone. This method requires a new phone and the same Google account you used for the backup.
Step 1: Get a New Phone (or Factory Reset Your Existing One)
You’ll need a phone where you can install WhatsApp and log in with your phone number.
Step 2: Install WhatsApp on the New Phone
Download and install WhatsApp from the Google Play Store (or App Store if you’re switching to an iPhone).
Step 3: Verify Your Phone Number
Open WhatsApp and verify your phone number. This is crucial, as WhatsApp uses your phone number to identify your account and associated backups.
Step 4: Restore from Google Drive Backup
During the setup process, WhatsApp will detect if there’s a Google Drive backup associated with your phone number and Google account. It will prompt you to restore from the backup. Follow the on-screen instructions to restore your chats and media.
Step 5: Access Your Chats on the New Phone
Once the restoration is complete, your WhatsApp chats and media should be available on your new phone. You can then connect the new phone to your laptop and transfer the data if needed.
Limitations: This method requires a previous Google Drive backup and a new phone to restore the backup to. It doesn’t directly back up to your laptop, but it allows you to access your chats on a new device, which you can then connect to your laptop.
Method 4: Checking for Local Backups (If You Have Access to the Phone’s Storage)
WhatsApp automatically creates local backups of your chats on your phone’s internal storage. If you can somehow access the phone’s storage (e.g., by connecting it to a computer or using a file manager app), you might be able to retrieve these local backups.
Step 1: Access the Phone’s Storage
Connect your phone to your computer using a USB cable. Make sure your phone is unlocked and allows file transfer.
Step 2: Locate the WhatsApp Backup Folder
On your computer, navigate to your phone’s internal storage. Look for a folder named “WhatsApp.” Inside the WhatsApp folder, you should find a folder named “Databases.” This folder contains the local WhatsApp backups.
Step 3: Identify the Latest Backup File
The backup files in the “Databases” folder are named something like “msgstore-YYYY-MM-DD.1.db.crypt12” (the “crypt12” part might be different depending on your WhatsApp version). The latest backup file will have the most recent date in the filename.
Step 4: Copy the Backup File to Your Laptop
Copy the latest backup file to a safe location on your laptop.
Step 5: Restore the Backup (Requires a New WhatsApp Installation)
Restoring from a local backup requires a new WhatsApp installation. Here’s how:
- Install WhatsApp on a new phone (or factory reset your existing one).
- During the setup process, when WhatsApp asks you to verify your phone number, don’t proceed yet.
- Connect the phone to your computer.
- Navigate to the “WhatsApp/Databases” folder on the phone’s internal storage.
- Copy the backup file you copied to your laptop (msgstore-YYYY-MM-DD.1.db.crypt12) into the “WhatsApp/Databases” folder on the phone.
- Rename the backup file to “msgstore.db.crypt12” (remove the date part).
- Now, proceed with the phone number verification in WhatsApp.
- WhatsApp should detect the local backup and prompt you to restore it.
Limitations: This method requires access to the phone’s storage and a new WhatsApp installation. The backup files are encrypted, so you can’t simply open them and read the messages directly. You need to restore them through WhatsApp.
Troubleshooting Common Issues
Backing up and restoring WhatsApp data can sometimes be tricky. Here are some common issues and how to troubleshoot them:
- Google Drive Backup Not Found: Ensure you’re using the same Google account you used for the backup. Also, check your Google Drive storage to make sure the backup is actually there.
- Backup Stuck at a Certain Percentage: This can be due to a slow internet connection or a large backup size. Try connecting to a faster Wi-Fi network and ensure you have enough storage space on your phone and Google Drive.
- Restoring from Backup Failed: This could be due to corrupted backup files or compatibility issues between different WhatsApp versions. Try restoring from an older backup if available.
- Third-Party Software Not Working: Ensure the software is compatible with your phone’s operating system and WhatsApp version. Also, check for any updates or patches for the software.
Protecting Your WhatsApp Data: Best Practices
Prevention is always better than cure. Here are some best practices to protect your WhatsApp data and avoid data loss:
- Enable Google Drive Backups: Regularly back up your WhatsApp data to Google Drive (or iCloud if you’re using an iPhone). Set it to automatically back up daily, weekly, or monthly.
- Secure Your Google Account: Protect your Google account with a strong password and enable two-factor authentication. This will prevent unauthorized access to your Google Drive backups.
- Be Cautious with Third-Party Apps: Only install apps from trusted sources and be wary of apps that request excessive permissions.
- Keep Your Phone Secure: Use a strong passcode or biometric authentication to protect your phone from unauthorized access.
- Regularly Check Your Backups: Periodically check your Google Drive to ensure your WhatsApp backups are being created successfully.
Conclusion: Ensuring Your Digital Conversations Are Safe
Losing your WhatsApp data can be a frustrating and even heartbreaking experience. By following the methods and best practices outlined in this guide, you can ensure that your precious conversations and memories are safe and sound, even if you don’t have direct access to your phone. Remember to prioritize data security and privacy when using third-party software, and always back up your data regularly to avoid data loss. With a little planning and effort, you can protect your digital life and enjoy peace of mind knowing that your WhatsApp chats are always within reach.
In conclusion, while backing up WhatsApp on a laptop without a phone presents challenges, it’s definitely achievable with the right approach. Whether it’s leveraging WhatsApp Web, exploring third-party solutions (with caution), restoring from Google Drive, or accessing local backups, there’s a method that can suit your specific situation. Remember, the key is to be proactive about data protection and choose the method that aligns with your comfort level and technical expertise. By taking these steps, you’re not just backing up data; you’re preserving memories and safeguarding important connections in your digital life.
