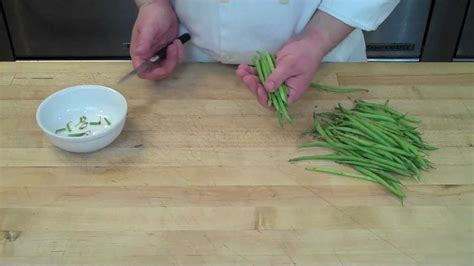
How to Blanch French Beans: A Step-by-Step Guide for Perfect Beans
Blanching French beans, also known as green beans, is a simple yet crucial step to enhance their flavor, texture, and vibrant green color. This quick cooking method preserves nutrients and prepares them perfectly for freezing, salads, or as a side dish. This guide provides a comprehensive walkthrough on how to blanch French beans effectively.
Why Blanch French Beans?
Before diving into the process, let's understand why blanching is beneficial:
- Retains color: Blanching helps retain the bright green color of French beans, preventing them from turning dull or brownish.
- Enhances flavor: It locks in the fresh, vibrant flavor of the beans.
- Improves texture: Blanching makes the beans tender-crisp, preventing them from becoming mushy.
- Easier freezing: Blanching is essential if you plan to freeze your French beans. It inactivates enzymes that cause deterioration during freezing, preserving quality for longer.
- Prepares for other recipes: Blanched beans are ready to be added to salads, stir-fries, or other dishes requiring pre-cooked vegetables.
What You'll Need:
- Fresh French Beans: Choose firm, bright green beans without any blemishes. Trim the ends before blanching.
- Large Pot: A large pot is essential to ensure the beans are submerged in boiling water.
- Colander: Use a large colander to quickly drain the beans after blanching.
- Ice Bath: A large bowl filled with ice water is crucial for stopping the cooking process and preserving the vibrant color.
- Timer: Accurate timing is essential for achieving the perfect blanch.
Step-by-Step Blanching Instructions:
1. Prepare the Beans:
Wash the French beans thoroughly and trim off both ends. Snap the beans into roughly equal-sized pieces, depending on your preference and intended use.
2. Boil Water:
Fill the large pot with enough water to completely submerge the French beans. Bring the water to a rolling boil over high heat.
3. Blanch the Beans:
Once boiling, gently add the French beans to the pot. Stir to ensure all beans are submerged. Start your timer immediately. The blanching time depends on the size of your beans and your desired texture:
- Thin beans: 2-3 minutes
- Thick beans: 3-5 minutes
Over-blanching will result in mushy beans, while under-blanching will leave them too firm.
4. Ice Bath Shock:
Prepare your ice bath beforehand. Once the blanching time is up, immediately transfer the beans using a slotted spoon or colander into the ice bath. This stops the cooking process and preserves the bright green color. Let them sit in the ice bath for the same amount of time as the blanching time (e.g., 3 minutes blanching, 3 minutes in ice bath).
5. Drain and Dry:
Remove the beans from the ice bath and drain them thoroughly in a colander. Pat them dry with paper towels if necessary.
Using Your Blanched French Beans:
- Freezing: After drying, spread the beans in a single layer on a baking sheet to prevent sticking. Once frozen, transfer them to freezer bags for long-term storage.
- Immediate use: Blanched French beans are ready to be incorporated into your favorite recipes! Add them to salads, soups, stir-fries, or enjoy them as a simple side dish.
Tips for Perfect Blanched French Beans:
- Don't overcrowd the pot: Overcrowding will lower the water temperature and result in uneven cooking. Blanch in batches if necessary.
- Use a timer: Accurate timing is crucial for achieving the perfect texture.
- Immediately cool the beans: A rapid cool-down is essential to retain the vibrant color and prevent overcooking.
By following these simple steps, you'll be able to blanch French beans perfectly every time, enhancing their flavor, texture, and color for a delicious and nutritious addition to your meals.
