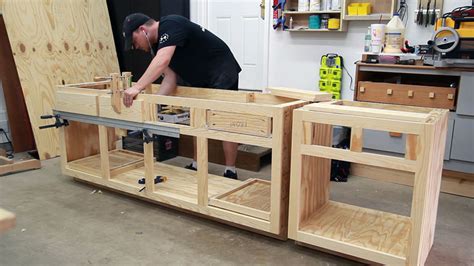
How to Build Cabinets: A Comprehensive DIY Guide
Building your own cabinets can be a rewarding and cost-effective project, allowing you to customize storage solutions perfectly for your space. This comprehensive guide will walk you through the process, from initial planning to the final finishing touches. Whether you're a seasoned DIYer or a beginner, this step-by-step approach will empower you to create beautiful, functional cabinets.
Planning Your Cabinet Project: Measurements & Design
Before you even pick up a saw, careful planning is crucial. This phase lays the foundation for a successful project.
1. Accurate Measurements:
- Space Assessment: Precisely measure the space where your cabinets will go. Note any obstacles like pipes or electrical outlets. Account for door swing clearances.
- Cabinet Dimensions: Determine the desired dimensions of your cabinets. Consider the available space and the intended use (kitchen, bathroom, etc.). Standard cabinet depths are 12", 18", and 24".
- Drawings & Sketches: Create detailed drawings of your cabinet design. Include measurements for all sides, shelves, and doors. This will serve as your blueprint.
2. Choosing Your Materials:
- Wood Selection: Popular choices include plywood (durable and stable), MDF (medium-density fiberboard, cost-effective), and solid wood (aesthetically pleasing but more expensive). Consider the moisture resistance required based on the cabinet's location (e.g., bathroom cabinets need moisture-resistant materials).
- Hardware: Source hinges, knobs, pulls, and drawer slides in advance. Consider the style and functionality you want.
- Finishing Supplies: Choose your paint, stain, or varnish, along with any primers and sealers needed.
Building Your Cabinets: A Step-by-Step Guide
Now for the hands-on part! This section breaks down the construction process.
1. Cutting the Wood:
- Precise Cuts: Using your drawings as a guide, accurately cut the wood components to size. A miter saw or table saw is recommended for clean, precise cuts.
- Safety First: Always wear appropriate safety gear, including safety glasses and hearing protection.
2. Assembling the Cabinet Boxes:
- Pocket Holes: Use pocket hole joinery for strong, hidden connections. This technique requires a pocket hole jig and screws.
- Glue & Screws: Apply wood glue to the joints before securing them with screws. Wipe away excess glue immediately.
- Squareness Check: Regularly check for squareness using a speed square to ensure your cabinet boxes are perfectly aligned.
3. Adding Shelves & Dividers:
- Shelf Placement: Determine the placement of shelves based on your storage needs. Use shelf supports or dadoes for a sturdy shelf installation.
- Dividers: Install dividers to create smaller compartments within drawers or cabinets.
4. Attaching Doors & Drawer Fronts:
- Hinge Installation: Carefully install hinges according to the manufacturer's instructions. Ensure the doors align properly.
- Drawer Slides: Mount drawer slides securely to both the cabinet sides and drawer boxes. Test the drawers for smooth operation.
5. Finishing Touches:
- Sanding: Sand all surfaces smoothly before applying any finish. Start with coarser grit sandpaper and progressively move to finer grits.
- Finishing: Apply your chosen finish (paint, stain, or varnish) according to the manufacturer's instructions. Multiple coats may be necessary for optimal protection and appearance.
- Hardware Installation: Attach knobs, pulls, and any other decorative hardware.
Tips for Success
- Practice Makes Perfect: Consider practicing your techniques on scrap wood before working with your final materials.
- Invest in Quality Tools: Using quality tools will make the process smoother and result in a better finished product.
- Take Your Time: Don't rush the process. Careful attention to detail will lead to a superior outcome.
Building your own cabinets is a challenging but deeply satisfying endeavor. By following these steps and taking your time, you can create custom storage solutions that perfectly meet your needs and enhance your home. Remember, even small mistakes are learning opportunities – embrace the process and enjoy the creation!
