How to Cancel Your Crunchyroll Subscription: A Step-by-Step Guide
Are you looking to cancel your Crunchyroll subscription? Maybe you've finished your favorite anime series, found a better streaming service, or simply want to save some money. Whatever the reason, canceling your Crunchyroll subscription is a straightforward process. This guide will walk you through the steps, regardless of how you initially signed up.
Understanding Your Subscription Method
Before you begin, it's crucial to understand how you subscribed to Crunchyroll. This will determine the cancellation process. You likely subscribed through one of the following methods:
- Directly through Crunchyroll's website: This is the most common method. Cancellation is done directly through your Crunchyroll account settings.
- Through a third-party platform: You might have subscribed through platforms like Apple App Store, Google Play Store, Amazon, or others. Cancellation must be done through that specific platform.
- Via a bundled service: If your Crunchyroll subscription was bundled with another service (like a mobile phone plan), you'll need to contact your service provider to cancel.
Cancelling Your Crunchyroll Subscription Directly
This section covers canceling subscriptions created directly through Crunchyroll's website.
Step 1: Log in to your Crunchyroll account. Go to the Crunchyroll website and log in using your email address and password.
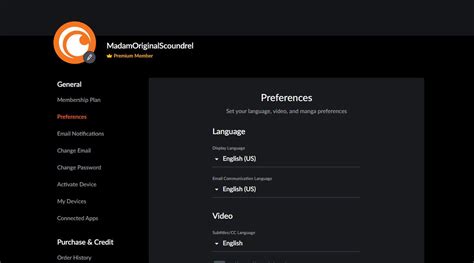
Step 2: Access your account settings. Look for a profile icon, usually located in the top right corner. Click on it and select "Account Settings" or a similar option.
Step 3: Locate the subscription management section. Within your account settings, you'll find a section related to your subscription, billing, or payments. This section may be labeled "Subscription," "Billing," "Membership," or something similar.
Step 4: Cancel your subscription. Once you've located the subscription management section, you should see a button or option to "Cancel Subscription," "Cancel Membership," or something equivalent. Click on it.
Step 5: Confirm your cancellation. Crunchyroll will likely ask you to confirm your cancellation. They might offer reasons for canceling—feel free to provide feedback, or simply confirm your choice.
Step 6: Verify Cancellation. After confirming, check your email for a cancellation confirmation from Crunchyroll. This email serves as proof that your subscription has been successfully canceled.
Cancelling Through Third-Party Platforms
If you subscribed through a third-party platform like the Apple App Store, Google Play Store, or Amazon, you must cancel through that platform, not directly through Crunchyroll. Here's a general outline; the exact steps might vary slightly depending on the platform:
- Open the App Store or Platform: Access the app store or platform where you initially subscribed.
- Go to your account settings: Find your account settings or profile section.
- Manage subscriptions: Locate your subscriptions or payment information.
- Find Crunchyroll: Identify your Crunchyroll subscription.
- Cancel Subscription: Select the option to cancel your Crunchyroll subscription.
- Confirm Cancellation: Confirm your decision to cancel. You might receive an email confirmation.
Cancelling Bundled Subscriptions
If your Crunchyroll subscription is bundled with another service, you need to contact your service provider (e.g., your mobile phone company) to cancel the bundle. They will guide you through the cancellation process. Be prepared to provide your account details.
What Happens After Cancellation?
Your Crunchyroll access will continue until the end of your current billing cycle. You won't be charged again after that date. You can continue to enjoy Crunchyroll until then!
This comprehensive guide should help you successfully cancel your Crunchyroll subscription. Remember to choose the appropriate method based on how you originally signed up. If you encounter any difficulties, contact Crunchyroll's customer support for assistance.
