How To Change Your Car Battery: A Step-by-Step Guide
Changing your car battery might seem daunting, but with the right tools and a little know-how, it's a manageable DIY task. This guide provides a comprehensive, step-by-step process, ensuring you can tackle this job safely and efficiently. Remember, safety first! Always prioritize your well-being when working with car batteries.
Before You Begin: Gather Your Supplies
Before you even pop the hood, make sure you have everything you need. This will streamline the process and prevent frustrating interruptions. You'll need:
- New Car Battery: Choose a battery with the correct group size and cold cranking amps (CCA) for your vehicle. Check your owner's manual for specifications.
- Wrench (or Socket Wrench): This will be used to remove the battery hold-down clamp and terminal connectors. The size will depend on your car's battery terminals.
- Safety Glasses: Protect your eyes from acid splashes.
- Gloves: Protect your hands from battery acid.
- Baking Soda and Water: A mixture of this can neutralize any spilled battery acid.
- Wire Brush: This helps clean the battery terminals.
- Optional: Battery Terminal Protector: These prevent corrosion.
Step-by-Step Guide to Changing Your Car Battery
Let's dive into the process of changing your car battery:
1. Preparation is Key: Safety First!
- Park on a Level Surface: Ensure your car is parked on a level surface and the engine is turned off. Engage the parking brake.
- Locate the Battery: Open your hood and locate the car battery. It’s usually in the engine compartment, often secured by a hold-down clamp.
- Ventilation: Work in a well-ventilated area. Battery fumes can be harmful.
2. Disconnect the Battery Terminals
- Negative Terminal First: Always disconnect the negative (-) terminal first. Use your wrench to loosen and remove the cable clamp.
- Positive Terminal Second: Next, disconnect the positive (+) terminal in the same manner.
3. Remove the Battery Hold-Down Clamp
- Loosen the Clamp: Use your wrench to loosen and remove the hold-down clamp securing the battery in place.
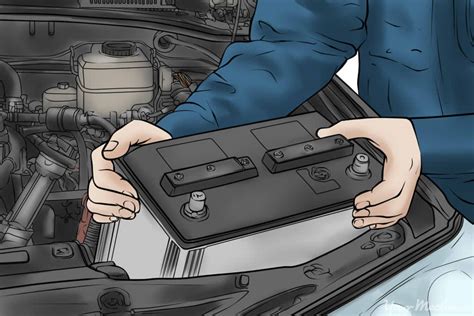
- Lift Out the Battery: Carefully lift the old battery out of the battery tray.
4. Install the New Battery
- Position the New Battery: Carefully place the new battery in the battery tray, ensuring it sits correctly.
- Secure the Battery: Reattach the hold-down clamp, tightening it securely.
5. Connect the Battery Terminals
- Positive Terminal First: Connect the positive (+) terminal first, ensuring a secure connection.
- Negative Terminal Second: Connect the negative (-) terminal last.
6. Clean Up and Double-Check
- Clean Spills: If any battery acid spilled, neutralize it with a mixture of baking soda and water.
- Double-Check Connections: Make sure all connections are secure before closing the hood.
- Start Your Car: Try starting your car to ensure everything is working correctly.
Troubleshooting and Maintenance Tips
- Corrosion on Terminals: If you encounter significant corrosion on the terminals, use a wire brush to clean them before connecting the new battery.
- Battery Size: Double-check the group size and CCA rating to ensure compatibility with your vehicle.
- Regular Maintenance: Regularly inspect your battery for signs of corrosion and ensure the terminals are clean and tight.
By following these steps, you can successfully change your car battery and get back on the road. Remember, if you're uncomfortable performing this task yourself, consult a qualified mechanic. This guide is for informational purposes only; always prioritize safety and consult your vehicle's owner's manual.
