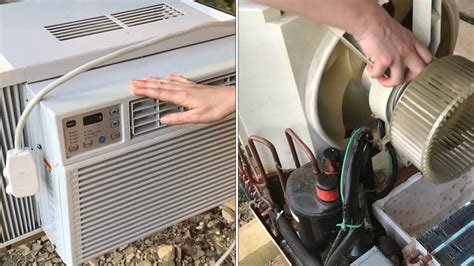
How To Clean Your Window AC Unit: A Step-by-Step Guide
Keeping your window air conditioning unit clean is crucial for its efficiency, longevity, and your health. A dirty unit can lead to reduced cooling power, increased energy bills, and even the growth of mold and mildew. This guide provides a comprehensive, step-by-step process to effectively clean your window AC unit.
Preparing for the Cleaning Process
Before you begin, gather your supplies. You'll need:
- A soft-bristled brush: A brush specifically designed for cleaning electronics is ideal. Avoid anything too harsh that could scratch the unit's fins.
- Vacuum cleaner with a brush attachment: This will help remove loose dirt and debris.
- Mild detergent and warm water: Avoid harsh chemicals that could damage the unit's components. A simple solution of dish soap and water usually suffices.
- Spray bottle: To easily apply your cleaning solution.
- Soft cloths or sponges: For wiping down surfaces.
- Fin comb (optional but highly recommended): This specialized tool helps straighten bent fins, improving airflow.
- Protective gloves: Protect your hands from dirt and chemicals.
Important Safety Note: Always unplug your window AC unit from the power source before starting any cleaning process.
Cleaning the Exterior of Your Window AC Unit
-
Remove the Unit: Carefully remove the AC unit from the window. This will make cleaning much easier. Support it appropriately to prevent damage.
-
Vacuuming: Use the brush attachment on your vacuum to remove loose dust, dirt, and debris from all exterior surfaces, including the sides, top, and bottom. Pay close attention to the areas around the fins.
-
Washing: Prepare your mild detergent solution. Using the spray bottle, lightly mist the exterior surfaces of the unit, avoiding getting the solution into any electrical components. Gently scrub with a soft cloth or sponge, rinsing with clean water as needed.
-
Drying: Thoroughly dry all surfaces with a clean, dry cloth before proceeding.
Cleaning the Interior of Your Window AC Unit
-
Access the Filters: Locate the air filters. Most window units have easily removable filters; consult your owner's manual if unsure.
-
Filter Cleaning: Gently vacuum the filters to remove loose debris. If the filters are heavily soiled, wash them separately using warm soapy water. Rinse thoroughly and allow them to air dry completely before reinstalling. Never use hot water or put them in a washing machine.
-
Cleaning the Fins: This is the most crucial step. Use the soft-bristled brush to gently clean the fins (the thin metal slats) on both the inside and outside of the unit. A fin comb is invaluable here for straightening any bent fins. Straight fins are essential for optimal airflow. If there’s stubborn dirt, carefully use the detergent solution, then rinse with clean water.
-
Inspect for Debris: Carefully examine the interior of the unit for any other debris or obstructions.
Reassembling and Maintenance
-
Reinstall Filters: Once the filters are completely dry, reinstall them in the unit.
-
Replace the Unit: Carefully return the AC unit to its window slot.
-
Regular Maintenance: To maintain peak efficiency, aim to clean your window AC unit at least once a month during regular use, or more frequently in dusty environments. Cleaning the filters alone should be done every 2-4 weeks.
Optimizing Your Window AC Unit's Performance
By following these steps and performing regular maintenance, you’ll extend the lifespan of your window AC unit, improve its cooling efficiency, and maintain a healthy indoor environment. Remember to always consult your owner's manual for specific instructions relevant to your model.
