

Introduction: Demystifying Factor Trees
Have you ever stared at a number and wondered what it’s truly made of? Not just the digits, but the fundamental building blocks that combine to create it? That’s where factor trees come in. Factor trees are a visual and intuitive method for breaking down a number into its prime factors. They’re like a family tree, but instead of tracing ancestry, you’re tracing the multiplicative origins of a number. They are a fundamental tool in number theory and essential for grasping concepts like greatest common factors (GCF) and least common multiples (LCM). This comprehensive guide will walk you through everything you need to know about factor trees, from the basic principles to more advanced applications.
Whether you’re a student grappling with prime factorization for the first time, a teacher looking for engaging ways to explain the concept, or simply someone curious about the underlying structure of numbers, this guide is for you. We’ll break down the process step-by-step, provide plenty of examples, and address common questions and pitfalls along the way. Get ready to embark on a journey into the fascinating world of prime numbers and the elegant simplicity of factor trees.
What is a Factor Tree?
At its core, a factor tree is a diagram that visually represents the prime factorization of a composite number. A composite number, remember, is any whole number greater than 1 that has more than two factors (1 and itself). Prime numbers, on the other hand, have only two factors: 1 and themselves (e.g., 2, 3, 5, 7, 11…).
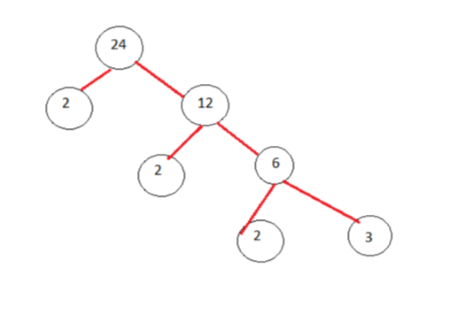
The factor tree starts with the composite number at the top (the ‘root’ of the tree). You then branch out, finding any two factors that multiply together to give you that number. You continue branching out from each factor until you’re left with only prime numbers at the ‘leaves’ of the tree. These prime numbers are the prime factors of the original number.
Think of it like dissecting a complex object into its simplest components. You keep breaking it down until you can’t break it down any further without changing its fundamental nature. In the case of numbers, those fundamental components are prime numbers.
Why Use Factor Trees?
Factor trees offer several advantages over other methods of prime factorization:
- Visual Representation: They provide a clear and easy-to-understand visual representation of the factorization process, making it easier to grasp the concept, especially for visual learners.
- Step-by-Step Approach: They break down the process into manageable steps, making it less intimidating and more accessible.
- Flexibility: There’s often more than one way to construct a factor tree for a given number, allowing for flexibility and catering to different learning styles.
- Foundation for Further Concepts: Mastering factor trees provides a solid foundation for understanding more advanced concepts like GCF, LCM, and simplifying fractions.
How to Construct a Factor Tree: A Step-by-Step Guide
Let’s walk through the process of constructing a factor tree with a concrete example: the number 36.
Step 1: Start with the Number
Write the number you want to factorize at the top of your page. This is the starting point of your factor tree. In our case, that’s 36.
Step 2: Find Any Two Factors
Think of any two numbers that multiply together to give you the original number. It doesn’t matter which factors you choose; the end result will be the same. For 36, you could choose 6 and 6, 4 and 9, or 2 and 18. Let’s go with 6 and 6 for this example.
Draw two branches extending downwards from the original number and write the two factors at the end of each branch.
Step 3: Check if the Factors are Prime
Now, examine each of the factors you’ve written down. Are they prime numbers? Remember, a prime number is only divisible by 1 and itself. 6 is not a prime number because it’s divisible by 1, 2, 3, and 6.
If a factor is prime, circle it or highlight it. This indicates that you’ve reached the end of that branch.
Step 4: Continue Factoring Composite Factors
If a factor is not prime (i.e., it’s a composite number), repeat Step 2 and Step 3 for that factor. In our example, both 6s are composite numbers, so we need to continue factoring them.
6 can be factored into 2 and 3. Draw two branches extending downwards from each 6 and write 2 and 3 at the end of each branch.
Step 5: Repeat Until All Factors are Prime
Continue this process until all the numbers at the end of the branches are prime numbers. In our example, 2 and 3 are both prime numbers. So, we circle or highlight them.
You should now have a tree-like diagram with 36 at the top and the prime factors 2, 3, 2, and 3 at the bottom.
Step 6: Write the Prime Factorization
Once you’ve reached the end of all the branches, you can write the prime factorization of the original number. This is simply the product of all the prime numbers at the bottom of the tree.
In our example, the prime factorization of 36 is 2 x 2 x 3 x 3, which can also be written as 22 x 32.
Alternative Factor Trees for the Same Number
One of the beautiful things about factor trees is that there’s often more than one way to create them. Let’s go back to our example of 36 and try a different starting point.
Instead of starting with 6 and 6, let’s start with 4 and 9.
- Step 1: Write 36 at the top.
- Step 2: Draw two branches and write 4 and 9 at the end of each branch.
- Step 3: 4 is not prime (it’s divisible by 1, 2, and 4), so we need to factor it further. 9 is also not prime (it’s divisible by 1, 3, and 9).
- Step 4: Factor 4 into 2 and 2. Factor 9 into 3 and 3.
- Step 5: 2 and 3 are both prime numbers, so we circle them.
The prime factorization we arrive at is still 2 x 2 x 3 x 3 (or 22 x 32), even though we started with different factors.
This demonstrates that regardless of the initial factors you choose, as long as you continue factoring correctly, you’ll always arrive at the same prime factorization.
Examples of Factor Trees for Different Numbers
Let’s look at a few more examples to solidify your understanding.
Example 1: Factor Tree for 48
We can start by factoring 48 into 6 and 8.
- 6 factors into 2 and 3 (both prime).
- 8 factors into 2 and 4.
- 4 factors into 2 and 2 (both prime).
The prime factorization of 48 is 2 x 2 x 2 x 2 x 3 (or 24 x 3).
Example 2: Factor Tree for 75
We can start by factoring 75 into 3 and 25.
- 3 is prime.
- 25 factors into 5 and 5 (both prime).
The prime factorization of 75 is 3 x 5 x 5 (or 3 x 52).
Example 3: Factor Tree for 100
We can start by factoring 100 into 10 and 10.
- 10 factors into 2 and 5 (both prime).
- 10 factors into 2 and 5 (both prime).
The prime factorization of 100 is 2 x 2 x 5 x 5 (or 22 x 52).
Common Mistakes to Avoid When Using Factor Trees
While factor trees are a relatively straightforward method, there are a few common mistakes that students often make. Being aware of these pitfalls can help you avoid them.
- Forgetting to Factor Completely: The most common mistake is stopping the factorization process before all the factors are prime. Make sure you continue factoring until you’re left with only prime numbers at the end of each branch.
- Incorrectly Identifying Prime Numbers: It’s crucial to have a good understanding of what prime numbers are. Double-check if a number is truly prime before circling it. Remember, 1 is not a prime number.
- Using Non-Integer Factors: Factor trees deal with whole numbers only. Don’t try to use fractions or decimals as factors.
- Getting Lost in the Branches: As the tree grows, it can become easy to lose track of which factors you’ve already factored. Use a clear and organized layout to avoid confusion.
Advanced Applications of Factor Trees
Factor trees are not just a standalone concept; they’re a fundamental building block for understanding more advanced mathematical ideas.
Finding the Greatest Common Factor (GCF)
The GCF of two or more numbers is the largest number that divides evenly into all of them. Factor trees can be used to find the GCF efficiently.
- Create factor trees for each of the numbers.
- Identify the prime factors that are common to all the numbers.
- Multiply these common prime factors together. The result is the GCF.
Example: Find the GCF of 36 and 48.
- The prime factorization of 36 is 2 x 2 x 3 x 3.
- The prime factorization of 48 is 2 x 2 x 2 x 2 x 3.
- The common prime factors are 2 x 2 x 3.
- Therefore, the GCF of 36 and 48 is 2 x 2 x 3 = 12.
Finding the Least Common Multiple (LCM)
The LCM of two or more numbers is the smallest number that is a multiple of all of them. Factor trees can also be used to find the LCM.
- Create factor trees for each of the numbers.
- Identify all the prime factors from both numbers.
- For each prime factor, take the highest power that appears in either factorization.
- Multiply these prime factors raised to their highest powers together. The result is the LCM.
Example: Find the LCM of 36 and 48.
- The prime factorization of 36 is 22 x 32.
- The prime factorization of 48 is 24 x 3.
- The highest power of 2 is 24.
- The highest power of 3 is 32.
- Therefore, the LCM of 36 and 48 is 24 x 32 = 16 x 9 = 144.
Simplifying Fractions
Factor trees can be used to simplify fractions by finding the GCF of the numerator and denominator and then dividing both by the GCF.
- Create factor trees for the numerator and denominator.
- Find the GCF of the numerator and denominator using the method described above.
- Divide both the numerator and denominator by the GCF.
Example: Simplify the fraction 36/48.
- We already know that the GCF of 36 and 48 is 12.
- Divide both the numerator and denominator by 12: 36/12 = 3 and 48/12 = 4.
- Therefore, the simplified fraction is 3/4.
Tips and Tricks for Mastering Factor Trees
Here are a few additional tips and tricks to help you master factor trees:
- Practice Regularly: The more you practice, the more comfortable you’ll become with the process. Start with simple numbers and gradually work your way up to more complex ones.
- Use Different Starting Points: Experiment with different starting factors to see how the tree changes. This will help you understand that the end result is always the same, regardless of the starting point.
- Memorize Prime Numbers: Knowing the first few prime numbers (2, 3, 5, 7, 11, 13, 17, 19, 23, 29…) will significantly speed up the factorization process.
- Look for Divisibility Rules: Understanding divisibility rules (e.g., a number is divisible by 2 if it’s even, divisible by 3 if the sum of its digits is divisible by 3, divisible by 5 if it ends in 0 or 5) can help you quickly identify factors.
- Check Your Work: After you’ve found the prime factorization, multiply the prime factors together to make sure you get back the original number. This is a good way to catch any errors.
Factor Trees in Real-World Applications
While factor trees might seem like an abstract mathematical concept, they have real-world applications in various fields.
- Cryptography: Prime factorization is a fundamental concept in cryptography, the science of secure communication. Many encryption algorithms rely on the difficulty of factoring large numbers into their prime factors.
- Computer Science: Prime factorization is used in various computer science applications, such as hashing algorithms and data compression.
- Music: The mathematical relationships between musical notes and intervals can be analyzed using prime factorization.
- Architecture: Prime numbers can be used in architectural design to create visually appealing and structurally sound buildings.
Conclusion: The Power of Prime Factorization
Factor trees are a powerful tool for understanding the fundamental structure of numbers. They provide a visual and intuitive way to break down composite numbers into their prime factors, laying the foundation for more advanced mathematical concepts like GCF, LCM, and simplifying fractions. By mastering factor trees, you’ll gain a deeper appreciation for the beauty and elegance of mathematics and unlock new problem-solving skills that can be applied in various fields.
So, grab a pencil and paper, choose a number, and start building your own factor trees. With practice and patience, you’ll become a prime factorization pro in no time!
