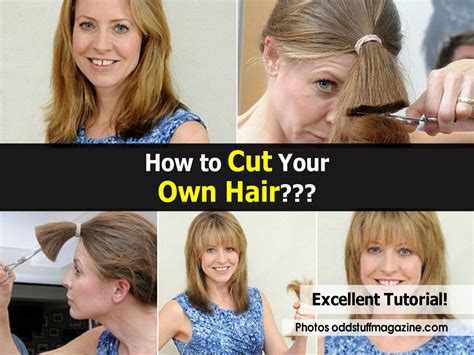
How to Cut Your Own Hair: A Beginner's Guide to a DIY Haircut
Cutting your own hair can seem daunting, but with the right tools and techniques, you can achieve a surprisingly good result, saving money and the hassle of salon appointments. This guide provides a step-by-step approach for various hair types and styles, focusing on safety and achieving a professional-looking finish.
Preparing for Your DIY Haircut
Before you grab those scissors, preparation is key. This will ensure a smoother, safer, and more successful haircut.
Essential Tools:
- Sharp Hair Cutting Scissors: Dull scissors will cause split ends and an uneven cut. Invest in a good pair specifically designed for hair. Avoid using household scissors.
- Hair Clips: Sectioning your hair is crucial for even cuts. Clips will keep your hair organized.
- Wide-Tooth Comb: This will help detangle your hair and create clean sections.
- Spray Bottle: A spray bottle filled with water will help keep your hair damp and manageable throughout the cutting process.
- Mirror: You'll need at least one mirror, and preferably two – one for the front and one for the back.
- Optional: Hair Cutting Shears (Thinning Shears): These are helpful for blending and creating texture, but are not essential for beginners.
Understanding Your Hair:
Knowing your hair type (straight, wavy, curly, coily) and its thickness is crucial. Different hair types require slightly different techniques. Consider your current hairstyle and the style you want to achieve. A small change is easier to manage than a drastic transformation for your first attempt.
Step-by-Step Guide to Cutting Your Own Hair
This guide focuses on a simple trim, ideal for beginners. For more complex styles, consider watching video tutorials.
1. Wash and Condition:
Start with clean, damp hair. This makes the hair easier to manage and provides a clearer view of the cut. Conditioning is important to prevent breakage and provide slip for easier cutting.
2. Section Your Hair:
Divide your hair into manageable sections using clips. The number of sections will depend on your hair length and thickness. For a simple trim, consider dividing your hair into top and bottom sections.
3. Start with the Ends:
Begin by trimming the ends of your hair. Hold the section of hair you are cutting taut, making sure to cut only very small amounts at a time. Point-cutting (cutting into the ends at an angle) can create a softer look and prevent blunt ends.
4. Work Your Way Up:
Once you have trimmed the ends, you can start to work your way up, trimming slightly shorter layers to create shape and style. Remember to take small amounts off at a time. It's much easier to cut more than to add it back!
5. Check Your Work:
Frequently check your work in the mirror. Use both mirrors if possible to get a good view of the back of your head.
6. Blend Layers (Optional):
If you're aiming for layered hair, use your thinning shears to carefully blend the layers. This helps create a more natural and less choppy look.
7. Dry and Style:
Once you're finished, dry and style your hair as usual. This will give you the best view of your finished result and allow you to make any necessary adjustments.
Tips for Success
- Work in well-lit areas: Good lighting is crucial for accurate cutting.
- Take your time: Rushing will lead to mistakes.
- Start small: It's always easier to take more hair off than to put it back.
- Watch tutorials: YouTube is a great resource for visual learners.
- Practice makes perfect: Don't be discouraged if your first attempt isn't perfect.
When to Seek Professional Help
While cutting your own hair can be a rewarding experience, some situations call for professional help. If you're aiming for a complex style or a significant change, it's always best to leave it to the professionals. Also, if you're unhappy with your DIY attempt, don't hesitate to see a hairstylist for a fix.
By following these steps and taking your time, you can successfully cut your own hair and achieve a great look at home. Remember, practice makes perfect!
