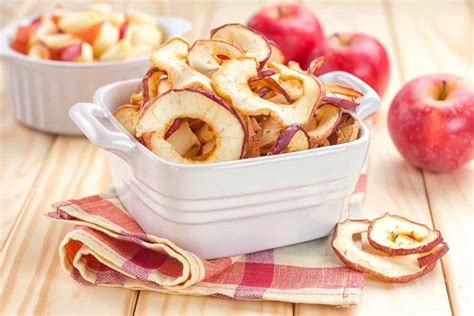
How To Dehydrate Apples: A Guide to Delicious, Homemade Apple Chips
Apples are a delicious and versatile fruit, enjoyed fresh, in pies, or even as a healthy snack. But did you know you can also transform them into delicious, long-lasting apple chips through dehydration? This guide will walk you through the process, providing tips and tricks for creating the perfect homemade apple chips.
Why Dehydrate Apples?
Dehydrating apples offers several key advantages:
- Extended Shelf Life: Dried apples can last for months, providing a convenient snack throughout the year.
- Nutrient Retention: While some nutrients are lost during dehydration, a significant portion remains, offering a healthy and flavorful treat.
- Flavor Concentration: The dehydration process intensifies the natural sweetness and flavor of the apples.
- Versatile Snack: Perfect for hiking, packing lunches, or enjoying as a healthy alternative to processed snacks.
Essential Equipment & Ingredients
Before you begin, ensure you have the following:
- Dehydrator: A food dehydrator is ideal, providing even heat distribution and optimal drying conditions. However, you can also use your oven.
- Sharp Knife: For efficient and safe apple slicing.
- Apples: Choose firm, ripe apples. Granny Smith, Honeycrisp, and Fuji are excellent choices.
- Lemon Juice (Optional): Adding a little lemon juice helps prevent browning and preserves the apple's color.
Step-by-Step Dehydration Process
1. Preparing the Apples:
- Wash and Core: Thoroughly wash your apples and remove the core using an apple corer or a sharp knife.
- Slicing: Slice the apples thinly and evenly. Uniform thickness ensures even drying. Aim for slices about ⅛ inch thick. Using a mandoline slicer can help achieve consistent thickness.
- Optional Lemon Juice Treatment: To prevent browning, toss the apple slices in a bowl with a little lemon juice.
2. Dehydrating Your Apples:
- Dehydrator Method: Arrange the apple slices in a single layer on the dehydrator trays, ensuring they don't overlap. Follow your dehydrator's instructions regarding temperature and drying time. Generally, a temperature between 135-145°F (57-63°C) is recommended. Drying time can vary from 6-12 hours depending on the thickness of the slices and the humidity.
- Oven Method: Preheat your oven to the lowest setting possible (usually around 170°F/77°C), leaving the oven door slightly ajar to allow moisture to escape. Arrange the apple slices on a baking sheet lined with parchment paper. Check frequently and rotate the trays to ensure even drying. This method typically takes longer than using a dehydrator.
3. Checking for Doneness:
The apple chips are ready when they are leathery and pliable, but not sticky or gummy. They should easily bend but not break.
4. Cooling and Storage:
Once the apple chips are dry, remove them from the dehydrator or oven and let them cool completely on a wire rack. Once cool, store them in an airtight container in a cool, dark, and dry place. They can last for several months, if stored properly.
Tips for Perfect Apple Chips
- Apple Variety Matters: Different apple varieties dehydrate differently. Experiment with different types to find your favorites.
- Thin is Best: Thinner slices dry faster and more evenly.
- Don't Overcrowd: Ensure adequate air circulation for efficient drying.
- Check Regularly: Monitor the drying process to prevent burning or spoilage.
Beyond the Basics: Flavor Variations
Get creative with your apple chips! Try these variations:
- Cinnamon Apple Chips: Sprinkle cinnamon on the apple slices before dehydrating.
- Spiced Apple Chips: Experiment with other spices like nutmeg, cloves, or allspice.
- Honey-Glazed Apple Chips: Brush the apple slices with honey before dehydrating for added sweetness.
By following these simple steps and tips, you'll be enjoying delicious homemade apple chips in no time! They’re a healthy, flavorful, and convenient snack that’s perfect for any occasion.
