

Understanding Fonts in Windows 10
Fonts are an integral part of the Windows 10 experience. They dictate how text appears across your system, from documents and web pages to application interfaces. While Windows 10 comes with a default set of fonts, users often install additional fonts for various purposes, such as graphic design, document creation, or simply personal preference. However, issues can arise, leading to the need to reinstall fonts. This could be due to font corruption, accidental deletion, or conflicts with other software.
Why Reinstall Fonts? Common Scenarios
Before diving into the how-to, let’s explore why you might need to reinstall fonts in the first place:
- Font Corruption: Sometimes, font files can become corrupted, leading to display issues like garbled text or application crashes.
- Accidental Deletion: It’s easy to accidentally delete a font, especially when cleaning up your system.
- Software Conflicts: Certain applications might overwrite or modify font files, causing unexpected problems.
- Upgrading Windows: Occasionally, upgrading to a new version of Windows can lead to font-related issues.
- Troubleshooting Display Problems: Reinstalling fonts can be a troubleshooting step when dealing with general display problems.
Methods for Reinstalling Fonts on Windows 10
Fortunately, reinstalling fonts on Windows 10 is a straightforward process. Here are several methods you can use, ranging from the simplest to more advanced techniques.
Method 1: Reinstalling Default Fonts
Windows 10 has a built-in option to restore the default fonts. This is useful if you suspect that system fonts have been modified or deleted.
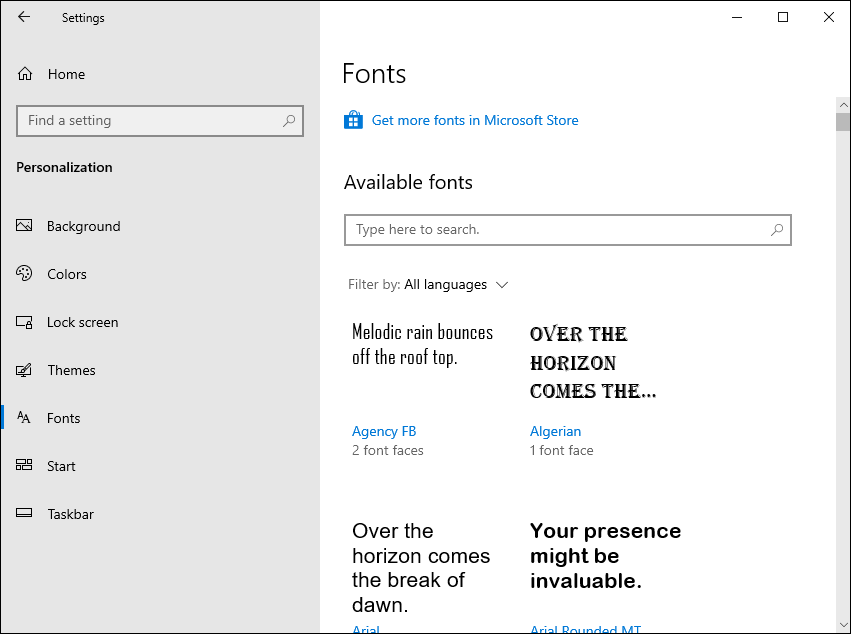
- Open Settings: Click the Start button and then click the gear icon to open the Settings app.
- Go to Personalization: In the Settings app, click on “Personalization.”
- Select Fonts: In the Personalization settings, click on “Fonts” in the left-hand menu.
- Restore Default Font Settings: Scroll down to the bottom of the Fonts settings page. You will find a link that says “Restore default font settings.” Click on it.
- Wait for the Process to Complete: Windows will now reinstall the default fonts. This process might take a few minutes.
- Restart Your Computer: After the process is complete, restart your computer to ensure that the changes take effect.
This method reinstalls all the fonts that come pre-installed with Windows 10. If you only need to reinstall specific fonts, consider the following methods.
Method 2: Reinstalling Fonts from the Microsoft Store
The Microsoft Store offers a variety of fonts, both free and paid. If you’ve previously installed fonts from the Store, you can easily reinstall them.
- Open the Microsoft Store: Click the Start button and search for “Microsoft Store.”
- Search for the Font: Use the search bar in the Microsoft Store to find the font you want to reinstall. If you know the name of the font, type it in. Otherwise, you can browse the font categories.
- Install the Font: Once you find the font, click on it to open its details page. If you’ve previously installed the font, you should see an “Install” button. Click on it to reinstall the font. If the button shows “Get” it means that you never installed it before, and you can acquire it.
- Wait for the Installation: The font will now be downloaded and installed. This process might take a few seconds to a few minutes, depending on the size of the font file and your internet speed.
- Restart Applications: After the installation is complete, restart any applications that use the font to ensure that the changes take effect.
Method 3: Manually Reinstalling Fonts from Font Files
If you have the font files (usually in .ttf or .otf format), you can manually reinstall the fonts.
- Locate the Font Files: Find the font files on your computer. They might be in a folder you downloaded, on a USB drive, or on a CD.
- Right-Click on the Font File: Right-click on the font file (.ttf or .otf).
- Select “Install”: In the context menu, select “Install.” This will install the font for all users on the computer. If you want to install the font only for your user account, select “Install for all users”.
- Alternative Installation Method: Alternatively, you can open the font file by double-clicking on it. This will open a preview window. In the preview window, click the “Install” button.
- Wait for the Installation: The font will now be installed. This process should only take a few seconds.
- Restart Applications: After the installation is complete, restart any applications that use the font to ensure that the changes take effect.
Important Note: Make sure you trust the source of the font files before installing them. Installing fonts from untrusted sources can pose a security risk.
Method 4: Using the Fonts Folder in Control Panel
Windows 10 has a dedicated Fonts folder in the Control Panel, which you can use to manage your fonts.
- Open Control Panel: Click the Start button and search for “Control Panel.”
- View by Category: In the Control Panel, make sure the “View by” option is set to “Category.” If it’s set to “Icons,” change it to “Category.”
- Click on “Appearance and Personalization”: In the Control Panel, click on “Appearance and Personalization.”
- Click on “Fonts”: In the Appearance and Personalization settings, click on “Fonts.” This will open the Fonts folder.
- Drag and Drop Font Files: Locate the font files you want to reinstall. Drag and drop the font files into the Fonts folder. Windows will automatically install the fonts.
- Copy and Paste Font Files: Alternatively, you can copy the font files and paste them into the Fonts folder.
- Wait for the Installation: Windows will now install the fonts. This process might take a few seconds to a few minutes, depending on the number of fonts you are installing.
- Restart Applications: After the installation is complete, restart any applications that use the font to ensure that the changes take effect.
Method 5: Using Command Prompt (Advanced)
For advanced users, you can use the Command Prompt to reinstall fonts. This method requires some technical knowledge.
- Open Command Prompt as Administrator: Click the Start button, search for “Command Prompt,” right-click on it, and select “Run as administrator.”
- Navigate to the Fonts Folder: In the Command Prompt, use the
cdcommand to navigate to the Fonts folder. The Fonts folder is usually located in theC:WindowsFontsdirectory. Typecd C:WindowsFontsand press Enter. - List Fonts: To see a list of installed fonts, you can use the
dircommand. Typedirand press Enter. This will display a list of all the font files in the Fonts folder. - Reinstall Fonts: To reinstall a font, you can use the
copycommand. For example, to reinstall the Arial font, you would typecopy arial.ttf C:WindowsFontsand press Enter. This will copy the font file from its current location to the Fonts folder, effectively reinstalling it. If the font is already in the folder it will say “File already exists”, so it is important to verify the font is not working correctly before trying to copy it. - Restart Your Computer: After reinstalling the fonts, restart your computer to ensure that the changes take effect.
Caution: Using the Command Prompt incorrectly can cause system instability. Make sure you know what you are doing before using this method.
Method 6: Reinstalling Fonts by System Restore
If the font issues occurred recently, you can use System Restore to revert your system to a previous state when the fonts were working correctly.
- Open Control Panel: Click the Start button and search for “Control Panel.”
- Search for Recovery: In the Control Panel, search for “Recovery.”
- Open System Restore: Click on “Recovery.” Then, click on “Open System Restore.”
- Choose a Restore Point: System Restore will open. Click “Next.” Choose a restore point from the list. Select a restore point that was created before the font issues started.
- Scan for Affected Programs: Before proceeding, click the “Scan for affected programs” button. This will show you which programs and drivers will be affected by the restore.
- Confirm and Start the Restore: Click “Next.” Then, click “Finish” to start the system restore.
- Wait for the Restore to Complete: System Restore will now restore your system to the selected restore point. This process might take a while, so be patient.
- Restart Your Computer: After the restore is complete, your computer will restart. Check if the font issues have been resolved.
Note: System Restore will revert your system files and settings to the selected restore point. Any programs or drivers installed after the restore point was created will be uninstalled.
Troubleshooting Common Font Issues
Even after reinstalling fonts, you might still encounter issues. Here are some common problems and how to troubleshoot them:
- Fonts Not Displaying Correctly: If fonts are not displaying correctly, make sure you have the correct font selected in your application. Also, try clearing the font cache.
- Fonts Missing: If fonts are missing, make sure they are installed correctly. Check the Fonts folder to see if the fonts are listed. If not, reinstall them.
- Fonts Look Blurry: If fonts look blurry, try adjusting the ClearType settings. Search for “ClearType” in the Start menu and follow the instructions to adjust the settings.
- Fonts Cause Application Crashes: If fonts cause applications to crash, try uninstalling the fonts and see if the problem is resolved. If so, the font might be corrupted.
Preventing Future Font Issues
To prevent future font issues, consider the following tips:
- Only Install Fonts from Trusted Sources: Avoid installing fonts from untrusted sources, as they might contain malware or be corrupted.
- Back Up Your Fonts: Regularly back up your fonts to an external drive or cloud storage. This will make it easier to restore your fonts if something goes wrong.
- Keep Your System Up to Date: Make sure your Windows 10 system is up to date with the latest updates and security patches.
- Be Careful When Deleting Fonts: Before deleting fonts, make sure you know what you are doing. Deleting system fonts can cause problems.
- Use a Font Manager: Consider using a font manager to organize and manage your fonts. A font manager can help you keep track of your fonts and prevent conflicts.
Advanced Font Management Techniques
For users who work extensively with fonts, here are some advanced techniques to consider:
Using Font Management Software
Font management software provides a more organized and efficient way to handle large font libraries. These tools allow you to activate and deactivate fonts as needed, preview fonts, and resolve conflicts. Popular font management software includes:
- FontBase: A free and powerful font manager with a modern interface.
- NexusFont: A free font manager with a simple and intuitive interface.
- FontExplorer X Pro: A professional-grade font manager with advanced features.
Clearing the Font Cache
The font cache stores temporary font data to improve performance. However, a corrupted font cache can cause display issues. Clearing the font cache can resolve these problems.
- Stop the Windows Font Cache Service: Open the Services app (search for “Services” in the Start menu), find the “Windows Font Cache Service,” right-click on it, and select “Stop.”
- Delete the Font Cache Files: Open File Explorer and navigate to the
C:WindowsServiceProfilesLocalServiceAppDataLocaldirectory. Delete the files namedFontCache*.dat. - Start the Windows Font Cache Service: Go back to the Services app, find the “Windows Font Cache Service,” right-click on it, and select “Start.”
- Restart Your Computer: Restart your computer to ensure that the changes take effect.
Working with Font Subsetting
Font subsetting involves creating a smaller version of a font that only includes the characters used in a specific document or website. This can reduce file size and improve performance. Font subsetting is typically done using specialized software or online tools.
Conclusion
Reinstalling fonts on Windows 10 is a relatively straightforward process that can resolve a variety of issues, from font corruption to accidental deletion. By following the methods outlined in this guide, you can easily restore your fonts and ensure that your system displays text correctly. Remember to always download fonts from trusted sources and back up your fonts regularly to prevent future problems. Whether you’re a casual user or a graphic design professional, understanding how to manage fonts is essential for a smooth and productive Windows 10 experience. By taking the time to learn about font management techniques, you can ensure that your system always displays text correctly and efficiently.
