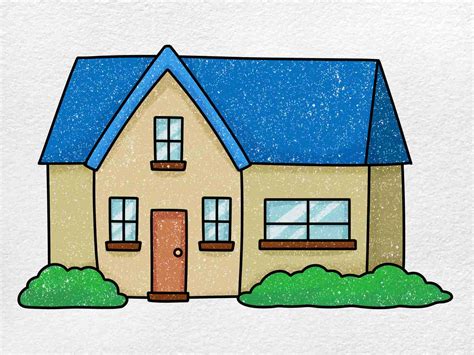
How to Draw a House: A Step-by-Step Guide for Beginners
Drawing a house might seem daunting, but with a few simple steps and some practice, anyone can create a charming illustration. This guide will walk you through the process, perfect for beginners and kids alike. We'll focus on creating a basic house, but you can easily adapt these techniques to draw more complex designs later.
What You'll Need:
- Paper: Any type of paper will do, but thicker paper is preferable to prevent smudging.
- Pencil: A standard HB pencil is ideal for sketching.
- Eraser: To correct mistakes and refine your drawing.
- Ruler (Optional): Helpful for straight lines, especially if you're aiming for a perfectly symmetrical house.
- Colored Pencils, Markers, or Crayons (Optional): To add color and detail to your finished drawing.
Step-by-Step Guide to Drawing a House:
Step 1: Drawing the Base
Start by drawing a square or rectangle. This will be the foundation of your house. Make it the size you desire; a larger square will result in a larger house. Don't worry about making it perfect; we're just sketching!
Step 2: Adding the Roof
Draw a triangle on top of the square or rectangle. This forms the roof of your house. The base of the triangle should align with the top of the square or rectangle. You can make the triangle an isosceles triangle (two equal sides) for a classic roof shape, or experiment with other shapes for a more unique look.
Step 3: Creating the Door
Draw a rectangle near the bottom center of your square or rectangle. This will be the doorway to your house. You can adjust the size and position to your liking.
Step 4: Adding Windows
Draw squares or rectangles on the sides of your house, above the door. These are the windows. Again, the size and placement are entirely up to you. You can add as many windows as you like!
Step 5: Enhancing the Details (Optional)
Now it's time to add some finer details to bring your house to life. You could:
- Add a chimney: Draw a small rectangle on the roof, usually towards one side.
- Draw a path: Add a curved or straight line leading to the door.
- Add trees or other landscaping: Draw simple trees or bushes around your house.
- Add some smoke coming from the chimney: Draw a few wavy lines rising from the chimney.
Step 6: Refine and Erase
Once you're happy with your sketch, carefully erase any unnecessary lines. Use your eraser gently to avoid damaging the paper. You can refine your lines to make them crisper and neater.
Beyond the Basics: Exploring Different House Styles
Once you've mastered the basic house drawing, you can experiment with different styles:
- Victorian Houses: Try adding intricate details like gables, turrets, and decorative trim.
- Modern Houses: Explore clean lines, geometric shapes, and flat roofs.
- Farmhouses: Add a porch, a barn, and perhaps some surrounding fields.
Tips for Success:
- Practice makes perfect: Don't be discouraged if your first attempt isn't perfect. Keep practicing, and you'll improve quickly.
- Have fun: Drawing should be enjoyable! Relax, experiment, and let your creativity flow.
- Use light pencil strokes: This allows you to easily erase and make adjustments.
- Look at real houses: Observing real-life houses will help you understand their proportions and shapes.
By following these steps and practicing regularly, you'll soon be drawing amazing houses! Remember, there's no right or wrong way to draw – the most important thing is to have fun and let your imagination run wild.
