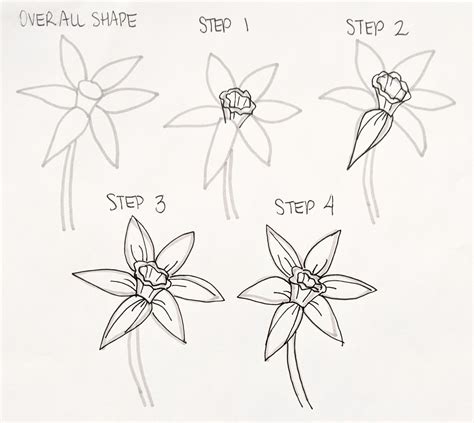
How to Draw a Simple Flower: A Beginner's Guide
Want to learn how to draw a beautiful flower, but intimidated by the thought? Don't be! This guide will walk you through drawing a simple flower, perfect for beginners and kids alike. We'll focus on easy-to-follow steps and basic shapes, making this a fun and accessible activity for everyone. Let's get started!
What You'll Need
Before we begin, gather your supplies. You'll need:
- Paper: Any kind of paper will do, but thicker paper is preferable to prevent bleed-through.
- Pencil: A standard #2 pencil is perfect. You'll want something that's easy to erase.
- Eraser: To correct any mistakes.
- Colored pencils, crayons, or markers (optional): To add color and vibrancy to your flower.
Step-by-Step Guide: Drawing a Simple Flower
Step 1: Drawing the Stem
Start by drawing a simple, slightly curved line for the stem of your flower. Imagine a gently bending stalk reaching upwards. Make it as long or short as you like!
Step 2: Adding the Leaves
Now, add some leaves to your stem. You can draw simple oval shapes or teardrop shapes for your leaves. Experiment with different sizes and placements. Remember to keep the leaves attached to the stem.
Step 3: Drawing the Flower's Center
Next, draw a small circle or oval at the top of the stem. This will be the center of your flower. This central circle will be the foundation for your flower's petals.
Step 4: Creating the Petals
This is the fun part! Draw several rounded petals around the central circle. You can overlap the petals slightly for a more natural look. Don't worry about making them perfectly symmetrical; slight imperfections add character! Consider varying the size of the petals slightly for added realism.
Step 5: Adding Detail (Optional)
Once you've drawn your petals, you can add some extra details to make your flower more realistic. You can add small lines within the petals to suggest texture, or draw tiny dots in the center to represent seeds.
Step 6: Coloring Your Flower (Optional)
Finally, if you'd like, add some color to your drawing using colored pencils, crayons, or markers. Be creative and experiment with different color combinations!
Tips for Success
- Start light: Use light pencil strokes so that you can easily erase any mistakes.
- Practice makes perfect: Don't get discouraged if your first attempt isn't perfect. Keep practicing, and you'll improve with each drawing.
- Have fun! Drawing should be enjoyable. Relax, let your creativity flow, and experiment with different styles.
Expanding Your Skills
Once you've mastered drawing this simple flower, you can try adding more details, experimenting with different flower types, or even creating a whole flower garden! You might try drawing different types of flowers like sunflowers, roses, or tulips, each with their unique petal structures and details. The possibilities are endless!
Remember to search for images of flowers for inspiration. Observing the different shapes, colors, and arrangements of petals will significantly help you enhance your drawings.
This simple guide is a great starting point for anyone interested in learning how to draw. So grab your pencils and paper, and start creating your own beautiful flower masterpieces!
