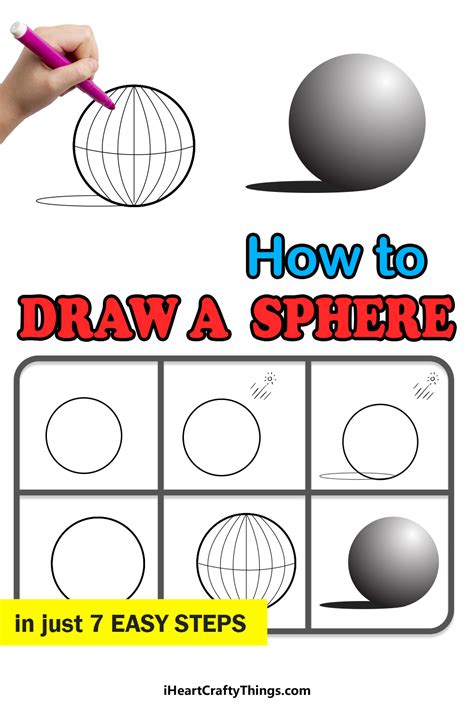
How To Draw a Sphere: A Step-by-Step Guide for Beginners and Beyond
Drawing a perfect sphere might seem daunting, but with the right techniques, it becomes achievable. This guide breaks down the process, catering to both beginners picking up a pencil for the first time and those looking to refine their skills. We'll cover everything from basic shapes to adding highlights and shadows for a truly realistic effect.
Understanding the Basics: More Than Just a Circle
Before diving into the details, remember that a sphere is a three-dimensional circle. This means it has volume and depth, unlike a flat circle. Capturing this three-dimensionality is key to a successful drawing.
1. Start with a Light Circle
Begin by lightly sketching a circle. Don't worry about perfection; it's just a guide. A slightly imperfect circle often lends more character to the final drawing. Use a light pencil (like a 2H or HB) to make it easy to erase later.
2. Defining the Form: The Construction Lines
Now, add a vertical and a horizontal line through the center of your circle. These lines are crucial for establishing the sphere's form and will help you place highlights and shadows accurately. Think of them as your roadmap.
3. Adding Depth: Shading and Highlights
This is where your sphere comes to life. The key to creating a realistic sphere lies in understanding light and shadow.
Understanding Light Sources:
Imagine a single light source shining on your sphere. This will create a highlight, a mid-tone area, and a shadow.
- Highlight: The brightest area, where the light directly hits the sphere. Leave this area completely white or very lightly shaded.
- Mid-tones: The areas between the highlight and the shadow. These will gradually transition from light to dark.
- Shadow: The darkest area, opposite the light source. This area needs the darkest shading.
Applying Shading Techniques:
- Hatching: Use closely spaced parallel lines to create shading. The closer the lines, the darker the area.
- Cross-hatching: Overlap hatching lines at different angles for deeper shadows.
- Blending: Use a blending stump or your finger to soften the transitions between light and dark areas, creating a smoother, more realistic look.
4. Refining the Form: Adding Details and Subtleties
Once your basic shading is complete, you can refine your sphere by adding more subtle details. This could include:
- Reflected Light: A small area of light on the shadow side, reflecting light from the environment.
- Cast Shadow: The shadow the sphere projects onto the surface beneath it. This adds to the three-dimensional effect.
- Texture: If your sphere is not perfectly smooth, you can add subtle texture variations through your shading.
Advanced Techniques for Realistic Spheres
For those seeking a more advanced approach, consider these techniques:
- Using different pencil grades: Experiment with harder pencils (like 4H) for light areas and softer pencils (like 6B) for dark areas, creating a richer tonal range.
- Value studies: Practice shading a sphere using a grayscale value chart to improve your understanding of light and shadow transitions.
Practice Makes Perfect: Tips for Success
Drawing spheres takes practice. Don't get discouraged if your first attempts aren't perfect. The more you practice, the better you'll become at understanding form, light, and shadow. Try drawing several spheres with different light sources and positions to hone your skills. Use various reference images for inspiration and to help you understand how light interacts with spherical forms.
By following these steps and practicing regularly, you'll be well on your way to drawing stunningly realistic spheres! Remember, the key is patience, observation, and a willingness to experiment.
