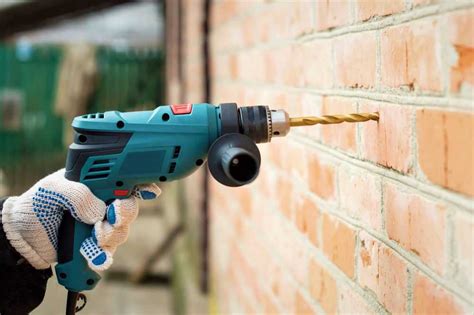
How To Drill Into Brick: A Comprehensive Guide
Drilling into brick can seem daunting, but with the right tools and techniques, it's a manageable DIY task. This guide will walk you through the process, ensuring you achieve clean, accurate holes every time. Whether you're hanging shelves, installing fixtures, or tackling a more complex project, this comprehensive guide will equip you with the knowledge to succeed.
Essential Tools for Drilling into Brick
Before you begin, gather the necessary tools. Having everything prepared beforehand streamlines the process and prevents frustrating interruptions.
- Hammer Drill: A hammer drill is crucial for drilling into brick. The hammer action helps break up the material, making the drilling process significantly easier. A standard drill won't provide the necessary power.
- Masonry Drill Bit: These specialized bits are designed to withstand the hardness of brick. Choose a bit size appropriate for your application. Using the wrong bit will lead to broken bits and frustration. Look for carbide-tipped bits for the best results.
- Safety Glasses: Always protect your eyes from flying debris. Safety glasses are non-negotiable.
- Dust Mask: Brick dust is irritating and potentially harmful. A dust mask will protect your respiratory system.
- Pencil: Mark the drilling location accurately to avoid mistakes.
- Level (optional but recommended): Ensure your holes are perfectly aligned, especially for shelving or other installations requiring precision.
Step-by-Step Guide to Drilling Into Brick
Following these steps will ensure a successful and safe drilling experience.
Step 1: Marking the Drilling Location
Use a pencil to mark the precise spot where you need to drill. Double-check your measurements to ensure accuracy. A slightly off-center hole can ruin the entire project.
Step 2: Secure the Work Area
Make sure the brick surface is stable and secure. If working at height, use appropriate safety measures. A shaky surface can cause the drill to slip and potentially cause injury.
Step 3: Selecting the Right Drill Bit
Choose a masonry drill bit slightly smaller than the fastener you'll be using. This allows for a snug fit and prevents the fastener from spinning.
Step 4: Starting the Hole
Place the drill bit firmly on the marked spot and start drilling slowly. Apply firm, even pressure. Avoid forcing the drill; let the hammer action do the work.
Step 5: Maintaining Steady Pressure
Continue drilling until the hole reaches the desired depth. Keep the drill bit at a consistent angle to prevent the hole from becoming uneven.
Step 6: Cleaning the Hole
Once you've completed drilling, use a brush or compressed air to clear out any brick dust from the hole. This will ensure a clean and secure fit for your fastener.
Tips for Success
- Start Slow: Begin drilling at a low speed to prevent the bit from slipping.
- Use Lubricant: A small amount of water can act as a lubricant and help keep the bit cool and prevent it from overheating.
- Take Breaks: If the bit starts to overheat, stop drilling and allow it to cool down. Overheating can damage the bit.
- Pre-drilling (for softer bricks): For softer brick types, pre-drilling a pilot hole with a smaller bit can help prevent chipping.
Troubleshooting Common Problems
- Bit Breaking: This usually indicates using the wrong bit or applying too much pressure. Always use masonry bits and apply steady, even pressure.
- Hole Too Wide: This can be caused by using a bit that's too large or by applying too much pressure.
- Chipped Brick: This is often caused by starting too quickly or applying uneven pressure.
By following these steps and tips, you'll be able to successfully drill into brick, completing your DIY projects with confidence. Remember safety first! Always wear appropriate safety gear.
