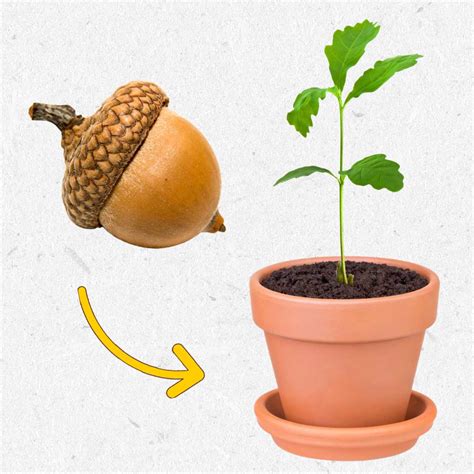
How To Germinate a Blue Oak Acorn Seed: A Step-by-Step Guide
Planting a blue oak tree from an acorn is a rewarding experience, connecting you with nature and contributing to environmental conservation. This guide provides a comprehensive, step-by-step process to successfully germinate your blue oak acorn seed.
Understanding Blue Oak Acorn Germination
Blue oaks ( Quercus douglasii) are native to California and possess unique germination requirements. Unlike some other oak species, blue oak acorns don't require a prolonged cold stratification period. However, proper preparation and conditions are still crucial for successful germination.
Key Factors for Success:
- Fresh Acorns: Use acorns collected in the fall of the current year. Older acorns have a significantly lower germination rate.
- Proper Preparation: Cleaning and pre-treating acorns is essential to remove inhibitors and promote healthy growth.
- Consistent Moisture: Maintaining the right level of moisture is vital throughout the germination process.
- Well-Draining Soil: Blue oaks prefer well-draining soil to prevent root rot.
- Light: While germination can occur in darkness, exposure to indirect sunlight after germination promotes healthy seedling growth.
Step-by-Step Germination Process
1. Collecting and Selecting Acorns:
- Timing: Gather acorns in the fall after they've naturally fallen from the tree. Avoid picking acorns from the ground that show signs of insect damage or decay.
- Inspection: Carefully examine each acorn. Select plump, firm acorns without cracks, holes, or significant blemishes. Discard any that feel lightweight or soft.
2. Cleaning the Acorns:
- Debris Removal: Gently remove any dirt, leaves, or other debris clinging to the acorns.
- Soaking (Optional): Some growers soak acorns for 24-48 hours in lukewarm water before planting. This can help soften the hard shell and improve germination rates, but it's not strictly necessary.
3. Planting the Acorns:
- Potting Mix: Use a well-draining potting mix. A mix of peat moss, perlite, and vermiculite works well. Avoid using garden soil, which can be too dense and retain too much moisture.
- Planting Depth: Plant the acorns about 1-2 inches deep, with the pointed end facing downwards.
- Spacing: If planting multiple acorns, space them several inches apart to allow for root development.
- Watering: Water gently after planting, ensuring the soil is moist but not waterlogged.
4. Providing Optimal Conditions:
- Temperature: Maintain a consistent temperature around 70°F (21°C). Avoid extreme temperature fluctuations.
- Moisture: Keep the soil consistently moist but not soggy. Check the moisture level regularly and water as needed. Allow the top inch of soil to dry slightly between waterings.
- Light: Place the pot in a location with indirect sunlight. Direct sunlight can be too harsh for young seedlings.
- Humidity: High humidity can aid germination. Consider covering the pot with a clear plastic dome or placing it in a humid environment.
5. Monitoring and Care:
- Germination Time: Germination can take anywhere from a few weeks to several months, depending on conditions. Be patient and monitor regularly.
- Thinning: Once seedlings emerge, thin them to leave only the strongest plant(s).
- Transplanting: Once the seedlings have developed a few sets of true leaves, they can be transplanted into larger containers or directly into the ground, provided conditions are suitable.
Troubleshooting:
- No Germination: If no germination occurs after several months, the acorns may have been too old or improperly stored. Try again with fresh acorns.
- Seedling Death: Seedling death is often caused by overwatering or fungal diseases. Ensure proper drainage and avoid overwatering.
- Slow Growth: Slow growth might be due to insufficient light, improper watering, or nutrient deficiency.
By following these steps and providing optimal conditions, you can significantly increase your chances of successfully germinating blue oak acorns and enjoying the beauty of this majestic tree. Remember, patience is key!
