How To Hem Jeans: A Step-by-Step Guide for a Perfect Fit
Jeans are a wardrobe staple, but finding the perfect length can be a challenge. Too long, and you're tripping over fabric; too short, and you look like you're wearing capris. Luckily, hemming your jeans is a manageable DIY project that can save you money and ensure a perfect fit. This guide will walk you through different methods, from simple hand-sewing to using a sewing machine, so you can find the technique that best suits your skill level.
Preparing Your Jeans for Hemming
Before you even pick up a needle, there's some prep work to do to ensure a professional-looking finish.
1. Try Them On!
This might seem obvious, but it's crucial. Put on your jeans and decide on your desired length. Consider your footwear – the hem should fall where you want it to with your usual shoes on. Use a tailor's chalk or a washable fabric marker to mark the desired hemline on both legs.
2. Account for the Hem Allowance
Once you've marked your desired length, add an extra inch (or 2.5cm) to account for the hem allowance. This extra fabric will be folded over and sewn, creating a neat and durable hem.
3. Cut the Excess Fabric
Carefully cut along your marked line, ensuring your scissors are sharp to avoid fraying. Remember, you can always trim a little more, but you can't add fabric back!
Hemming Methods: Choose Your Adventure!
There are several ways to hem jeans, catering to different skill levels and preferences.
Hand-Sewing: The Simple Solution
This method is perfect for beginners and requires minimal equipment.
- Step 1: Folding the Hem: Fold the extra inch (or 2.5cm) of fabric upwards, creating a clean edge. Press this fold firmly with an iron.
- Step 2: Second Fold: Fold the fabric upwards again, creating a neat hem. Press again.
- Step 3: Hand-Stitching: Use a small, even stitch to sew the hem in place. A slip stitch is almost invisible and ideal for jeans.
Sewing Machine Hemming: For a Faster Finish
If you're comfortable with a sewing machine, this is the quickest and most durable option.
- Step 1: Folding as Above: Follow the same folding steps as the hand-sewing method.
- Step 2: Sewing: Stitch along the folded edge using a straight stitch. A slightly longer stitch length (around 2.5-3) works well for denim.
No-Sew Hemming: Temporary Fix or Quick Hack
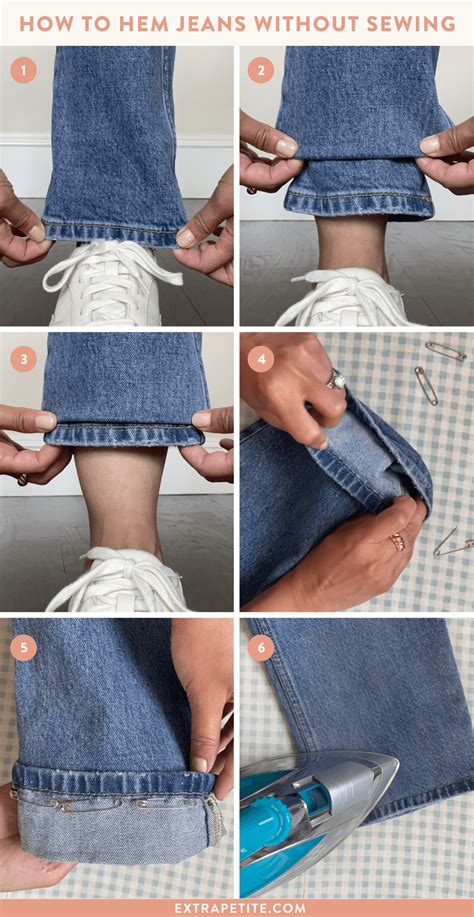
For a temporary solution or a quick fix, you can use fabric glue or double-sided tape. This isn't as durable as sewing, but it's a great option for a temporary alteration.
Tips for a Professional Finish
- Pre-wash your jeans: This prevents shrinkage after hemming.
- Use sharp scissors: Clean cuts prevent fraying.
- Press your hems: This creates a crisp, professional look.
- Choose the right thread: Select a sturdy thread that matches your jeans' color.
Beyond the Basics: Creative Hem Options
Once you master the basic hem, you can explore more creative options:
- Raw Hem: A trendy, unfinished look that works well with certain jean styles.
- Rolled Hem: A charming, casual hem achieved by repeatedly rolling and stitching.
- Frayed Hem: A deliberately frayed edge, often achieved through strategic distressing.
Hemming your jeans is a rewarding DIY project that saves money and results in perfectly fitting denim. So grab your tools and get started! With a little patience and these simple steps, you'll be rocking your perfectly hemmed jeans in no time.
