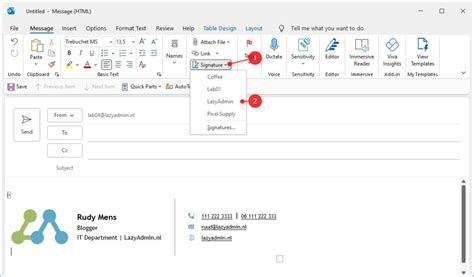
How to Insert a Signature in Outlook: A Step-by-Step Guide
Adding a professional signature to your Outlook emails is crucial for branding and efficiency. This guide will walk you through the process, covering both the basics and advanced customization options. Whether you're using Outlook on your desktop or on the web, we've got you covered.
Creating Your Outlook Email Signature
Before you begin, consider what information you want to include in your signature. A professional signature typically includes:
- Your Name: This is essential!
- Your Title: Helps recipients understand your role.
- Your Company: Branding is key.
- Contact Information: Phone number and email address (consider including a website link).
- Social Media Links (Optional): Include relevant professional platforms like LinkedIn.
Avoid: overly long signatures, excessive graphics, or anything that detracts from the main email content.
Adding a Signature in Outlook Desktop (Windows and Mac):
- Open Outlook: Launch your Outlook application.
- Access Signature Settings: Go to File > Options > Mail > Signatures.
- Edit or Create a New Signature: You'll see a list of existing signatures. Click "New" to create one, or select an existing signature to edit.
- Compose Your Signature: In the text box, type your signature information. Remember to use consistent formatting.
- Add Formatting: Outlook allows you to bold text, italicize, change font size and color, and even insert images. Experiment to create a professional-looking signature.
- Insert Images: Click the "Image" button to add a logo or other relevant visuals. Keep the image size small to avoid cluttering your emails.
- Choose Default Signature: Select the "Choose default signature" options to assign this signature to new messages or replies/forwards.
- Save Changes: Click "OK" to save your signature.
Adding a Signature in Outlook on the Web:
- Open Outlook on the Web: Log in to your Outlook account through your web browser.
- Access Settings: Click the gear icon (Settings) in the top right corner.
- View All Outlook Settings: Select "View all Outlook settings".
- Mail > Compose and reply: Locate the "Compose and reply" section.
- Signatures: Click "Signatures"
- Create or Edit: Similar to the desktop version, create a new signature or modify an existing one using the text box and formatting options.
- Save Changes: Save your changes.
Troubleshooting and Tips
- HTML vs. Plain Text: Choose the "HTML" option for richer formatting, including images and different fonts. Plain text is simpler and works across all email clients.
- Image Size: Keep images small to ensure your signature loads quickly and doesn't look unprofessional.
- Testing Your Signature: Send a test email to yourself to preview how your signature appears in different email clients.
- Mobile Optimization: Ensure your signature looks good on mobile devices. Avoid overly complex layouts.
Optimizing Your Signature for Professionalism
Your email signature is a reflection of your brand and professionalism. By following these steps and incorporating the tips above, you can create a signature that enhances your communication and leaves a lasting positive impression. Remember to regularly review and update your signature to ensure accuracy and relevance. This seemingly small detail can significantly impact your professional image.
