How to Make Your Facebook Profile Private: A Step-by-Step Guide
Want to control who sees your Facebook posts and information? Making your Facebook profile private is a simple process that significantly enhances your online privacy. This guide walks you through the steps, ensuring your personal details remain visible only to those you choose.
Understanding Facebook Privacy Settings
Before diving into the specifics, it's crucial to understand that Facebook's privacy settings are layered. You can adjust various aspects individually, controlling who sees your posts, photos, friends list, and more. The goal is to achieve a level of privacy that suits your comfort level. We'll cover the most important settings to make your profile as private as possible.
Step-by-Step Guide to a Private Facebook Profile
1. Accessing Your Privacy Settings:
- Log in: Start by logging into your Facebook account.
- Settings & Privacy: Locate the downward-facing arrow in the top right corner of the page. Click on it. You'll see a menu; select "Settings & Privacy."
- Settings: From the next menu, select "Settings."
2. Adjusting Key Privacy Settings:
-
Who can see your future posts? This is arguably the most important setting. Navigate to "Privacy Shortcuts" (usually located near the top of the settings page) and find "Who can see your future posts?". Change this setting from "Public" to "Friends." This ensures only your friends can see anything you post from this point forward.
-
Reviewing Past Posts: This step is crucial but often overlooked. Once you've changed the setting for future posts, you might want to review your past posts and adjust their privacy settings individually if necessary. You can usually do this by going to your timeline and selecting each post you want to modify and changing the audience.
-
Who can send me friend requests? Under "Privacy Shortcuts," locate "Who can send me friend requests?" Consider changing this from "Everyone" to "Friends of Friends." This limits friend requests to those who have mutual friends with you.
-
Timeline and Tagging: Navigate to "Timeline and Tagging" in the left-hand menu. Here, you can control who can post on your timeline and who can see posts you're tagged in. Choose "Friends" for greater privacy. Also, review the options for "Review posts friends tag you in before they appear on your timeline?". Enabling this gives you more control.
-
Blocking Users: If you have specific individuals you want to prevent from viewing your profile entirely, use the "Blocking" feature. This is found within the "Blocking" section of the settings.
3. Regularly Review and Update:
Facebook updates its features and privacy settings periodically. It's a good habit to review your privacy settings every few months to ensure they align with your preferences and to stay ahead of any changes Facebook implements.
Beyond Basic Settings: Additional Privacy Tips
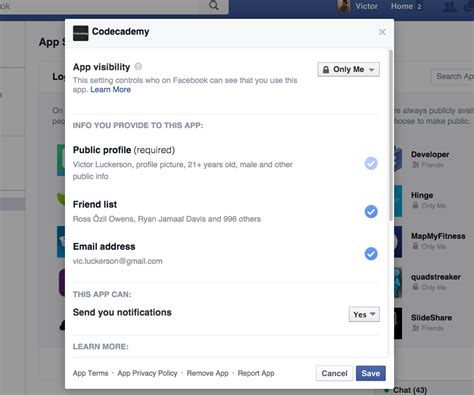
- Limit App Permissions: Review the apps connected to your Facebook account. Many apps request access to your information. Carefully examine what permissions each app has and revoke any unnecessary ones.
- Be Mindful of What You Share: Even with a private profile, remember that anything you share online can potentially be shared further. Think twice before posting sensitive information.
- Use Two-Factor Authentication: Adding an extra layer of security like two-factor authentication strengthens the protection of your account, minimizing the risk of unauthorized access.
By following these steps, you can significantly enhance the privacy of your Facebook profile. Remember that consistent monitoring and adjustment of your settings are key to maintaining a secure online presence.
