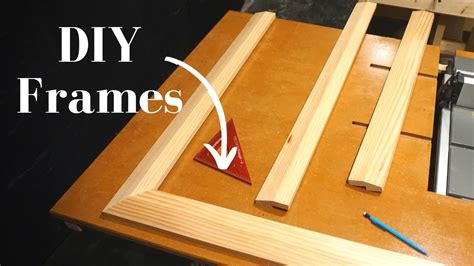
How to Make a Picture Frame: A DIY Guide for Beginners
Creating your own picture frame is a rewarding DIY project that allows you to personalize your home décor and showcase your cherished memories. This guide will walk you through the process of making a picture frame, from selecting materials to adding the finishing touches. Whether you're a seasoned crafter or a complete beginner, you'll find this easy-to-follow tutorial helpful.
Choosing Your Materials
The first step in making a picture frame is selecting the right materials. The options are vast, offering opportunities for creativity and customization.
Wood:
- Types: Pine, oak, and basswood are popular choices due to their workability and affordability. Hardwoods like cherry or walnut offer a more luxurious look but require more skill to work with.
- Dimensions: Measure your picture or artwork to determine the frame's inner dimensions. Add extra width for the frame's thickness (typically 1-2 inches).
- Purchasing: You can purchase wood from home improvement stores, lumber yards, or even craft stores in pre-cut sizes.
Other Materials:
- Cardboard or Foam Core: A budget-friendly alternative for smaller frames. Easy to cut and shape, but less durable than wood.
- Reclaimed Wood: Gives your frame unique character and adds a rustic touch. Consider using old pallets or repurposed wood.
- Decorative Elements: Consider adding embellishments like buttons, beads, fabric scraps, or dried flowers to personalize your frame.
Tools You'll Need
Before you begin, gather the necessary tools:
- Measuring Tape & Pencil: Accurate measurements are crucial.
- Mitre Saw or Hand Saw: To cut the wood accurately at 45-degree angles. A mitre box can help ensure precise cuts with a hand saw.
- Sandpaper: To smooth the edges of your wood and create a professional finish. Use different grits (e.g., 80, 120, 220) for progressively finer sanding.
- Wood Glue: A strong wood glue is essential for joining the frame pieces.
- Clamps: To hold the frame pieces together while the glue dries.
- Picture Hanging Hardware: Choose the appropriate hanging mechanism for your frame's weight and wall type. (e.g., sawtooth hangers, D-rings)
- Optional: Wood Stain or Paint: To customize the color of your frame.
Steps to Building Your Picture Frame
Now for the fun part – let's build your frame!
1. Cutting the Wood
- Cut four pieces of wood to the dimensions you calculated, ensuring a 45-degree miter cut on each end. Precise cuts are essential for a well-fitting frame.
- Tip: Always measure twice and cut once.
2. Assembling the Frame
- Apply a thin bead of wood glue to the ends of each piece.
- Carefully join the four pieces, ensuring the mitered corners fit snugly.
- Clamp the frame together firmly, making sure the corners are square and aligned.
- Allow the glue to dry completely according to the manufacturer's instructions (usually several hours).
3. Sanding and Finishing
- Once the glue is dry, carefully remove the clamps.
- Sand all the edges and surfaces of the frame smoothly, paying attention to any imperfections.
- If desired, apply wood stain or paint to achieve your preferred look. Allow the finish to dry thoroughly.
4. Adding the Picture and Hanging Hardware
- Attach picture hanging hardware to the back of the frame.
- Carefully insert your artwork or photo into the frame, securing it in place with backing board and clips or other fasteners.
Tips for Success
- Practice makes perfect: If you're using a hand saw, practice your cuts on scrap wood first.
- Use quality materials: This will result in a sturdier and more attractive frame.
- Take your time: Rushing the process can lead to mistakes.
- Get creative: Experiment with different woods, finishes, and decorative elements to personalize your frame.
By following these steps, you can easily create a beautiful and personalized picture frame to showcase your favorite photos and artwork. Enjoy the process!
