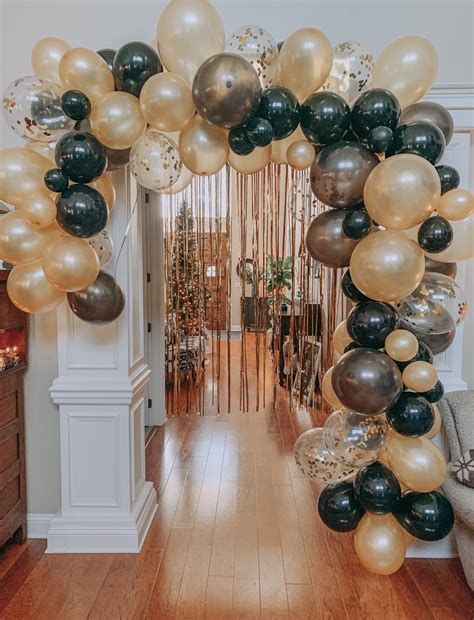
How To Prepare a Stunning Balloon Arch: A Step-by-Step Guide
Creating a balloon arch is a fantastic way to add a pop of color and excitement to any event, from birthdays and weddings to corporate parties and holiday celebrations. This guide will walk you through the process, ensuring you create a show-stopping arch that wows your guests.
Essential Supplies for Your Balloon Arch
Before you begin, gather these essential supplies. Having everything ready will make the process much smoother:
- Balloons: Choose a variety of sizes and colors to create visual interest. Consider using a mix of 11-inch and 5-inch balloons for a fuller, more dynamic look.
- Balloon Arch Kit: This often includes a strip or frame to help structure your arch. These kits are readily available online and in party supply stores. Alternatively, you can create a frame using floral wire or even PVC pipes.
- Balloon Pump: A hand pump or electric pump will save you time and effort, especially if you're using a large number of balloons.
- Fishing Line or String: This will be used to tie the balloons to the arch frame.
- Scissors: For cutting the string.
- Measuring Tape: To ensure accurate spacing and arch dimensions.
- Optional: Balloon Weights: To keep the arch stable, especially if it's placed outdoors or on a surface that is not perfectly level.
Step-by-Step Guide to Creating Your Balloon Arch
Follow these steps for creating a beautiful and professional-looking balloon arch:
Step 1: Inflate Your Balloons
Consistency is Key: Inflate your balloons to a consistent size. Over-inflating can cause them to burst, while under-inflating will result in a less visually appealing arch. Use your pump to ensure even inflation.
Step 2: Prepare Your Balloon Arch Frame
Assemble the Frame: Carefully assemble your balloon arch kit according to the manufacturer's instructions. If you're using a DIY frame, ensure it's sturdy and the desired size before proceeding.
Step 3: Attaching the Balloons
Strategic Placement: Start by attaching balloons to the center of the frame, working your way outwards. Alternate balloon sizes and colors for a balanced, aesthetically pleasing look. This ensures the arch maintains its shape and looks full and impressive.
Securing the Balloons: Use fishing line or string to securely tie each balloon to the arch frame. Don't pull too tightly; leave a little give to allow for natural balloon movement.
Step 4: Filling in Gaps
Achieve Uniformity: Once you've attached the majority of your balloons, step back and assess the arch. Fill in any gaps with smaller balloons or strategically place balloons to balance the arch's shape. Aim for a full, even appearance from all angles.
Step 5: Final Adjustments & Placement
Perfect the Arch: Gently adjust the balloons to create the desired arch shape. Make sure it is balanced and aesthetically pleasing. Consider adding some additional string or tape for extra reinforcement if needed.
Secure Placement: Carefully position your completed balloon arch in its designated location. Use balloon weights if needed for stability.
Tips for an Extra-Special Balloon Arch
- Theme it up: Coordinate balloon colors and styles with your event's theme for a cohesive look.
- Add embellishments: Consider incorporating other decorative elements such as ribbons, flowers, or greenery to enhance the visual appeal.
- Consider balloon types: Experiment with different types of balloons, such as chrome, matte, or pearl balloons, to add texture and visual interest.
- Plan ahead: Inflate balloons a day or two in advance to save time on the day of your event.
By following these steps and incorporating your own creative flair, you can create a stunning balloon arch that elevates any celebration! Remember to practice beforehand if you're a beginner—it might take some time to get used to tying the balloons. Enjoy the process, and happy arching!
