How to Add Freon to Your Car AC: A Step-by-Step Guide
Adding freon to your car's air conditioning system might seem daunting, but with the right tools and knowledge, it's a manageable task. This guide will walk you through the process safely and effectively. However, remember that this is a simplified guide. If you're uncomfortable performing this task, it's always best to consult a professional mechanic. Improper handling of refrigerants can be dangerous.
Before You Begin: Essential Tools and Safety Precautions
Before you start, gather the necessary tools and understand the safety precautions:
Essential Tools:
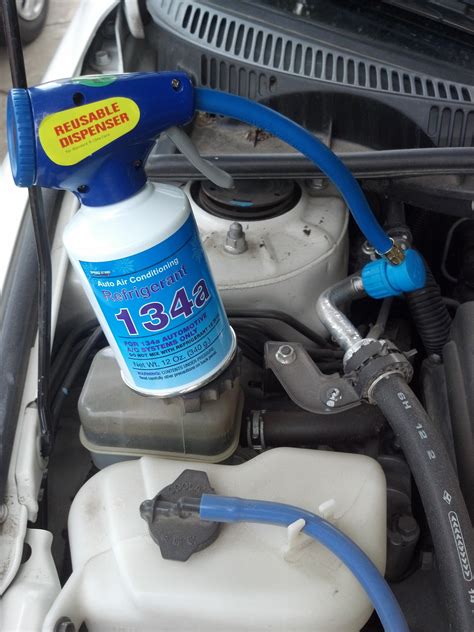
- Freon recharge kit: This kit typically includes a gauge to measure the pressure in your system, a hose to connect to your car's AC system, and a can of refrigerant (R-134a is commonly used in modern vehicles). Make sure the kit is compatible with R-134a.
- Safety glasses: Protect your eyes from potential leaks or sprays.
- Gloves: Protect your hands from refrigerant exposure.
- Wrench (if needed): Some vehicles require you to access the low-pressure port with a wrench. Check your vehicle's manual.
Safety Precautions:
- Work in a well-ventilated area: Refrigerant can be harmful if inhaled.
- Avoid contact with skin and eyes: Wear safety glasses and gloves.
- Follow the instructions on your recharge kit carefully: Each kit may have slightly different procedures.
- Never attempt to recharge the system if you suspect a leak: A leak could indicate a more serious problem.
Locating the Low-Pressure Port
The low-pressure port is where you'll connect the recharge kit. It's usually located near the engine compartment, often identified with a blue cap. Consult your vehicle's owner's manual to locate the exact position of the low-pressure port.
Step-by-Step Freon Recharge Process
- Turn on your car's AC: Set it to the coldest setting with the fan on high.
- Locate the low-pressure port: Identify the port using your owner's manual and carefully remove the cap.
- Connect the recharge hose: Securely attach the hose from your recharge kit to the low-pressure port.
- Follow the kit's instructions: Each kit will have specific instructions on how to use the gauge and release the refrigerant. Carefully read and follow these instructions.
- Monitor the gauge: The gauge will indicate the pressure in your system. Add refrigerant until the pressure reaches the manufacturer's recommended level (usually found on the kit or in your owner's manual).
- Disconnect the hose: Once the recommended pressure is reached, carefully disconnect the hose from the low-pressure port.
- Replace the cap: Securely replace the cap on the low-pressure port.
Troubleshooting and When to See a Professional
- The AC still doesn't work: If you've added refrigerant and the AC still isn't working, you likely have a leak in the system. This requires professional repair.
- The gauge doesn't work properly: A faulty gauge can lead to incorrect refrigerant levels. Consider using a professional service.
- You're uncomfortable with the process: Don't hesitate to take your car to a qualified mechanic. Improper handling of refrigerant can be dangerous.
Keyword Optimization Considerations:
This post uses relevant keywords throughout, including "add freon," "car AC," "recharge," "R-134a," "low-pressure port," and "freon recharge kit." The title itself is a strong keyword phrase. For off-page SEO, sharing this guide on relevant forums and social media platforms focused on car maintenance would help increase visibility. Remember to build high-quality backlinks to further enhance search rankings.
