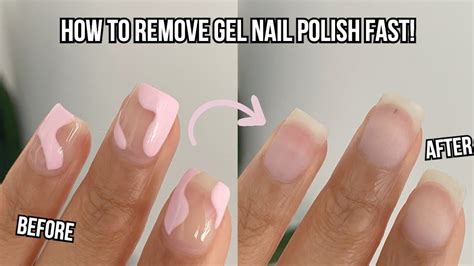
How to Remove Gel Polish: A Safe and Effective Guide
Removing gel polish at home can seem daunting, but with the right techniques and products, it's achievable without damaging your natural nails. This guide provides a step-by-step process for safely removing gel polish, ensuring your nails remain healthy and strong.
Why Proper Removal is Crucial
Improper removal of gel polish can lead to several issues:
- Nail damage: Scraping or peeling gel polish can weaken and thin your nails, making them prone to breakage and splitting.
- Infection: If you damage the nail bed during removal, it creates an entry point for bacteria and fungi, potentially leading to infection.
- Uneven nail surface: Removing gel polish incorrectly can leave behind residue, making your nails look uneven and dull.
What You'll Need:
- Acetone: This is the key ingredient for dissolving gel polish. Pure acetone is most effective.
- Cotton balls or pads: Use high-quality cotton that won't leave lint behind.
- Aluminum foil: This will create a seal to keep the acetone on your nails.
- Cuticle pusher or orangewood stick: To gently push back cuticles and remove any remaining gel.
- Nail file (optional): To lightly buff the top coat of the gel polish before soaking. This helps the acetone penetrate better.
- Nail buffer (optional): To smooth out any unevenness after removal
- Nail oil: To moisturize and nourish your nails after removal.
- Hand cream: To hydrate your skin after the process.
Step-by-Step Guide to Safe Gel Polish Removal:
1. Preparation is Key:
- Gather your supplies: Make sure you have everything you need before you begin.
- Protect your workspace: Acetone is a solvent, so cover your work surface with a towel or newspaper.
- Ventilate the area: Acetone has a strong odor, so ensure good ventilation.
2. File the Top Coat (Optional):
- Lightly buff the top layer: Use a nail file to gently remove the shine from the top layer of your gel polish. This helps the acetone penetrate the polish more effectively. Avoid filing too aggressively; you just want to roughen the surface slightly.
3. Soak Your Nails:
- Soak cotton pads in acetone: Saturate cotton pads or balls with acetone.
- Apply to nails: Place a saturated cotton pad on each nail.
- Wrap with foil: Securely wrap each finger with a small piece of aluminum foil, ensuring the cotton pad stays firmly in place.
- Wait: Allow the acetone to work for 10-15 minutes. You may need to leave it on longer depending on the thickness of your gel polish. Check after 10 minutes to see if the polish is softening.
4. Remove the Gel Polish:
- Carefully remove the foil: Gently peel off the foil and cotton pads.
- Gently scrape off the softened gel: Use an orangewood stick or cuticle pusher to gently push off the softened gel polish. Avoid excessive force to prevent nail damage.
5. Post-Removal Care:
- Moisturize: Apply cuticle oil to your nails and surrounding skin to hydrate and nourish them.
- Hydrate your skin: Use hand cream to replenish moisture lost during the process.
- Buff (Optional): If any residue remains, use a nail buffer to gently smooth the nail surface.
Tips for Success:
- Don't rush the process: Patience is key to preventing nail damage.
- Use pure acetone: Other acetone-based removers may contain additives that can weaken your nails.
- Avoid excessive scrubbing: Gently remove the softened gel to protect your nails.
- Regular manicures: Give your nails a break between gel manicures to allow them to recover.
By following these steps, you can safely and effectively remove your gel polish at home, maintaining the health and beauty of your natural nails. Remember, healthy nails are beautiful nails!
