How to Remove a Tub Drain Stopper: A Step-by-Step Guide
Replacing a broken or clogged tub drain stopper is a common DIY plumbing task. But before you can replace it, you need to remove the old one. This guide will walk you through how to remove various types of tub drain stoppers, from the simple flip-type to more complex mechanisms. We'll cover troubleshooting common issues and provide tips for a smooth, successful removal.
Identifying Your Tub Drain Stopper Type
Before you begin, it's crucial to identify the type of stopper you have. There are several common types:
- Flip-type Stopper: This is the most common type. It's operated by a small lever or button on the overflow plate (the plate above the drain).
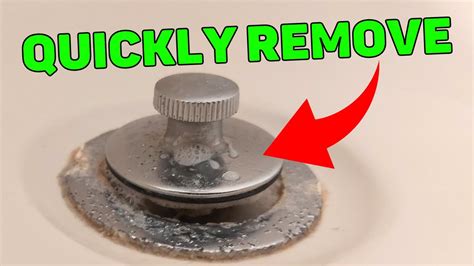
- Push-pull Stopper: Activated by pushing or pulling a knob located on the drain itself.
- Trip Lever Stopper: Operated by a lever located either on the overflow plate or inside the drain assembly itself. This type often requires more specialized removal techniques.
- Toe-touch Stopper: These are activated by gently pressing the drain. Removing these usually involves disassembly from below the tub.
Tools You Might Need:
Depending on your stopper type, you may need some or all of the following tools:
- Screwdriver (Phillips and Flathead): For removing screws on the overflow plate or drain assembly.
- Pliers (Needle-nose and Slip-joint): Helpful for gripping small parts and loosening stubborn connections.
- Adjustable Wrench: Useful for loosening stubborn drain nuts.
- Basin Wrench: Essential for reaching those hard-to-access nuts underneath the tub.
- Putty Knife: Can help remove old caulk or sealant.
Removing Different Types of Tub Drain Stoppers:
Removing a Flip-Type Stopper:
- Locate the overflow plate: This is the plate positioned above the drain.
- Remove the overflow plate: Typically, there are screws securing the plate; carefully unscrew these using a screwdriver.
- Access the stopper mechanism: Once the overflow plate is removed, you should see the stopper's linkage.
- Disconnect the linkage: Gently separate the linkage from the stopper. Sometimes this involves removing a small clip or nut.
- Remove the stopper: The stopper should now be free to remove from the drain opening.
Removing a Push-Pull Stopper:
- Locate the drain knob: The knob is typically on top of the drain.
- Unscrew the knob (if necessary): Some knobs unscrew, revealing a nut or other components below.
- Remove the stopper: After removing the knob (if applicable), the stopper may come out with gentle pulling or twisting. You may need pliers to help grip the stopper.
Removing a Trip Lever Stopper:
This is often the most challenging type to remove. You'll likely need to access the mechanism from underneath the tub. This may involve removing the drain assembly completely, requiring a basin wrench. Consult online videos specific to your drain assembly design for detailed instructions.
Removing a Toe-Touch Stopper:
These require accessing the drain assembly from below the tub. Expect this to be a more involved process needing specialized tools and potentially some plumbing knowledge.
Troubleshooting Common Problems:
- Stuck Stopper: Try using penetrating oil to loosen any corroded parts.
- Broken Linkage: Replacement parts are readily available at most hardware stores.
- Seized Drain Assembly: This may require professional help.
Important Safety Tips:
- Turn off the water supply: Before starting any work, turn off the water supply to prevent leaks.
- Wear gloves: Protect your hands from sharp edges or chemicals.
- Take pictures: Take pictures of the process as you go to help with reassembly.
By following these steps, you should be able to remove your tub drain stopper successfully. If you encounter significant difficulties, it's always best to consult a qualified plumber. Remember to always prioritize safety!
