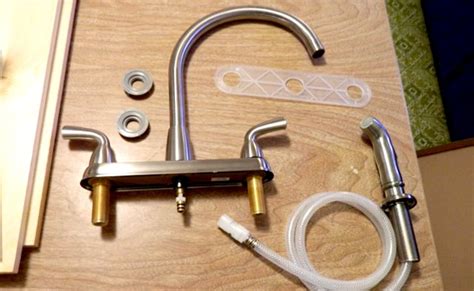
How To Replace a Kitchen Faucet: A Step-by-Step Guide
Replacing your kitchen faucet might seem daunting, but with the right tools and a little patience, it's a DIY project well within reach. This guide provides a comprehensive, step-by-step process to help you successfully replace your old faucet with a shiny new one. We'll cover everything from preparation to final cleanup.
Before You Begin: Gathering Your Supplies and Tools
Before diving in, ensure you have all the necessary tools and materials. This will streamline the process and prevent frustrating delays. You'll need:
- New Kitchen Faucet: Choose a faucet that suits your style and sink configuration.
- Adjustable Wrench: For loosening and tightening nuts and connections.
- Basin Wrench: Essential for accessing hard-to-reach nuts under the sink.
- Pliers: For gripping and manipulating smaller parts.
- Screwdrivers (Phillips and Flathead): Depending on your faucet model.
- Plumber's Putty: To create a watertight seal around the faucet base.
- Teflon Tape: To seal threaded connections and prevent leaks.
- Bucket: To catch any remaining water in the pipes.
- Shop Towels or Rags: For cleaning up spills and messes.
- Penetrating Oil (optional): To help loosen stubborn nuts and connections.
Step-by-Step Guide to Faucet Replacement
1. Turn Off the Water Supply: This is the most crucial step. Locate the shut-off valves under your sink for both hot and cold water lines. Turn them clockwise to completely stop the water flow.
2. Disconnect the Water Supply Lines: Use your adjustable wrench to carefully loosen and disconnect the water supply lines from the old faucet. Have your bucket ready to catch any remaining water in the lines.
3. Disconnect the Drain Assembly (if necessary): Depending on your faucet design, you might need to disconnect the drain assembly. This usually involves loosening nuts and removing the connecting pipes.
4. Remove the Old Faucet: This step varies depending on the faucet type. You might need to unscrew mounting nuts from under the sink (this is where the basin wrench is invaluable) or remove mounting screws from the top of the sink. Carefully remove the old faucet, taking note of how it’s assembled for future reference.
5. Clean the Sink Surface: Thoroughly clean the sink surface where the new faucet will be installed. Remove any old plumber's putty or sealant.
6. Apply Plumber's Putty: Apply a small amount of plumber's putty to the base of the new faucet, creating a watertight seal.
7. Install the New Faucet: Carefully follow the instructions provided with your new faucet. Generally, this involves mounting the faucet body to the sink, securing it with nuts or screws, and connecting the water supply lines.
8. Connect the Water Supply Lines: Wrap the threaded connections of the new supply lines with Teflon tape to ensure a leak-proof seal. Connect the supply lines to the new faucet, tightening them securely with your adjustable wrench.
9. Reconnect the Drain Assembly (if necessary): If you disconnected the drain assembly earlier, reconnect it now, following the reverse order of disassembly.
10. Turn the Water Supply Back On: Slowly turn the water supply valves counter-clockwise to restore water flow. Carefully check all connections for leaks.
11. Test the Faucet: Turn the faucet on and off, testing both hot and cold water to ensure everything is working correctly. Check under the sink for any leaks.
Troubleshooting Common Issues
- Leaky Faucet: Double-check all connections for tightness and ensure proper Teflon tape application. If the leak persists, you might need to replace worn-out O-rings or cartridges.
- Difficult to Turn: This could be due to mineral deposits or debris. Try cleaning the faucet aerator.
- Low Water Pressure: Check for clogs in the aerator or water supply lines.
Replacing your kitchen faucet is a rewarding DIY project. By following these steps carefully and taking your time, you can enjoy a functional and aesthetically pleasing upgrade to your kitchen. Remember, safety is paramount – if you encounter any significant challenges, it's always best to consult a professional plumber.
