How To Replace a Toilet: A Step-by-Step Guide for DIY Home Improvement
Replacing a toilet might seem daunting, but with the right tools and a little patience, it's a manageable DIY project that can save you money and enhance your bathroom. This comprehensive guide provides a step-by-step walkthrough, ensuring a smooth and successful toilet replacement.
Tools and Materials You'll Need
Before you begin, gather the necessary tools and materials. Having everything ready will streamline the process and prevent frustrating delays.
- New Toilet: Choose a toilet that fits your bathroom's style and space. Consider factors like height, bowl shape (round or elongated), and water efficiency (look for a WaterSense label).
- Adjustable Wrench: For disconnecting and connecting water supply lines.
- Basin Wrench: Essential for accessing hard-to-reach nuts under the sink.
- Channel-Lock Pliers: Useful for gripping and turning various fittings.
- Plumber's Putty: Creates a watertight seal between the toilet and the floor.
- Teflon Tape: Prevents leaks on threaded pipe connections.
- Bucket and Rags: For catching water and cleaning up spills.
- Level: Ensures the toilet is properly installed and prevents wobbles.
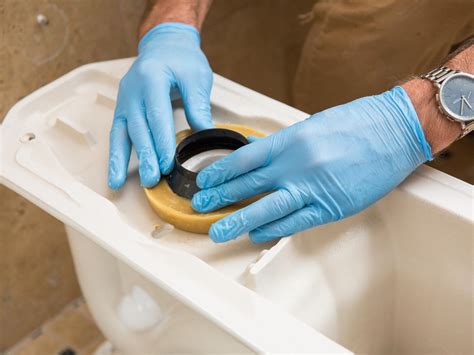
- Toilet Wax Ring: Creates a watertight seal between the toilet and the drain flange. Consider using a wax ring with a built-in flange for easier installation.
- Safety Glasses: Protect your eyes from debris and splashing water.
- Gloves: Protect your hands from germs and potential cuts.
Step-by-Step Toilet Replacement Guide
Step 1: Turn Off the Water Supply
Locate the water supply valve for your toilet, usually located behind the toilet near the floor. Turn the valve clockwise to shut off the water supply completely. Flush the toilet once to clear any remaining water in the tank and bowl.
Step 2: Disconnect the Water Supply Line
Use an adjustable wrench to carefully disconnect the water supply line from the toilet's fill valve. Place a bucket underneath to catch any remaining water.
Step 3: Disconnect the Toilet from the Drain
This is where the wax ring comes into play. You’ll need to carefully break the seal between the toilet and the drain flange. This often involves some gentle rocking and potentially a bit of force. Be prepared for some water spillage.
Step 4: Remove the Old Toilet
Once disconnected, carefully lift the old toilet. It might be heavy, so ask for help if needed. Dispose of the old toilet properly according to your local regulations.
Step 5: Inspect the Drain Flange
Carefully inspect the drain flange for any damage or cracks. If damaged, replacing it is crucial to avoid future leaks.
Step 6: Prepare the New Toilet
Apply a generous amount of plumber's putty to the base of the new toilet, creating a smooth, even seal.
Step 7: Install the New Wax Ring
Carefully press the new wax ring onto the drain flange. Ensure it's centered and properly seated.
Step 8: Position and Secure the New Toilet
Carefully lower the new toilet onto the wax ring. Make sure it's centered and level. Use the bolts to secure the toilet to the floor. Tighten the bolts carefully, avoiding over-tightening.
Step 9: Reconnect the Water Supply Line
Wrap Teflon tape around the threads of the water supply line's connector and carefully connect it to the fill valve on the new toilet.
Step 10: Test for Leaks
Turn the water supply valve back on. Check for leaks around the base of the toilet and the water supply connections. Address any leaks immediately by tightening connections or reapplying sealant as needed.
Step 11: Final Touches
Clean up any excess plumber's putty and enjoy your new, sparkling toilet!
Troubleshooting Common Issues
- Leaks: Leaks often indicate improper sealing. Recheck the wax ring and plumber's putty.
- Wobbly Toilet: Ensure the toilet is properly bolted to the floor and leveled.
- Difficult Bolt Access: Consider using a basin wrench to access hard-to-reach bolts.
Replacing a toilet is a rewarding DIY project. By following these steps and taking your time, you can successfully upgrade your bathroom and save on professional plumbing costs. Remember safety first, and don't hesitate to seek professional help if you encounter significant difficulties.
