

How To Reset a JV iPhone: A Comprehensive Guide to Restoring Your Device
So, you’ve got a JV iPhone and things aren’t quite working as they should? Maybe you’re experiencing persistent software glitches, forgotten your passcode, or simply want to start fresh. Resetting your iPhone can often resolve many common issues. But before you dive in, it’s crucial to understand what a JV iPhone is, the implications of resetting one, and the various methods you can use.
Understanding JV iPhones
First off, what exactly is a JV iPhone? The term “JV” typically refers to “Jailbreak Verification” or “Joint Venture,” but in the context of iPhones, it usually means a device that has been unlocked or modified to bypass carrier restrictions. These iPhones are often sold in regions where they weren’t originally intended to be used, or they might have been altered to work on different networks. This unlocking process can sometimes lead to instability or software issues, making a reset necessary.
It’s important to note that resetting a JV iPhone can have different outcomes compared to resetting a standard, unmodified iPhone. Depending on how the device was unlocked and the type of reset performed, you might encounter reactivation locks or other unexpected problems. Always proceed with caution and understand the potential risks.
Before You Begin: Essential Preparations
Before you even think about resetting your JV iPhone, take these crucial steps:
1. Back Up Your Data
This is paramount. Resetting your iPhone will erase all data, including photos, contacts, messages, and apps. You don’t want to lose precious memories or important information, do you? Here’s how to back up your iPhone:
- iCloud Backup: Go to Settings > [Your Name] > iCloud > iCloud Backup. Make sure iCloud Backup is toggled on, and then tap “Back Up Now.” Ensure you are connected to a stable Wi-Fi network.
- iTunes/Finder Backup: Connect your iPhone to your computer using a USB cable. Open iTunes (or Finder if you’re on macOS Catalina or later). Select your iPhone when it appears. Click “Back Up Now.” For extra security, you can encrypt your backup by selecting the “Encrypt local backup” option.
Choose the method that works best for you, but make sure you have a recent backup before proceeding. It’s a safety net you’ll be grateful for.
2. Disable Find My iPhone
Find My iPhone is a great feature for locating a lost or stolen device, but it can also cause issues during a reset. Disabling it prevents activation lock from kicking in after the reset.
To disable Find My iPhone, go to Settings > [Your Name] > Find My > Find My iPhone. Toggle it off. You’ll be prompted to enter your Apple ID password to confirm. This step is crucial to avoid getting locked out of your device after the reset.
3. Gather Your Apple ID and Password
You’ll likely need your Apple ID and password during or after the reset process. Make sure you have them readily available. If you’ve forgotten your password, you can reset it through Apple’s website or another trusted device. Knowing your credentials beforehand will save you a lot of headache and frustration.
4. Understand the Risks
Resetting a JV iPhone can sometimes lead to complications, especially if the unlocking method was not entirely legitimate or if the device has been tampered with. Be aware that you might encounter:
- Reactivation Lock: If Find My iPhone was not properly disabled, you might be locked out of your device, requiring your Apple ID and password to reactivate it.
- Loss of Unlock: The reset might undo the unlocking process, rendering the iPhone unusable on certain networks.
- Software Instability: In rare cases, the reset can exacerbate existing software issues or introduce new ones.
By acknowledging these risks, you can approach the reset with a clear understanding of what might happen and be prepared to troubleshoot any potential problems.
Methods to Reset Your JV iPhone
Now that you’ve prepared your device, let’s explore the different methods you can use to reset your JV iPhone. Each method has its own advantages and disadvantages, so choose the one that best suits your needs and comfort level.
1. Resetting Through the Settings App (Easiest)
This is the simplest and most straightforward method for resetting your iPhone. It’s ideal for resolving minor software glitches or simply clearing out personal data.
- Open the Settings app.
- Tap General.
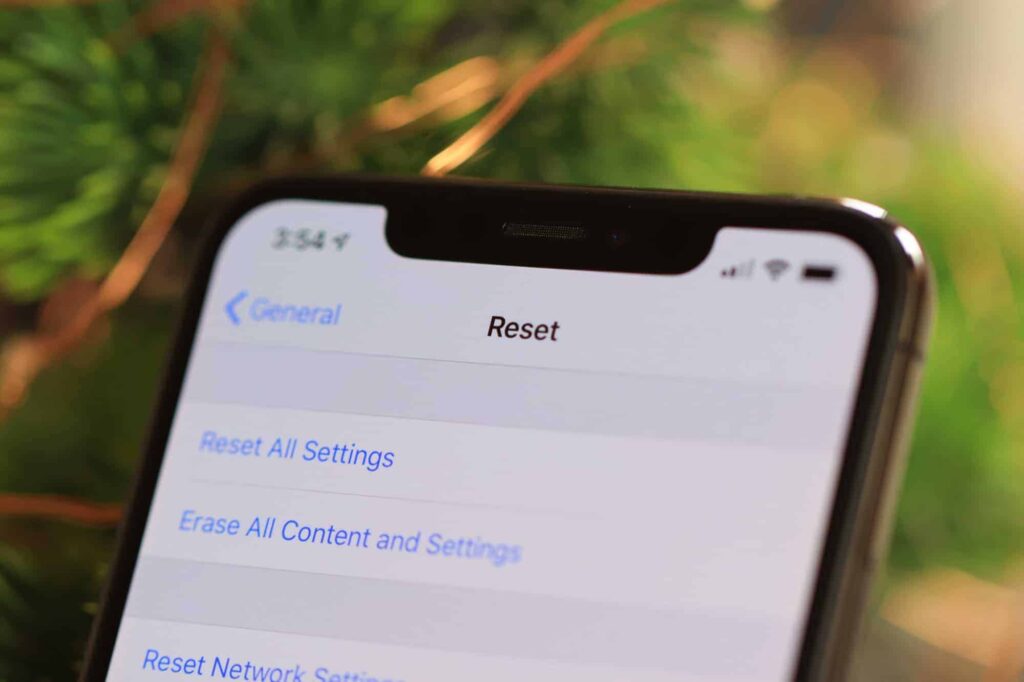
- Scroll down and tap Reset.
- You’ll see several options:
- Reset All Settings: This will reset all your settings to their default values but won’t erase your data. It’s a good option for fixing configuration issues.
- Erase All Content and Settings: This will completely wipe your iPhone, removing all data and settings. This is the option you want if you’re selling your iPhone or experiencing significant software problems.
- Reset Network Settings: This will reset your Wi-Fi passwords, cellular settings, and VPN configurations.
- Reset Keyboard Dictionary: This will clear the words your iPhone has learned over time.
- Reset Home Screen Layout: This will restore your Home Screen to its default layout.
- Reset Location & Privacy: This will reset your location and privacy settings.
- Choose “Erase All Content and Settings” if you want a complete reset.
- Enter your passcode if prompted.
- Tap “Erase iPhone” to confirm.
- Your iPhone will begin the reset process. This may take several minutes.
After the reset, your iPhone will restart and display the setup screen, as if it were brand new. You can then choose to restore from a backup or set it up as a new device.
2. Resetting Using iTunes/Finder (For More Stubborn Issues)
If your iPhone is experiencing more severe software problems or if you’re unable to reset it through the Settings app, you can use iTunes (or Finder on macOS Catalina or later) to restore it.
- Connect your iPhone to your computer using a USB cable.
- Open iTunes (or Finder).
- Select your iPhone when it appears.
- Click “Restore iPhone.”
- A message will appear asking if you want to back up your iPhone before restoring. It’s highly recommended to back up your data if you haven’t already.
- Click “Restore” to confirm.
- iTunes/Finder will download the latest iOS software and begin restoring your iPhone. This process may take some time.
- Your iPhone will restart and display the setup screen.
Restoring through iTunes/Finder is a more thorough process than resetting through the Settings app. It can often resolve deeper software issues and return your iPhone to a clean state.
3. Entering Recovery Mode (For When All Else Fails)
If your iPhone is unresponsive or stuck in a loop, you might need to enter Recovery Mode to restore it. This is a more advanced method, but it can be a lifesaver when other options fail.
The steps for entering Recovery Mode vary depending on your iPhone model:
- iPhone 8 and later: Press and quickly release the Volume Up button. Press and quickly release the Volume Down button. Then, press and hold the Side button until you see the Recovery Mode screen.
- iPhone 7 and iPhone 7 Plus: Press and hold both the Side (or Top) button and the Volume Down button at the same time. Keep holding them until you see the Recovery Mode screen.
- iPhone 6s and earlier: Press and hold both the Home button and the Side (or Top) button at the same time. Keep holding them until you see the Recovery Mode screen.
Once your iPhone is in Recovery Mode, connect it to your computer and open iTunes/Finder. You’ll see a message asking if you want to Restore or Update your iPhone. Choose “Restore” to erase all data and install the latest iOS software.
Warning: Restoring in Recovery Mode will erase all data on your iPhone. Make sure you have a backup before proceeding, if possible.
4. DFU Mode (The Last Resort)
DFU (Device Firmware Update) mode is the deepest type of restore you can perform on an iPhone. It bypasses the operating system and allows you to directly modify the firmware. This is typically used as a last resort when Recovery Mode fails.
Entering DFU mode is more complex and requires precise timing. The steps vary depending on your iPhone model, so it’s best to consult a detailed guide specific to your device. Here’s a general overview:
- Connect your iPhone to your computer and open iTunes/Finder.
- Enter DFU mode using the specific button combination for your iPhone model. This usually involves pressing and holding certain buttons in a specific sequence.
- If successful, your iPhone’s screen will remain black. iTunes/Finder will detect your iPhone in Recovery Mode.
- Click “Restore iPhone” in iTunes/Finder.
Important: DFU mode is a powerful tool, but it can also be risky. If not performed correctly, it can potentially brick your iPhone. Only use DFU mode if you’re comfortable with the process and understand the risks involved.
After the Reset: Setting Up Your iPhone
Once your JV iPhone has been reset, you’ll be greeted with the setup screen. From here, you can choose to restore from a backup or set it up as a new device.
1. Restoring from a Backup
If you created a backup before resetting your iPhone, you can restore your data and settings during the setup process. This will bring back your photos, contacts, messages, apps, and other personal information.
- Choose “Restore from iCloud Backup” or “Restore from iTunes/Finder Backup” during the setup process.
- Sign in to your Apple ID if restoring from iCloud.
- Select the backup you want to restore from.
- Wait for the restore process to complete. This may take some time depending on the size of your backup.
Restoring from a backup is the easiest way to get your iPhone back to the way it was before the reset. However, keep in mind that it will also restore any software issues that were present in the backup. If you were experiencing problems before the reset, it might be better to set up your iPhone as a new device.
2. Setting Up as a New Device
If you choose to set up your iPhone as a new device, you’ll start with a clean slate. This is a good option if you want to get rid of any lingering software issues or if you’re giving your iPhone to someone else.
- Choose “Set Up as New iPhone” during the setup process.
- Follow the on-screen instructions to configure your iPhone.
- Sign in to your Apple ID to access iCloud services.
- Download and install your apps from the App Store.
Setting up as a new device takes more time and effort than restoring from a backup, but it can result in a cleaner and more stable iPhone experience.
Troubleshooting Common Issues
Even with careful preparation, you might encounter some issues after resetting your JV iPhone. Here are some common problems and how to troubleshoot them:
1. Activation Lock
If you see an Activation Lock screen after the reset, it means that Find My iPhone was not properly disabled. You’ll need to enter your Apple ID and password to unlock your device. If you’ve forgotten your password, you can reset it through Apple’s website.
2. No Service
If you’re not getting any cellular service after the reset, it could be due to several reasons:
- SIM Card Issues: Make sure your SIM card is properly inserted and activated.
- Network Settings: Reset your network settings (Settings > General > Reset > Reset Network Settings).
- Carrier Lock: The reset might have undone the unlocking process, rendering the iPhone unusable on certain networks. Contact the seller or a professional unlocking service for assistance.
3. Software Glitches
If you’re still experiencing software glitches after the reset, try these steps:
- Update to the Latest iOS Version: Go to Settings > General > Software Update.
- Reset All Settings: Go to Settings > General > Reset > Reset All Settings.
- Restore Through iTunes/Finder: Connect your iPhone to your computer and restore it using iTunes/Finder.
4. Battery Drain
If you notice excessive battery drain after the reset, try these tips:
- Check Battery Usage: Go to Settings > Battery to see which apps are using the most battery power.
- Disable Background App Refresh: Go to Settings > General > Background App Refresh.
- Adjust Screen Brightness: Lower your screen brightness or enable Auto-Brightness.
Conclusion: Resetting Your JV iPhone with Confidence
Resetting a JV iPhone can seem daunting, but with the right preparation and knowledge, you can successfully restore your device and resolve many common issues. Remember to back up your data, disable Find My iPhone, and understand the risks involved. Choose the reset method that best suits your needs, and don’t hesitate to seek professional help if you encounter any problems. By following these guidelines, you can confidently reset your JV iPhone and enjoy a smoother, more reliable mobile experience.
