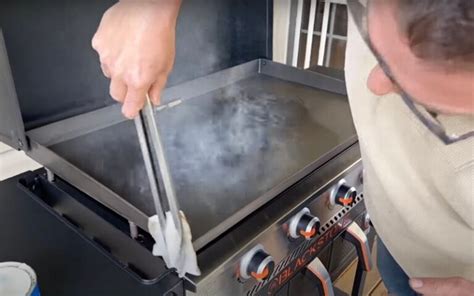
How to Season a Blackstone Griddle: A Guide to Griddle Perfection
So, you've got your shiny new Blackstone griddle – congratulations! Now, before you start slinging burgers and sizzling veggies, you need to take a crucial step: seasoning. Seasoning your Blackstone isn't just about aesthetics; it's about creating a naturally non-stick surface that will protect your griddle and improve its performance over time. This comprehensive guide will walk you through the process, ensuring your Blackstone is ready for years of delicious meals.
Why Seasoning Your Blackstone Griddle is Essential
Seasoning your Blackstone griddle creates a polymerized layer of oil on the cooking surface. This layer acts as a natural non-stick coating, preventing food from sticking and making cleanup a breeze. More importantly, it protects the griddle's surface from rust and corrosion, extending its lifespan considerably. A well-seasoned griddle also imparts a subtle flavor to your food, enhancing the overall cooking experience.
The Supplies You'll Need
Before you begin, gather these essential items:
- Your Blackstone griddle: Make sure it's clean and free of any manufacturer's residue.
- Vegetable oil: High smoke point oils like canola, grapeseed, or refined coconut oil are ideal. Avoid olive oil, as it has a lower smoke point and can leave a residue.
- Paper towels: Lots of them!
- Heat-resistant gloves or mitts: The griddle will get hot!
- Optional: A soft bristle brush: For cleaning and applying oil.
Step-by-Step Seasoning Process
Follow these steps for perfectly seasoned Blackstone griddle:
Step 1: Cleaning Your New Griddle
Begin by thoroughly cleaning your new Blackstone griddle. Remove any stickers or protective films. Wipe down the entire surface with a damp cloth to remove any dust or debris.
Step 2: Applying the First Coat of Oil
Using paper towels, apply a thin, even coat of your chosen oil to the entire cooking surface of the griddle. Don't overdo it; a light coating is sufficient. You should barely see any oil sheen.
Step 3: Heating the Griddle
Turn on your Blackstone griddle to medium-high heat. Let it heat up for about 15-20 minutes, or until you see a light haze forming from the oil. This is the oil polymerizing and creating that non-stick layer.
Step 4: Wiping Down Excess Oil
Once the oil haze dissipates, turn off the griddle and allow it to cool completely. Once cooled, use paper towels to wipe away any excess oil that hasn't polymerized.
Step 5: Repeating the Process
Repeat steps 2-4 at least two to three more times. Each subsequent seasoning layer will build upon the previous one, creating a stronger, more durable non-stick surface.
Step 6: Post-Seasoning Maintenance
After the initial seasoning, maintain your griddle's non-stick surface by oiling it lightly after each use and periodically performing a full re-seasoning as needed (every few months or when the surface begins to look dull).
Tips for Blackstone Griddle Seasoning Success
- Patience is key: Don't rush the process. Allow the griddle to heat and cool properly between coats.
- Thin is in: Apply thin, even coats of oil to avoid build-up and uneven seasoning.
- High smoke point oil: Choose an oil with a high smoke point to prevent burning and off-flavors.
- Regular maintenance: Regular oiling after each use and occasional re-seasoning will keep your griddle in top condition.
By following these steps, you'll have a perfectly seasoned Blackstone griddle ready for countless delicious meals. Happy cooking!
