How to Unsend an Email in Gmail: A Step-by-Step Guide
Sending an email is often instantaneous, but sometimes, we hit send a little too quickly. Maybe you spotted a typo, a misplaced attachment, or perhaps the entire email's tone feels off. Luckily, Gmail offers a handy "unsend" feature that can save you from potential embarrassment or miscommunication. This guide will walk you through how to unsend an email in Gmail, ensuring you maintain control over your outgoing messages.
Understanding Gmail's Unsend Feature
Gmail's "unsend" feature isn't about magically deleting an email from the recipient's inbox after it's been delivered. Instead, it allows you to recall your message within a limited timeframe, effectively preventing the recipient from ever seeing it. This is crucial for catching those last-minute mistakes.
The time window for unsending an email is customizable, ranging from 5 to 30 seconds. Choosing a longer timeframe increases your chances of catching errors, but it also means the email remains vulnerable to being read for a longer period.
How to Enable the Unsend Feature
Before you can use the unsend function, you need to enable it in your Gmail settings. Here's how:
- Access Gmail Settings: Open your Gmail account and click on the gear icon (Settings) in the top right corner.
- Navigate to "See all settings": In the dropdown menu, select "See all settings."
- Find the "Undo Send" setting: Look for the "Undo Send" section within the "General" tab.
- Customize your recall time: You'll see a dropdown menu allowing you to choose an "Undo send" time. Select your preferred duration (5, 10, 20, or 30 seconds).
- Save Changes: Click the "Save Changes" button at the bottom of the page to activate the feature.
Now, whenever you send an email, you'll have a short window to unsend it.
Unsending an Email: A Practical Walkthrough
After enabling the "Undo Send" feature, here's what happens when you send an email:
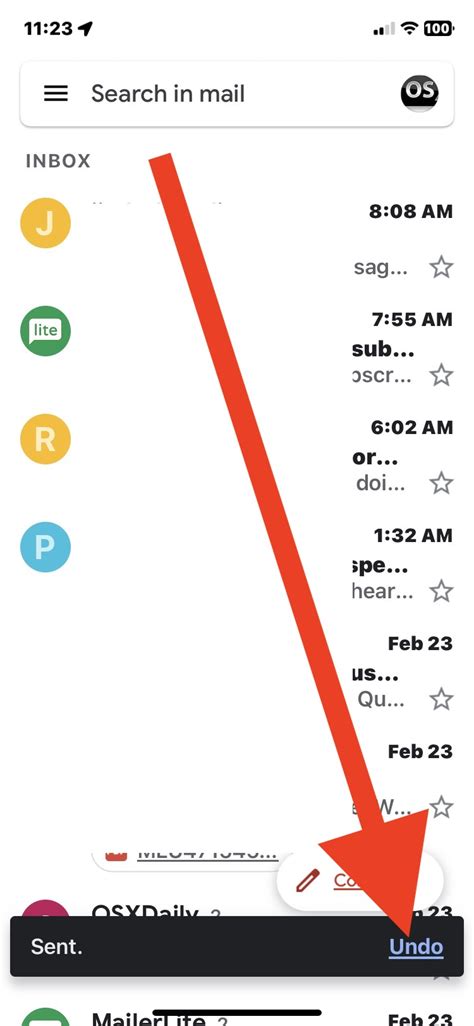
- The "Undo Send" notification: A brief message will appear at the bottom of your screen, giving you the option to undo the sending process.
- Click "Undo": If you spot an error, quickly click the "Undo" button within the allotted time.
- Confirmation: Gmail will confirm that your message has been successfully recalled.
Troubleshooting: Why Unsend Might Not Work
There are some situations where the "unsend" feature might not function as expected:
- Time Limit Exceeded: If you don't click "Undo" within the timeframe you've set, the email will be sent regardless.
- Recipient's Actions: Once the recipient has opened the email, even if within the unsend window, the recall may not be completely successful. They might have already seen parts of it.
- Technical Issues: Rare technical glitches on either Gmail's end or your internet connection can interfere with the process.
Best Practices for Avoiding Email Regrets
While the "unsend" feature provides a safety net, it's always best to practice preventative measures:
- Proofread Carefully: Before hitting "Send," take a moment to review your email for typos, grammatical errors, and clarity.
- Use the "Schedule Send" Feature: This allows you to compose your email ahead of time and send it later, giving you more time for review.
- Check Attachments: Double-check that you've included the correct attachments before sending.
By understanding how to enable and use Gmail's "unsend" feature and following these best practices, you can significantly reduce the risk of sending regrettable emails. Remember, a few extra seconds spent reviewing your message can save you from potential embarrassment and communication mishaps.
