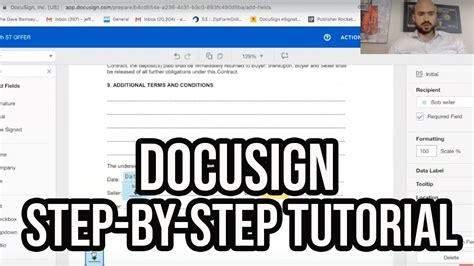
How To Use DocuSign: A Comprehensive Guide
DocuSign is a leading e-signature platform that streamlines the process of signing and sending documents electronically. This guide will walk you through the basics of using DocuSign, from creating an account to sending and managing documents. Whether you're a seasoned professional or a first-time user, this tutorial will equip you with the knowledge to harness the power of DocuSign.
Getting Started with DocuSign
Before diving into the specifics, let's cover the initial setup.
1. Creating a DocuSign Account
Signing up for DocuSign is straightforward. Simply visit the DocuSign website and follow the instructions to create a free account or choose a paid plan based on your needs. You'll need to provide some basic information, including your email address and create a password.
2. Understanding the DocuSign Interface
Once logged in, you'll be greeted by the DocuSign dashboard. Take some time to familiarize yourself with the various options and menus. The interface is generally intuitive, but understanding the layout will significantly improve your efficiency.
Sending Documents for Signature
This is where the real power of DocuSign shines. Here’s how to send documents for electronic signatures.
1. Preparing Your Document
Before you can send a document, you'll need to have it ready in a digital format (PDF, Word, etc.). Make sure your document is complete and accurately reflects the intended agreement.
2. Uploading Your Document to DocuSign
DocuSign allows you to upload documents directly from your computer or cloud storage services like Dropbox or Google Drive. Simply locate the "Upload Document" or equivalent button and select your file.
3. Adding Recipients and Signature Fields
This is a crucial step. You need to specify who needs to sign the document and where they should place their signatures. DocuSign makes this easy with a drag-and-drop interface to add signature fields, date fields, and other necessary information. You'll also need to enter the recipient's email addresses.
4. Adding Other Actions (Optional)
Depending on your document, you might need to add other actions such as checkboxes, initials, or text fields. DocuSign provides various tools to customize the document according to your specific needs.
5. Sending the Document
Once you've added all the necessary recipients and fields, review everything carefully. Then, click "Send" to dispatch the document for signature.
Managing Your Documents
Effective document management is key to leveraging DocuSign effectively.
1. Tracking Your Documents
DocuSign provides a detailed overview of the status of each document. You can easily monitor whether a document has been sent, viewed, signed, or completed.
2. Downloading Completed Documents
Once a document is fully signed, you can download a copy for your records. DocuSign provides different format options for downloaded documents.
Advanced DocuSign Features
DocuSign offers numerous advanced features to enhance your workflow. Explore these for increased efficiency and productivity. These include:
- Templates: Create reusable templates for frequently used documents.
- Bulk Sending: Send the same document to multiple recipients simultaneously.
- Integrations: Connect DocuSign with other applications you use daily, like Salesforce or Google Workspace.
Troubleshooting Common Issues
Encountering problems? Here are some common issues and solutions:
- Recipient not receiving the email: Double-check the recipient's email address for accuracy.
- Unable to upload a document: Ensure the file is in a supported format and not too large.
- Signature field issues: Review the placement and properties of your signature fields.
By following these steps and exploring the advanced features, you'll be well on your way to mastering DocuSign and streamlining your document workflow. Remember to always consult the official DocuSign help center for the most up-to-date information and support.
