

Introduction: Excel on the Go – A Mobile Powerhouse
Microsoft Excel, the ubiquitous spreadsheet software, has long been a staple for professionals and individuals alike. While many associate Excel with desktop computers, its mobile version for iPhone brings a surprising amount of functionality to your fingertips. One essential feature, especially when dealing with large datasets, is the ability to freeze panes. This guide will walk you through the ins and outs of freezing panes in Excel on your iPhone, ensuring you can efficiently manage and analyze your data, no matter where you are.
Imagine you’re reviewing a massive sales report on your iPhone during your commute. Without freezing panes, scrolling through the data would mean losing sight of the column headers or row labels, making it incredibly difficult to interpret the information. Freezing panes solves this problem by keeping specific rows or columns visible, regardless of how far you scroll. It’s a game-changer for mobile Excel users.
Why Freeze Panes? Understanding the Benefits
Before diving into the how-to, let’s explore why freezing panes is such a valuable feature:
- Improved Data Visibility: When you freeze the top row or leftmost columns, you ensure that your headers or labels remain visible at all times. This is crucial for understanding the context of the data you’re viewing.
- Enhanced Navigation: With frozen panes, you can quickly navigate through large datasets without constantly scrolling back to the top or left to identify the data.
- Reduced Errors: By always having the relevant labels in sight, you’re less likely to make mistakes when entering or analyzing data.
- Increased Efficiency: Freezing panes saves time and effort, allowing you to focus on the actual analysis rather than struggling with navigation.
- Better Mobile Experience: On the smaller screen of an iPhone, freezing panes becomes even more critical for maintaining data clarity and usability.
How to Freeze Panes in Excel on iPhone: A Step-by-Step Guide
Freezing panes in the Excel iPhone app is straightforward, but it’s essential to follow the correct steps. Here’s a detailed guide:
Step 1: Open Your Excel Spreadsheet
First, launch the Excel app on your iPhone and open the spreadsheet you want to work with. You can either open an existing file from your OneDrive, Dropbox, or local storage, or create a new one.
Step 2: Select the Cell Where You Want to Freeze
This is the most crucial step. The cell you select determines which rows and columns will be frozen. Here’s how it works:
- To freeze the top row: Select cell A2. This will freeze the first row (row 1).
- To freeze the first column: Select cell B1. This will freeze the first column (column A).
- To freeze both the top row and the first column: Select cell B2. This will freeze row 1 and column A.
- To freeze multiple rows and columns: Select the cell that is one row below the last row you want to freeze and one column to the right of the last column you want to freeze. For example, to freeze rows 1 and 2 and columns A and B, select cell C3.
Important Note: The cell you select will be the top-left cell of the area that isn’t frozen. All rows above and all columns to the left of the selected cell will be frozen.
Step 3: Access the Freeze Panes Option
Once you’ve selected the appropriate cell, follow these steps to access the Freeze Panes option:
- Tap the Edit icon (usually a pencil icon) to enter editing mode.
- Tap the three dots icon (More Options) located at the bottom right corner of the screen. This will open a menu.
- Scroll down the menu and tap View.
- In the View menu, tap Freeze Panes.
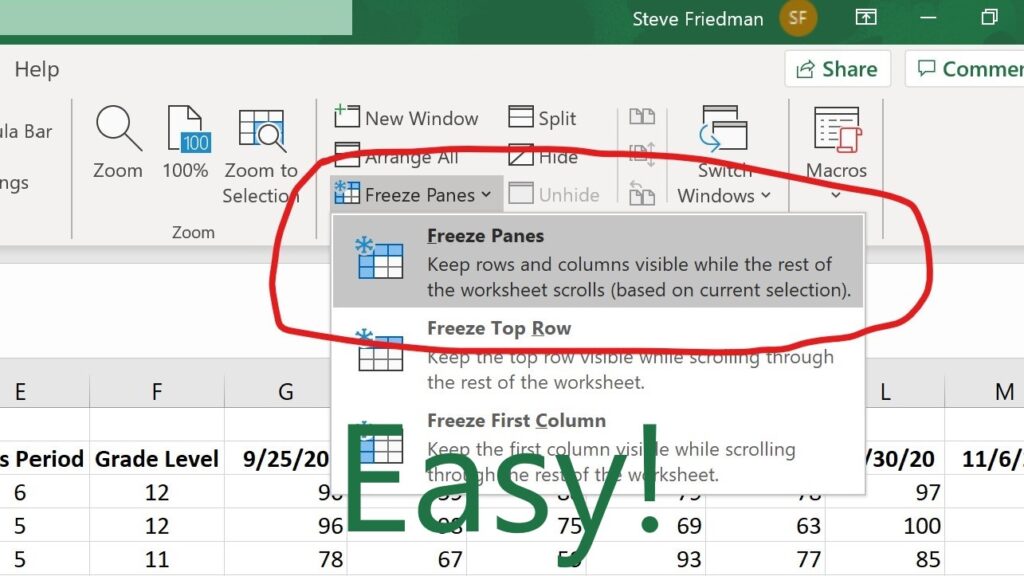
Step 4: Choose Your Freeze Panes Option
After tapping ‘Freeze Panes,’ you’ll see the following options:
- Freeze Panes: This option freezes rows above and columns to the left of your selected cell.
- Freeze Top Row: This option freezes only the top row of the spreadsheet.
- Freeze First Column: This option freezes only the first column of the spreadsheet.
- Unfreeze Panes: This option removes any existing frozen panes.
Select the option that best suits your needs. If you selected a specific cell in Step 2, choose ‘Freeze Panes.’ If you only want to freeze the top row or first column, choose the corresponding option.
Step 5: Verify the Frozen Panes
After selecting your freeze option, scroll through your spreadsheet to verify that the panes are frozen correctly. The frozen rows and columns should remain visible as you scroll.
Unfreezing Panes: Reversing the Process
If you no longer need to freeze panes or want to adjust the frozen area, you can easily unfreeze them. Here’s how:
- Follow steps 1-3 from the freezing panes instructions to access the View menu and the Freeze Panes options.
- Tap Unfreeze Panes.
This will remove any existing frozen panes, allowing you to scroll freely through your entire spreadsheet.
Troubleshooting Common Issues
While freezing panes is generally a straightforward process, you might encounter some issues. Here are a few common problems and their solutions:
- Panes Not Freezing Correctly: This is usually due to selecting the wrong cell in Step 2. Double-check your cell selection and ensure it’s in the correct position relative to the rows and columns you want to freeze. Remember, the selected cell is the top-left of the unfrozen area.
- Freeze Panes Option Grayed Out: This can happen if you’re not in editing mode. Make sure you’ve tapped the Edit icon (pencil icon) before trying to access the Freeze Panes option.
- Conflicting Freeze Settings: If you’ve previously frozen panes in the desktop version of Excel, it might affect how they appear on your iPhone. Try unfreezing panes on your desktop and then re-freezing them on your iPhone.
Tips and Tricks for Effective Use
Here are some additional tips to help you get the most out of the Freeze Panes feature in Excel on your iPhone:
- Plan Ahead: Before you start working with a large spreadsheet, take a moment to plan which rows and columns you’ll need to freeze. This will save you time and effort in the long run.
- Use with Filters: Freezing panes works perfectly with Excel’s filtering feature. You can freeze the header row and then filter the data to focus on specific subsets.
- Adjust Zoom Level: On the iPhone’s small screen, adjusting the zoom level can help you see more data at once. Experiment with different zoom levels to find the optimal balance between readability and information density.
- Consider Landscape Mode: For wider spreadsheets, rotating your iPhone to landscape mode can provide a better viewing experience.
- Practice Makes Perfect: The more you use the Freeze Panes feature, the more comfortable you’ll become with it. Experiment with different scenarios to master the technique.
Beyond Freezing Panes: Other Useful Excel iPhone Features
While freezing panes is a crucial feature for mobile Excel users, the iPhone app offers a range of other functionalities that can enhance your productivity:
- Formulas and Functions: The Excel iPhone app supports a wide range of formulas and functions, allowing you to perform complex calculations on the go.
- Charts and Graphs: You can create and edit charts and graphs directly on your iPhone, making it easy to visualize your data.
- Data Validation: Use data validation to ensure the accuracy of your data by setting rules for what can be entered into specific cells.
- Conditional Formatting: Apply conditional formatting to highlight important data points and trends.
- Collaboration: Share your spreadsheets with others and collaborate in real-time using OneDrive or SharePoint.
Use Cases: Real-World Examples
Let’s look at some real-world examples of how freezing panes can be beneficial in different scenarios:
- Sales Reporting: Imagine you’re a sales manager reviewing monthly sales data on your iPhone. By freezing the top row (containing the column headers like ‘Product Name,’ ‘Sales Revenue,’ ‘Units Sold’) and the first column (containing the names of your sales representatives), you can easily compare the performance of each rep across different products without losing context.
- Inventory Management: If you’re managing inventory using Excel on your iPhone, freezing the top row (containing headers like ‘Item Code,’ ‘Description,’ ‘Quantity on Hand,’ ‘Reorder Point’) allows you to quickly check stock levels and identify items that need to be reordered.
- Budget Tracking: When tracking your personal or business budget on your iPhone, freezing the top row (containing headers like ‘Date,’ ‘Description,’ ‘Income,’ ‘Expense,’ ‘Balance’) helps you monitor your spending and stay on top of your finances.
- Project Management: If you’re using Excel to manage a project, freezing the first column (containing task names) and the top row (containing dates or milestones) allows you to easily track progress and identify potential delays.
- Scientific Data Analysis: Scientists and researchers can use Excel on their iPhones to analyze data collected in the field. Freezing panes helps them keep track of variables and measurements as they scroll through large datasets.
The Future of Mobile Excel
The Excel iPhone app is constantly evolving, with Microsoft regularly adding new features and improvements. As mobile devices become more powerful and ubiquitous, we can expect even greater functionality and integration in the future. Features like enhanced collaboration tools, AI-powered data analysis, and improved touch input will further enhance the mobile Excel experience.
Conclusion: Mastering Mobile Data Management
Freezing panes in Excel on your iPhone is a simple yet powerful technique that can significantly improve your data management and analysis capabilities. By following the steps outlined in this guide and practicing the tips and tricks, you can master this essential feature and unlock the full potential of Excel on your mobile device. Whether you’re a business professional, a student, or simply someone who wants to stay organized, freezing panes can help you work more efficiently and effectively, no matter where you are. So, grab your iPhone, open Excel, and start freezing those panes!
