

Mastering iPhone Screen Recording: A Comprehensive Guide for iOS Users
In today’s digital age, capturing what’s happening on your iPhone screen has become incredibly useful. Whether you’re creating tutorials, sharing gameplay, or simply documenting a funny glitch, screen recording is a feature many iOS users rely on daily. Fortunately, Apple has made it remarkably easy to record your screen directly from your iPhone. This comprehensive guide will walk you through everything you need to know about screen recording on your iPhone, from the basics to advanced tips and troubleshooting.
Why Screen Record on Your iPhone?
Before diving into the how-to, let’s explore why screen recording is such a valuable tool:
- Creating Tutorials: If you’re explaining how to use an app or navigate a specific feature, a screen recording can provide a clear visual demonstration.
- Sharing Gameplay: Gamers often record their gameplay to share highlights, strategies, or funny moments with friends or on social media platforms.
- Troubleshooting: When encountering a technical issue, recording your screen can help you document the problem and share it with tech support or online forums for assistance.
- Documenting Bugs or Glitches: Capturing unexpected behavior on your iPhone can be crucial for developers to identify and fix issues.
- Saving Ephemeral Content: Some apps, like Snapchat or Instagram, feature content that disappears after a short period. Screen recording allows you to save these moments for later viewing.
- Creating Presentations: You can create engaging presentations by recording your screen while navigating through slides or demonstrating app functionalities.
Enabling Screen Recording on Your iPhone
The first step to screen recording on your iPhone is to ensure that the feature is enabled in your Control Center. Here’s how to do it:
- Open Settings: Tap on the Settings app icon on your iPhone’s home screen.
- Navigate to Control Center: Scroll down and tap on “Control Center.”
- Customize Controls: Look for the “Customize Controls” option and tap on it.
- Add Screen Recording: Scroll through the list of available controls until you find “Screen Recording.” Tap the green “+” button next to it to add it to your Control Center.
Once you’ve added Screen Recording to your Control Center, you’re ready to start recording your screen whenever you need to.
How to Start a Screen Recording
Now that you’ve enabled the screen recording feature, here’s how to initiate a recording:
- Access Control Center: Swipe down from the top-right corner of your screen (on iPhones with Face ID) or swipe up from the bottom of the screen (on iPhones with a Home button) to open the Control Center.
- Tap the Screen Recording Icon: Look for the circular icon with a dot inside (the Screen Recording icon). Tap it to start the recording.
- Countdown: You’ll see a three-second countdown before the recording begins. This gives you a moment to prepare.
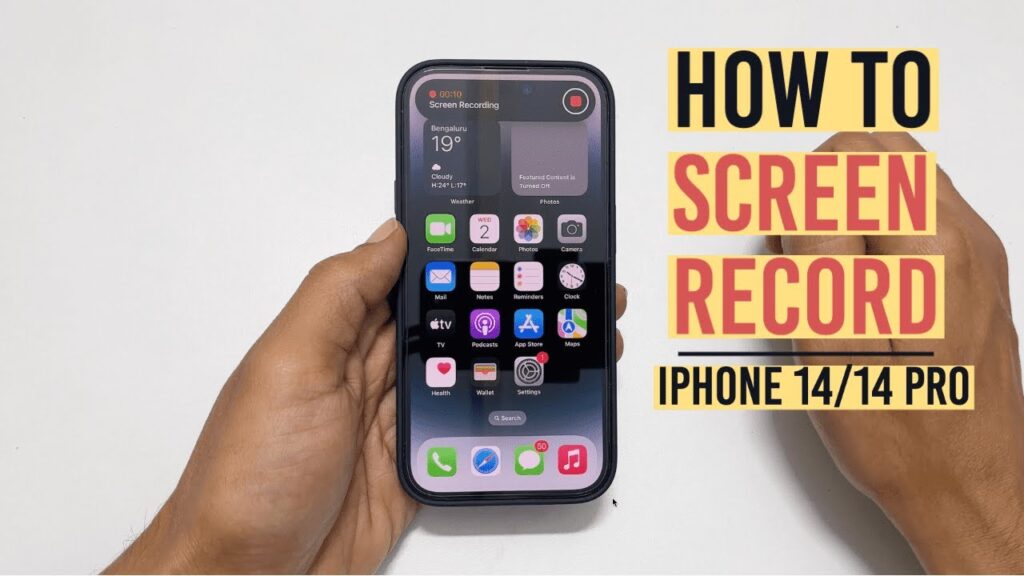
- Recording Indicator: Once the recording starts, the Screen Recording icon in the Control Center will turn red, and a red bar will appear at the top of your screen (or around the Dynamic Island on newer models). This indicates that your screen is currently being recorded.
How to Stop a Screen Recording
Stopping a screen recording is just as simple:
- Tap the Red Bar: Tap the red bar at the top of your screen (or around the Dynamic Island).
- Stop Confirmation: A prompt will appear asking if you want to stop the screen recording. Tap “Stop.”
- Access Your Recording: Your screen recording will be automatically saved to your Photos app.
Alternatively, you can also stop the recording by accessing the Control Center again and tapping the Screen Recording icon (which will now be red) to turn it off.
Screen Recording with Microphone Audio
Sometimes, you might want to include audio narration or capture ambient sound during your screen recording. Here’s how to enable microphone audio:
- Access Control Center: Open the Control Center as described earlier.
- Long Press the Screen Recording Icon: Instead of tapping the Screen Recording icon, long-press it (press and hold). This will bring up additional options.
- Microphone Audio: In the options that appear, you’ll see a microphone icon with the label “Microphone Audio.” Tap it to toggle the microphone on or off.
- Start Recording: Once the microphone is enabled, tap “Start Recording.”
When the microphone is enabled, your iPhone will record both the screen activity and any audio picked up by the microphone. Remember to speak clearly and ensure that your environment is relatively quiet for the best audio quality.
Tips for Better Screen Recordings
To create high-quality screen recordings, consider these tips:
- Minimize Notifications: Before starting a recording, enable “Do Not Disturb” mode to prevent notifications from interrupting your recording.
- Clean Up Your Screen: Close unnecessary apps and organize your home screen to present a clean and focused recording.
- Plan Your Recording: Outline what you want to demonstrate or explain beforehand to ensure a smooth and coherent recording.
- Speak Clearly: If you’re using microphone audio, speak clearly and at a moderate pace to ensure that your narration is easy to understand.
- Use a Screen Recorder App: For more advanced features, explore third-party screen recorder apps available on the App Store.
- Edit Your Recordings: Use the built-in editing tools in the Photos app or a dedicated video editing app to trim, crop, or add annotations to your recordings.
Troubleshooting Common Issues
While screen recording on the iPhone is generally reliable, you might encounter some issues. Here are a few common problems and their solutions:
- No Sound: If your screen recording has no sound, ensure that the microphone is enabled (as described earlier). Also, check that your iPhone’s volume is turned up and that you haven’t accidentally muted the audio.
- Screen Recording Not Showing Up: If you can’t find the Screen Recording icon in the Control Center, double-check that it’s been added in the Settings app under “Control Center” and then “Customize Controls.”
- Recording Stops Unexpectedly: This can happen if your iPhone runs out of storage space or if an app crashes during the recording. Free up storage space and try again. Also, ensure that the app you’re recording is stable and up-to-date.
- Low-Quality Recording: The quality of your screen recording depends on your iPhone’s settings and the app you’re recording. Ensure that your iPhone’s display resolution is set to the highest possible setting for better video quality.
- Microphone Not Working: If the microphone isn’t picking up any sound, check that the microphone permissions are enabled for the app you’re recording. You can find these settings in the Settings app under “Privacy” and then “Microphone.”
Advanced Screen Recording Techniques
For users who need more advanced screen recording capabilities, there are several third-party apps available on the App Store. These apps often offer features such as:
- Video Editing: Advanced editing tools for trimming, cropping, adding annotations, and applying filters to your recordings.
- Live Streaming: The ability to stream your screen recording live to platforms like Twitch or YouTube.
- Custom Overlays: Adding custom overlays, such as logos or watermarks, to your recordings.
- Scheduled Recordings: Scheduling recordings to start and stop automatically at specific times.
- Cloud Storage Integration: Integration with cloud storage services like Dropbox or Google Drive for easy sharing and backup.
Some popular screen recording apps for iOS include:
- DU Recorder: A free and user-friendly screen recorder with basic editing features.
- Record it!: A simple screen recorder with the option to add facecam reactions to your recordings.
- Go Record: A versatile screen recorder with advanced editing and streaming capabilities.
Privacy Considerations
When screen recording on your iPhone, it’s essential to be mindful of privacy considerations. Avoid recording sensitive information, such as passwords, credit card details, or personal conversations, unless absolutely necessary. Additionally, be respectful of other people’s privacy and obtain their consent before recording them or their content.
Screen Recording for Educational Purposes
Screen recording has become an invaluable tool in education, allowing teachers and students to create engaging and informative content. Here are some ways screen recording can be used in educational settings:
- Creating Video Tutorials: Teachers can create video tutorials to explain complex concepts, demonstrate problem-solving techniques, or provide step-by-step instructions for assignments.
- Recording Online Lectures: Students can record online lectures or webinars to review the material later or share it with classmates who were unable to attend.
- Providing Feedback: Teachers can provide personalized feedback on student work by recording their screen while reviewing assignments and offering suggestions for improvement.
- Creating Presentations: Students can create dynamic presentations by recording their screen while navigating through slides, demonstrating software applications, or showcasing their research findings.
- Sharing Student Work: Students can share their screen recordings with teachers and classmates to showcase their projects, presentations, or problem-solving skills.
Screen Recording for Gaming
For gamers, screen recording is a must-have feature for capturing and sharing their gaming experiences. Here are some ways gamers can use screen recording on their iPhones:
- Sharing Gameplay Highlights: Gamers can record their best moments, such as epic wins, impressive skills, or funny glitches, and share them with friends or on social media platforms.
- Creating Tutorials and Walkthroughs: Gamers can create tutorials and walkthroughs to help other players improve their skills or complete challenging levels.
- Live Streaming Gameplay: Gamers can stream their gameplay live to platforms like Twitch or YouTube, allowing them to interact with their audience in real-time.
- Analyzing Gameplay: Gamers can record their gameplay to analyze their performance, identify areas for improvement, and develop strategies for future matches.
- Creating Gaming Content: Gamers can create a wide range of gaming content, such as montages, reviews, and commentaries, using screen recordings of their gameplay.
Screen Recording for Business
In the business world, screen recording can be a powerful tool for communication, training, and collaboration. Here are some ways businesses can use screen recording on their iPhones:
- Creating Training Videos: Businesses can create training videos to teach employees how to use software applications, follow company procedures, or provide customer service.
- Demonstrating Products and Services: Businesses can create videos to showcase their products and services, highlight key features, and demonstrate how they can benefit customers.
- Providing Customer Support: Businesses can provide customer support by recording their screen while guiding customers through troubleshooting steps or explaining how to use specific features.
- Collaborating on Projects: Team members can collaborate on projects by recording their screen while working on documents, presentations, or designs, and sharing their recordings with colleagues for feedback.
- Documenting Processes: Businesses can document their processes by recording their screen while performing tasks, creating a visual record of how things are done.
Conclusion
Screen recording on the iPhone is a versatile and valuable tool that can be used for a wide range of purposes, from creating tutorials and sharing gameplay to documenting bugs and providing customer support. By following the steps outlined in this guide, you can easily master the art of screen recording on your iPhone and unlock its full potential. Whether you’re a student, a gamer, a business professional, or simply someone who wants to capture and share moments from your iPhone screen, screen recording is a skill that will undoubtedly come in handy. So go ahead, give it a try, and discover the many ways screen recording can enhance your iPhone experience.
