

Introduction: Unlocking the Power of RAR Files on Your Mac
In the digital age, managing and sharing files efficiently is paramount. While macOS offers built-in compression tools, they often fall short when dealing with larger files or the need for advanced features. This is where RAR (Roshal Archive) files come into play. RAR is a popular archive format known for its superior compression capabilities, password protection, and ability to split large files into smaller, manageable chunks. If you’re a Mac user looking to harness the power of RAR files, you’ve come to the right place. This comprehensive guide will walk you through everything you need to know about creating, extracting, and managing RAR files on your macOS device.
Whether you’re a student, a professional, or simply someone who wants to optimize their file management, understanding how to work with RAR files on a Mac is a valuable skill. We’ll delve into the various methods available, from using command-line tools to employing user-friendly graphical applications. By the end of this guide, you’ll be equipped with the knowledge and tools to confidently handle RAR files and streamline your workflow.
Why Use RAR Files on a Mac?
Before we dive into the “how-to,” let’s explore the reasons why you might want to use RAR files on your Mac in the first place:
- Superior Compression: RAR often achieves better compression ratios than the standard ZIP format, allowing you to reduce file sizes more significantly. This is especially useful for archiving large media files, documents, or software packages.
- File Splitting: RAR allows you to split large archives into smaller, more manageable parts. This is invaluable for sharing files via email or transferring them to storage devices with limited capacity. Imagine trying to email a 5GB video file – splitting it into smaller RAR parts makes the process feasible.
- Password Protection: RAR offers robust password protection, ensuring that your sensitive data remains secure. You can encrypt your archives with a strong password, preventing unauthorized access to the contents.
- Data Redundancy: RAR includes built-in data redundancy features that help protect against data corruption. This means that even if some parts of the archive are damaged, the remaining parts can often be used to recover the original data.
- Archive Recovery: RAR archives can include recovery records, which allow you to repair damaged archives, even if some parts are missing. This is a huge advantage over ZIP, which doesn’t offer the same level of resilience.
Methods for Creating RAR Files on Mac
There are several ways to create RAR files on your Mac, each with its own advantages and disadvantages. Let’s explore the most popular methods:
1. Using Command-Line Tools (Terminal)
For advanced users who are comfortable with the command line, using the Terminal offers the most control and flexibility when creating RAR files. However, it requires some technical knowledge and familiarity with command-line syntax.
Installing the Unrar Tool
Before you can create RAR files using the Terminal, you need to install the unrar tool. The easiest way to do this is using a package manager like Homebrew. If you don’t have Homebrew installed, you can download and install it from brew.sh.
Once Homebrew is installed, open the Terminal and run the following command:
brew install unrarThis will download and install the unrar tool and its dependencies.
Creating a RAR Archive
To create a RAR archive using the Terminal, use the following command:
rar a archive_name.rar file1 file2 directory_namerar: This is the command-line tool for creating and managing RAR archives.a: This option tellsrarto create a new archive.archive_name.rar: This is the name you want to give to your RAR archive. Replacearchive_namewith the desired name.file1 file2 directory_name: These are the files and directories you want to include in the archive. You can specify multiple files and directories separated by spaces.
For example, to create a RAR archive named my_archive.rar containing the files document.txt and image.jpg and the directory my_folder, you would use the following command:
rar a my_archive.rar document.txt image.jpg my_folderAdding Password Protection
To add password protection to your RAR archive, use the -p option followed by your desired password:
rar a -psecretpassword archive_name.rar file1 file2 directory_nameReplace secretpassword with your actual password. Remember to choose a strong password that is difficult to guess.
Splitting the Archive into Multiple Parts
To split the archive into multiple parts, use the -v option followed by the desired size of each part. For example, to split the archive into parts of 10MB each, use the following command:
rar a -v10m archive_name.rar file1 file2 directory_nameThis will create a series of files named archive_name.part1.rar, archive_name.part2.rar, and so on.
2. Using Graphical Applications
If you prefer a more user-friendly interface, several graphical applications are available for creating RAR files on Mac. These applications provide a visual interface that makes it easier to manage files and configure archive settings.
The Unarchiver
The Unarchiver is a free and open-source application that supports a wide range of archive formats, including RAR. While primarily designed for extracting archives, it can also be used to create ZIP archives. To create RAR archives, you’ll need to install the rar command-line tool as described above.
To use The Unarchiver, simply drag and drop the files and folders you want to archive onto the application icon. The Unarchiver will then create a ZIP archive. To create a RAR archive, you’ll need to use the Terminal as described earlier.
Keka
Keka is another popular archiving tool for macOS that supports a wide variety of formats, including RAR. It offers a simple and intuitive interface for creating and extracting archives.
To create a RAR archive using Keka, follow these steps:
- Download and install Keka from the official website.
- Open Keka.
- Drag and drop the files and folders you want to archive onto the Keka window.
- Select “RAR” from the dropdown menu.
- Choose your desired compression level and other settings.
- Click the “Create” button.
WinRAR (via Emulation or Virtualization)
WinRAR is a popular archiving tool for Windows, but it’s not natively available for macOS. However, you can run WinRAR on your Mac using emulation or virtualization software like Parallels Desktop or VMware Fusion. These applications allow you to run Windows within macOS, giving you access to Windows-only software like WinRAR.
Once you have Windows running on your Mac, you can download and install WinRAR as you would on a Windows computer. Then, you can use WinRAR to create and extract RAR files as usual.
Extracting RAR Files on Mac
Extracting RAR files on a Mac is generally easier than creating them, as many tools are available that natively support the RAR format.
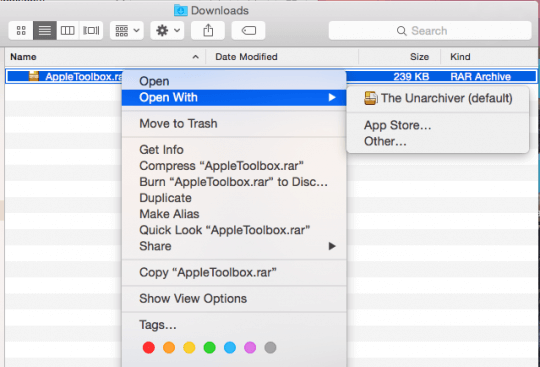
1. Using The Unarchiver
The Unarchiver is an excellent choice for extracting RAR files on macOS. It’s free, open-source, and supports a wide range of archive formats.
To extract a RAR file using The Unarchiver, simply double-click the RAR file. The Unarchiver will automatically extract the contents to the same directory as the RAR file. You can also drag and drop the RAR file onto the The Unarchiver icon in the Dock.
2. Using Keka
Keka also provides a seamless experience for extracting RAR files.
To extract a RAR file using Keka, simply double-click the RAR file. Keka will automatically extract the contents to the same directory as the RAR file. Alternatively, you can drag and drop the RAR file onto the Keka window.
3. Using Command-Line Tools (Terminal)
You can also extract RAR files using the command-line tool unrar.
To extract a RAR file to the current directory, use the following command:
unrar x archive_name.rarunrar: This is the command-line tool for extracting RAR archives.x: This option tellsunrarto extract the archive with full paths.archive_name.rar: This is the name of the RAR archive you want to extract.
To extract the RAR file to a specific directory, use the following command:
unrar x archive_name.rar destination_directoryReplace destination_directory with the path to the directory where you want to extract the files.
4. Dealing with Password-Protected RAR Files
If the RAR file is password-protected, you’ll be prompted to enter the password before the contents can be extracted. Both The Unarchiver and Keka will display a password prompt when you try to extract a password-protected RAR file. If you’re using the command line, you can use the -p option followed by the password:
unrar x -psecretpassword archive_name.rarReplace secretpassword with the correct password. If you enter the wrong password, the extraction will fail.
Tips and Tricks for Working with RAR Files on Mac
Here are some additional tips and tricks to help you work more efficiently with RAR files on your Mac:
- Use Strong Passwords: When creating password-protected RAR archives, always use strong passwords that are difficult to guess. A strong password should be at least 12 characters long and include a mix of uppercase and lowercase letters, numbers, and symbols.
- Keep Your Software Up-to-Date: Make sure you’re using the latest versions of your archiving software. Newer versions often include bug fixes, performance improvements, and support for new features.
- Verify Archive Integrity: Before extracting a large RAR archive, it’s a good idea to verify its integrity to ensure that it’s not corrupted. Many archiving tools include a built-in verification feature.
- Consider Compression Levels: When creating RAR archives, you can choose different compression levels. Higher compression levels result in smaller file sizes but take longer to compress. Experiment with different compression levels to find the best balance between file size and compression time.
- Organize Your Archives: Keep your RAR archives organized by using descriptive filenames and storing them in appropriate directories. This will make it easier to find and manage your archives in the future.
- Utilize Split Archives for Large Files: When dealing with very large files, splitting them into multiple RAR parts can make them easier to share and manage.
- Explore Advanced Options: Most archiving tools offer a variety of advanced options, such as creating self-extracting archives, adding recovery records, and setting archive comments. Explore these options to customize your archiving experience.
Troubleshooting Common RAR File Issues on Mac
Even with the right tools and knowledge, you might encounter some issues when working with RAR files on your Mac. Here are some common problems and how to troubleshoot them:
- “Archive is Corrupted” Error: This error usually indicates that the RAR archive is damaged or incomplete. Try downloading the archive again or using a different archiving tool to extract it. If the archive contains recovery records, you may be able to repair it.
- “Incorrect Password” Error: If you’re prompted for a password and you’re sure you’re entering the correct password, double-check that Caps Lock is off and that you’re using the correct keyboard layout. If you’ve forgotten the password, you may need to try password recovery tools (though success is not guaranteed).
- Extraction Takes Too Long: Extracting large RAR archives can take a significant amount of time, especially if the archive is highly compressed. Make sure your Mac has enough free disk space and that no other resource-intensive applications are running in the background.
- Incompatible Archive Format: Some older RAR archives may use an older format that is not fully supported by modern archiving tools. Try using a different archiving tool or updating your existing tool to the latest version.
- File Permissions Issues: After extracting a RAR archive, you may encounter file permission issues that prevent you from accessing or modifying the extracted files. Use the Finder or the Terminal to adjust the file permissions as needed.
Conclusion: Mastering RAR Files for Efficient File Management
Working with RAR files on a Mac doesn’t have to be a daunting task. By understanding the benefits of the RAR format, choosing the right tools, and following the tips and tricks outlined in this guide, you can efficiently manage and share your files. Whether you prefer the command-line interface or a user-friendly graphical application, there’s a method that suits your needs and technical expertise. So, go ahead and unlock the power of RAR files on your Mac and take your file management skills to the next level. From archiving important documents to sharing large media files, RAR is a valuable tool in any Mac user’s arsenal. Embrace the efficiency and security that RAR offers, and you’ll find yourself streamlining your workflow and enjoying a more organized digital life.
Remember to choose strong passwords to protect your sensitive data, keep your software up-to-date, and always verify the integrity of your archives before extracting them. With a little practice and patience, you’ll become a RAR file master in no time!
