

Creating a table of contents (TOC) in Microsoft Word is usually a straightforward process, especially when you’ve diligently used headings to structure your document. But what happens when you need a TOC and haven’t used headings, or perhaps you’re working with a document that doesn’t lend itself to the traditional heading structure? Don’t worry; it’s absolutely possible to create a table of contents in Word without relying on headings. This comprehensive guide will walk you through several methods to achieve this, ensuring your document is well-organized and easy to navigate, even without the usual heading hierarchy.
Why Create a Table of Contents Without Headings?
Before diving into the ‘how,’ let’s consider the ‘why.’ There are several scenarios where creating a TOC without headings becomes necessary or preferable:
- Legacy Documents: You might be working with an older document that wasn’t formatted with headings. Retrofitting headings might be too time-consuming or risk altering the document’s original formatting.
- Specific Formatting Requirements: Some documents, like scripts or poems, don’t naturally fit into a heading structure. However, you might still want a TOC for easy navigation.
- Creative Control: You might want more control over what appears in your TOC than what headings alone offer. Creating a TOC manually or using custom styles allows for greater flexibility.
- Simplified Documents: For very short documents, the formal heading structure might feel like overkill. A simple TOC can still provide a useful overview.
Whatever your reason, understanding how to create a table of contents without headings expands your Word formatting toolkit and allows you to handle a wider range of document types.
Method 1: Using Bookmarks and Hyperlinks
This method involves manually creating bookmarks at each section you want to include in your TOC and then creating hyperlinks from the TOC entries to those bookmarks. It’s a bit more hands-on but offers precise control.
Step 1: Inserting Bookmarks
Bookmarks are invisible markers you insert into your document. They act as targets for hyperlinks.
- Identify Sections: Scroll through your document and identify the sections you want to include in your table of contents.
- Select Text: Select the text you want to bookmark. This could be a title, a sentence, or even a paragraph.
- Insert Bookmark: Go to the ‘Insert’ tab on the ribbon and click on ‘Bookmark’ in the ‘Links’ group.
- Name Bookmark: In the Bookmark dialog box, enter a unique name for your bookmark. Bookmark names must start with a letter and cannot contain spaces. Use underscores (_) to separate words (e.g., ‘Introduction_Section’).
- Click ‘Add’: Click the ‘Add’ button to create the bookmark.
- Repeat: Repeat steps 1-5 for each section you want to include in your TOC. Make sure each bookmark name is unique; otherwise, Word will overwrite the previous bookmark.
Pro Tip: To make bookmarks visible while you’re working, go to ‘File’ > ‘Options’ > ‘Advanced’ and under ‘Show document content,’ check the box next to ‘Show bookmarks.’ This will display bookmarks as gray I-beams in your document.
Step 2: Creating the Table of Contents
Now that you’ve created your bookmarks, it’s time to build the table of contents itself.
- Choose Location: Decide where you want your table of contents to appear in your document (usually at the beginning).
- Type Entries: Manually type each entry for your table of contents, mirroring the text of the sections you bookmarked. For example, if you bookmarked a section titled ‘Project Overview,’ type ‘Project Overview’ in your TOC.
- Create Hyperlinks: For each entry, select the text you just typed.
- Insert Hyperlink: Go to the ‘Insert’ tab and click on ‘Link’ (or ‘Hyperlink’).
- Link to Bookmark: In the ‘Insert Hyperlink’ dialog box, click on ‘Place in This Document.’
- Select Bookmark: Expand the ‘Bookmarks’ section and select the corresponding bookmark for that entry.
- Click ‘OK’: Click ‘OK’ to create the hyperlink.
- Repeat: Repeat steps 3-7 for each entry in your table of contents.
Now, when you click on an entry in your table of contents, it will jump directly to the corresponding section in your document. Remember to test each hyperlink to ensure it points to the correct location.
Advantages and Disadvantages
- Advantages: Precise control over TOC entries, works with any document structure, no reliance on headings.
- Disadvantages: Manual process, time-consuming for long documents, requires careful attention to detail, TOC doesn’t automatically update if content changes.
Method 2: Using Styles and the Table of Contents Feature (Modified)
While the traditional Table of Contents feature in Word relies on headings, we can modify it to work with custom styles. This approach involves creating custom styles and applying them to the text you want to include in your TOC. It’s more automated than the bookmark method but requires some initial setup.
Step 1: Creating Custom Styles
Custom styles allow you to define specific formatting characteristics and apply them consistently throughout your document.
- Open Styles Pane: Go to the ‘Home’ tab and click the small arrow in the bottom-right corner of the ‘Styles’ group to open the Styles pane.
- Create New Style: Click the ‘New Style’ button at the bottom of the Styles pane (it looks like an ‘A+’ icon).
- Name Style: In the ‘Create New Style from Formatting’ dialog box, give your style a descriptive name (e.g., ‘TOCLevel1’, ‘TOCSection’).
- Style Type: Ensure the ‘Style type’ is set to ‘Paragraph.’
- Formatting: Choose the formatting you want for this style (font, size, color, indentation, etc.). This is how your TOC entries will look.
- Add to TOC: Click the ‘Format’ button at the bottom of the dialog box and select ‘Paragraph.’ In the Paragraph dialog box, go to the ‘Outline level’ dropdown and select a level (e.g., ‘Level 1’ for main sections, ‘Level 2’ for sub-sections). This is the crucial step that links the style to the TOC feature.
- Click ‘OK’: Click ‘OK’ to close the Paragraph dialog box and then click ‘OK’ again to create the style.
- Repeat: Repeat steps 2-7 to create additional styles for different levels in your TOC (e.g., ‘TOCLevel2’, ‘TOCLevel3’), each with its own formatting and outline level.
Important Note: The ‘Outline level’ setting is what tells Word to include text formatted with this style in the table of contents. Without setting an outline level, the style won’t be recognized by the TOC feature.
Step 2: Applying Styles to Your Document
Now that you’ve created your custom styles, apply them to the sections you want to include in your TOC.
- Select Text: Select the text you want to include in your TOC.
- Apply Style: In the Styles pane, click on the style you created for that level (e.g., ‘TOCLevel1’).
- Repeat: Repeat steps 1-2 for each section you want to include in your TOC, applying the appropriate style based on its level in the hierarchy.
Make sure you apply the styles consistently throughout your document. Inconsistency will lead to an inaccurate table of contents.
Step 3: Inserting the Table of Contents
With your styles applied, you can now insert the table of contents.
- Choose Location: Decide where you want your table of contents to appear.
- Insert TOC: Go to the ‘References’ tab and click on ‘Table of Contents.’
- Custom Table of Contents: Select ‘Custom Table of Contents…’ at the bottom of the dropdown menu.
- Customize Settings: In the Table of Contents dialog box, you can customize the appearance of your TOC (e.g., show page numbers, right align page numbers, use hyperlinks). The key setting here is under “Show levels:” adjust the number to match the number of TOC levels you created. If you created TOCLevel1, TOCLevel2, and TOCLevel3, then set “Show levels:” to 3.
- Click ‘OK’: Click ‘OK’ to insert the table of contents.
Word will automatically generate a table of contents based on the styles you applied and their corresponding outline levels. If you make changes to your document, you can update the table of contents by right-clicking on it and selecting ‘Update Field.’ Choose ‘Update entire table’ to reflect any changes to the TOC entries themselves.
Advantages and Disadvantages
- Advantages: More automated than the bookmark method, TOC can be updated automatically, allows for consistent formatting of TOC entries.
- Disadvantages: Requires initial setup of custom styles, relies on consistent application of styles, less flexible than the bookmark method if you need to include very specific elements.
Method 3: Manual Table Creation with Hyperlinks (Simplified)
This method is a hybrid approach, combining manual table creation with hyperlinks. It’s useful when you want a very simple and visually distinct table of contents without the complexities of styles or bookmarks.
Step 1: Creating a Table
- Insert Table: Go to the ‘Insert’ tab and click on ‘Table.’ Choose the number of rows you need for your TOC entries (you can always add more later) and a single column.
- Type Entries: Type each entry for your table of contents into the table cells.
- Format Table: Format the table to your liking (e.g., remove borders, adjust font size, add shading). You can make the table look however you want.
Step 2: Inserting Hyperlinks
Now, link each entry in the table to the corresponding section in your document. This assumes you have some way to identify the target sections, even if it’s just by visually scanning the document.
- Select Text: Select the text in the table cell that you want to link.
- Insert Hyperlink: Go to the ‘Insert’ tab and click on ‘Link’ (or ‘Hyperlink’).
- Link to Place in Document: In the ‘Insert Hyperlink’ dialog box, click on ‘Place in This Document.’
- Select Target: Choose the target location for the hyperlink. If you’ve used bookmarks (from Method 1), you can select them here. Otherwise, you’ll need to scroll through the document structure and select the appropriate heading or location. If you haven’t created bookmarks, you’ll be linking to specific headings (if they exist) or to the ‘Top of the document’. If the latter, the user will still need to scroll a little.
- Click ‘OK’: Click ‘OK’ to create the hyperlink.
- Repeat: Repeat steps 1-5 for each entry in the table.
This method creates a visually appealing and functional table of contents, but it requires manual linking and won’t automatically update if your document changes.
Advantages and Disadvantages
- Advantages: Simple to create, visually customizable, good for short documents, doesn’t require headings or styles.
- Disadvantages: Manual linking, TOC doesn’t automatically update, requires some visual cues to identify target sections.
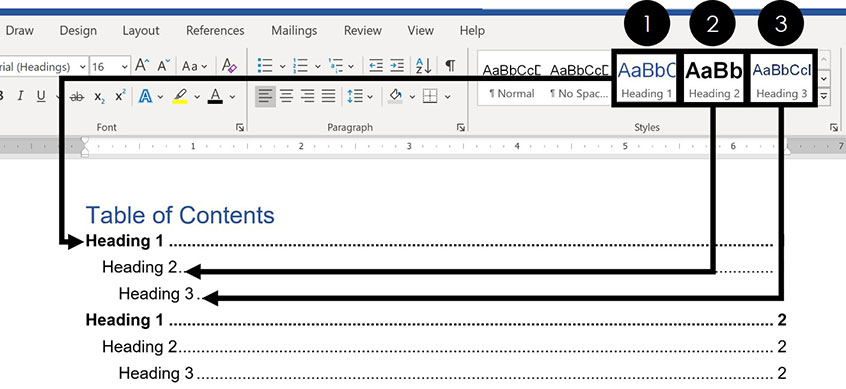
Method 4: Using Word’s Built-in Table of Contents with Hidden Headings
This method leverages Word’s built-in Table of Contents feature while effectively hiding the headings from view in the main document body. This is a slightly more advanced technique but can be very useful when you want the automation of a standard TOC without the visual clutter of headings.
Step 1: Inserting and Formatting Headings
First, you’ll need to insert headings into your document at the locations you want to appear in the Table of Contents. These headings will technically be present in the document, but we’ll make them invisible.
- Insert Headings: Go to each section where you want a TOC entry and insert a heading (e.g., Heading 1, Heading 2). Type the text you want to appear in the TOC.
- Format Headings: Apply the appropriate heading style (e.g., Heading 1, Heading 2) from the Styles gallery on the ‘Home’ tab.
Step 2: Hiding the Headings
Now, we’ll make these headings invisible without removing them from the document structure.
- Select Heading: Select the heading you want to hide.
- Open Font Dialog: Right-click on the selected heading and choose ‘Font…’ (or press Ctrl+D).
- Hide Text: In the Font dialog box, check the ‘Hidden’ box under the ‘Effects’ section.
- Click ‘OK’: Click ‘OK’ to apply the change. The heading will disappear from view.
- Repeat: Repeat steps 1-4 for all the headings you want to hide.
The headings are now hidden, but they are still present in the document structure, which is crucial for the Table of Contents feature to recognize them.
Step 3: Inserting the Table of Contents
Now, insert the Table of Contents as you normally would.
- Choose Location: Decide where you want your table of contents to appear.
- Insert TOC: Go to the ‘References’ tab and click on ‘Table of Contents.’
- Choose Style: Select a table of contents style from the dropdown menu (e.g., Automatic Table 1, Automatic Table 2).
Word will generate a Table of Contents based on the hidden headings. The headings are invisible in the document body, but they are visible in the TOC.
Step 4: Fine-Tuning (Optional)
You might need to adjust the formatting of the Table of Contents to match your document’s style. You can modify the TOC styles (e.g., TOC 1, TOC 2) in the Styles pane to change the font, size, and other formatting attributes.
Advantages and Disadvantages
- Advantages: Uses Word’s built-in TOC feature, TOC updates automatically, headings are hidden from view, relatively easy to implement.
- Disadvantages: Requires inserting headings (even though they are hidden), can be confusing to edit the document later (because the headings are invisible), relies on understanding heading styles.
Troubleshooting Common Issues
Creating a table of contents without headings can sometimes present challenges. Here are some common issues and how to address them:
- Hyperlinks Not Working: Double-check that you’ve correctly linked each TOC entry to the corresponding bookmark or heading. Test each hyperlink to ensure it points to the right location.
- TOC Not Updating: If you’re using the custom styles method, make sure you’ve applied the styles consistently and that you update the TOC after making changes to your document (right-click on the TOC and select ‘Update Field’).
- Incorrect TOC Levels: Ensure you’ve assigned the correct outline levels to your custom styles. Level 1 should be the main sections, Level 2 the sub-sections, and so on.
- Hidden Headings Not Working: If the hidden headings are still visible, double-check that you’ve correctly applied the ‘Hidden’ font effect. Also, make sure that the ‘Show hidden text’ option is not enabled in Word’s options (File > Options > Display).
- TOC Entries Look Wrong: Modify the TOC styles in the Styles pane to adjust the font, size, indentation, and other formatting attributes of the TOC entries.
Best Practices for Creating Tables of Contents
Regardless of the method you choose, here are some best practices to keep in mind:
- Plan Ahead: Before you start formatting your document, think about how you want your table of contents to look and what sections you want to include.
- Be Consistent: Use consistent formatting and styles throughout your document to ensure a professional and polished look.
- Use Descriptive Names: When creating bookmarks or custom styles, use descriptive names that are easy to understand and remember.
- Test Thoroughly: After creating your table of contents, test all the hyperlinks to make sure they work correctly.
- Update Regularly: If you make changes to your document, update your table of contents to reflect those changes.
- Consider Accessibility: Ensure your table of contents is accessible to users with disabilities. Use clear and concise language, and provide alternative text for any images or graphics.
Conclusion
Creating a table of contents in Word without headings might seem daunting at first, but with the right techniques and a little patience, it’s entirely achievable. Whether you choose the manual bookmark method, the custom styles approach, the simplified table method, or the hidden headings technique, you can create a well-organized and easy-to-navigate document that meets your specific needs. Remember to plan ahead, be consistent, and test thoroughly to ensure a professional and polished result. So, go ahead and unlock the secret of creating a table of contents in Word, even without the traditional headings!
