

In the ever-evolving digital landscape, PDFs have become the ubiquitous standard for sharing documents. From important contracts and academic papers to captivating brochures and stunning portfolios, PDFs are everywhere. However, the very nature of a PDF – designed for consistent presentation across different platforms – can often make editing them a frustrating ordeal. While specialized PDF editing software exists, it often comes with a hefty price tag. Fortunately, there’s a powerful, free, and open-source alternative that many overlook: GIMP.
GIMP, the GNU Image Manipulation Program, is primarily known as a robust image editor, rivalling even industry giants like Adobe Photoshop in its capabilities. But beyond its image editing prowess, GIMP also offers a surprisingly effective method for editing PDF files. This comprehensive guide will walk you through the intricacies of editing PDFs using GIMP, empowering you to modify text, images, and other elements within your PDF documents without breaking the bank. We’ll explore the various techniques, tips, and tricks to help you master this often-overlooked functionality.
Why Choose GIMP for PDF Editing?
Before diving into the ‘how-to’, let’s consider why GIMP is a viable option for PDF editing. Several compelling reasons make it a compelling choice:
- Cost-Effectiveness: GIMP is completely free and open-source. You don’t need to shell out a single penny to use it, making it an ideal choice for individuals, students, and small businesses operating on a budget.
- Cross-Platform Compatibility: GIMP runs seamlessly on Windows, macOS, and Linux, ensuring you can edit PDFs regardless of your operating system.
- Image Editing Power: GIMP’s core strength lies in image editing. If your PDF contains images you need to modify, GIMP excels in this area, allowing you to retouch, resize, and manipulate them with ease.
- Text Editing Capabilities: While not its primary function, GIMP provides adequate text editing tools for making basic changes to text within your PDF. You can modify existing text, add new text, and adjust font styles and sizes.
- Accessibility: GIMP’s user interface is relatively intuitive, especially if you’re familiar with other image editing software. A vast online community provides ample tutorials and support, making it easy to learn and troubleshoot.
Of course, GIMP isn’t a perfect PDF editor. It’s not designed to be a full-fledged PDF editing suite like Adobe Acrobat. However, for basic to intermediate editing tasks, it’s a remarkably capable and accessible solution.
Getting Started: Installing and Setting Up GIMP
Before we can start editing PDFs, you’ll need to install GIMP on your computer. The process is straightforward:
- Download GIMP: Visit the official GIMP website (https://www.gimp.org/) and download the installer for your operating system (Windows, macOS, or Linux).
- Run the Installer: Follow the on-screen instructions to install GIMP. The installation process is usually quick and easy.
- Launch GIMP: Once the installation is complete, launch GIMP from your applications or program menu.
That’s it! You’re now ready to open and edit PDFs in GIMP. Let’s move on to the actual editing process.
Opening a PDF in GIMP
Opening a PDF in GIMP is the crucial first step. Here’s how to do it:
- File -> Open: In GIMP, go to the “File” menu and select “Open.”
- Select Your PDF: Browse to the location of your PDF file on your computer and select it.
- Import as Images: GIMP will present a dialog box asking how you want to import the PDF. By default, it imports each page of the PDF as a separate image layer. You can adjust these settings if needed, but the default settings usually work fine.
- Click “Open”: Click the “Open” button to import the PDF into GIMP.
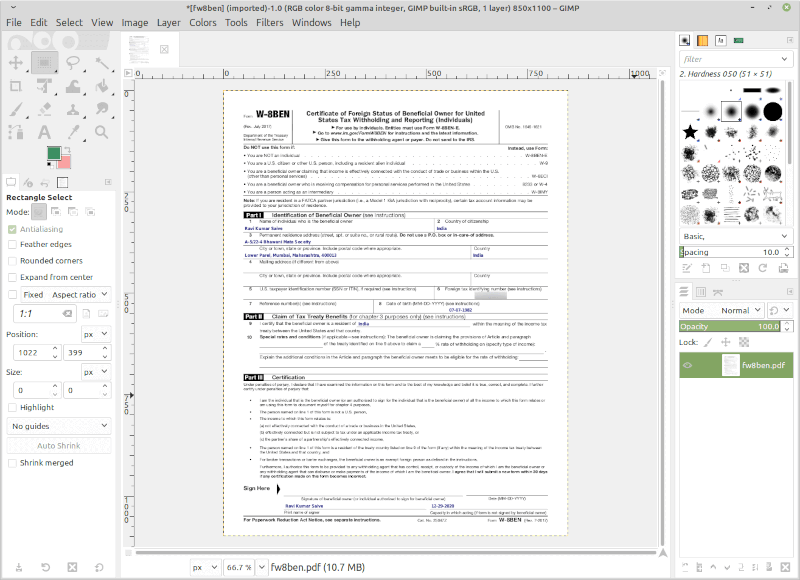
GIMP will then render each page of your PDF as a separate image. You’ll see each page as a distinct layer in the “Layers” panel on the right side of the GIMP interface. You can now begin editing each page individually.
Editing Text in GIMP
Editing text in GIMP is where things get a little trickier, but it’s still possible to make modifications.
- Select the Text Tool: In the toolbox (usually located on the left side of the GIMP interface), select the “Text Tool” (represented by a capital “A”).
- Click on the Text: Click on the text you want to edit within the image of the PDF page. GIMP will attempt to recognize the existing text and allow you to edit it.
- Edit the Text: A text editing box will appear, allowing you to modify the text. You can change the words, add new text, and adjust the font, size, and style.
- Adjust Font Properties: In the “Tool Options” panel (usually located below the toolbox), you can adjust the font, size, color, and alignment of the text.
- Reposition Text: After editing, you can use the “Move Tool” (represented by a crosshair icon in the toolbox) to reposition the text on the page.
Important Considerations for Text Editing:
- Font Matching: GIMP may not always perfectly match the original font used in the PDF. Try to choose a similar font to maintain visual consistency.
- Text Quality: The quality of the text may be slightly reduced after editing, especially if you are repeatedly editing and saving.
- Complexity: Editing complex text layouts or large blocks of text can be challenging. GIMP is better suited for making small adjustments.
Editing Images in GIMP
Editing images within your PDF is one of GIMP’s strongest suits. Here’s how to manipulate images:
- Select the Layer: In the “Layers” panel, select the layer that contains the image you want to edit.
- Use Editing Tools: GIMP offers a vast array of image editing tools, including:
- Move Tool: To reposition the image.
- Scale Tool: To resize the image.
- Rotate Tool: To rotate the image.
- Crop Tool: To crop the image.
- Selection Tools: (Rectangle Select, Ellipse Select, Free Select, etc.) To select specific areas of the image for editing.
- Color Correction Tools: (Brightness-Contrast, Levels, Curves, etc.) To adjust the colors and tones of the image.
- Filters: To apply various effects to the image.
- Make Your Edits: Use the selected tool to make the desired changes to the image.
- Apply Changes: After making your edits, apply them by clicking the appropriate button (e.g., “Scale,” “Rotate,” “Crop”) or by clicking outside the image area.
GIMP provides a non-destructive editing workflow, meaning you can always revert your changes or edit them later. This flexibility is a significant advantage.
Adding New Elements to Your PDF
Beyond editing existing content, you can also add new elements to your PDF using GIMP:
- Adding Text: Use the “Text Tool” as described above to add new text to the PDF.
- Adding Images: You can import new images into your PDF.
- File -> Open as Layers: Go to “File” -> “Open as Layers” and select the image you want to add.
- Reposition and Resize: Use the “Move Tool” and “Scale Tool” to position and resize the new image on the page.
- Adding Shapes and Drawings: Use the various selection tools, brush tools, and path tools to create shapes, lines, and drawings.
Saving Your Edited PDF
Once you’ve finished editing your PDF pages, it’s time to save your work. Here’s how:
- File -> Export As: Go to the “File” menu and select “Export As.”
- Choose PDF Format: In the “Export Image” dialog box, choose the PDF format from the file type selection.
- Name Your File: Give your edited PDF a name and choose a location to save it.
- PDF Export Options: Click the “Export” button. GIMP will then present a dialog box with PDF export options. You can adjust these options to suit your needs, such as:
- General: Allows you to set the compression, resolution, and other general settings.
- Images: Allows you to control the compression of images within the PDF.
- Text: Allows you to control the font embedding and other text-related settings.
- Click “Export”: After adjusting the export options, click the “Export” button to save your edited PDF.
Your edited PDF is now saved and ready to be shared or used as needed.
Tips and Tricks for Effective PDF Editing in GIMP
To get the most out of GIMP for PDF editing, consider these helpful tips and tricks:
- Zoom In: Zoom in on the PDF pages to make precise edits to text and images.
- Use Layers Effectively: Utilize layers to organize your edits and make it easier to modify individual elements.
- Non-Destructive Editing: Take advantage of GIMP’s non-destructive editing capabilities by using layers and filters. This allows you to experiment with different edits without permanently altering the original image.
- Font Matching (Again!): When editing text, try to match the original font as closely as possible. If you don’t have the exact font, choose a similar one.
- Backup Your Original: Always create a backup copy of your original PDF before making any edits. This will protect your original document in case you make a mistake or want to revert to the original version.
- Experiment with Filters: GIMP offers a wide array of filters that can enhance the appearance of your PDF. Experiment with different filters to achieve the desired look.
- Explore Online Resources: The GIMP community is vast and active. Utilize online tutorials, forums, and documentation to learn more about GIMP’s features and capabilities.
- Practice Makes Perfect: The more you use GIMP for PDF editing, the better you’ll become. Practice on different types of PDFs to gain experience and refine your skills.
- Consider Alternatives for Complex Edits: While GIMP is a powerful tool, it’s not a full-fledged PDF editor. For extremely complex edits, you might consider using dedicated PDF editing software or a combination of tools.
Troubleshooting Common Issues
You might encounter a few common issues when editing PDFs in GIMP. Here are some troubleshooting tips:
- Text Distortion: If text appears distorted after editing, try changing the font size or choosing a different font. The original font might not be fully supported.
- Image Quality: If images appear blurry after saving, check the export settings and adjust the image compression. Ensure the resolution is sufficient.
- Missing Fonts: If fonts are missing, GIMP will substitute them with default fonts. Install the original fonts on your system if possible.
- Slow Performance: Editing large or complex PDFs can be resource-intensive. Close other applications to free up system resources.
- Unexpected Behavior: If you encounter unexpected behavior, try restarting GIMP or consulting the GIMP documentation or online forums.
Beyond the Basics: Advanced Techniques
Once you’ve mastered the basic techniques, you can explore some more advanced techniques:
- Using Paths for Precision: Use the “Path Tool” to create precise selections and shapes. This is especially useful for making detailed edits to images.
- Creating Custom Brushes: Create custom brushes to add unique effects to your PDF.
- Working with Layers Modes: Experiment with different layer modes (e.g., Multiply, Screen, Overlay) to achieve creative effects.
- Using Scripts and Plugins: GIMP supports scripts and plugins that can extend its functionality. Explore these options to automate tasks and add new features.
Conclusion: Unleashing the Power of GIMP for PDF Editing
GIMP provides a surprisingly capable and cost-effective solution for editing PDF files. While it may not offer all the features of dedicated PDF editing software, it excels in image editing and provides adequate text editing capabilities for many common tasks. By following the steps outlined in this guide, you can unlock the potential of GIMP to modify, enhance, and customize your PDF documents, all without breaking the bank. Embrace the power of this free and open-source tool, and you’ll discover a versatile and accessible way to manage your PDF editing needs. So, the next time you need to make a quick edit to a PDF, remember the power of GIMP, and you’ll be well on your way to mastering this invaluable skill.
With practice and exploration, you can transform GIMP into your go-to tool for PDF editing, saving you money and empowering you with a valuable skill in the digital age. Happy editing!
