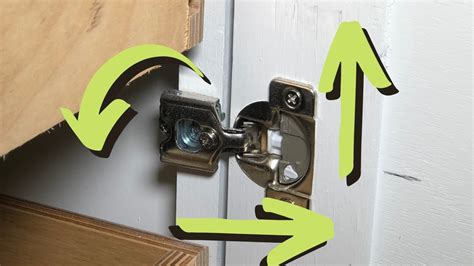
How to Adjust Door Hinges: A Comprehensive Guide
Are your doors sticking, sagging, or slamming shut? The culprit might be misaligned door hinges. Fortunately, adjusting door hinges is a relatively simple DIY project that can save you money and frustration. This comprehensive guide will walk you through the process, helping you get your doors swinging smoothly again.
Understanding Door Hinge Problems
Before you start adjusting, it's helpful to understand why your door hinges need attention. Common issues include:
- Sagging Doors: Over time, the weight of the door can cause the hinges to loosen, leading to a sagging door that rubs against the frame.
- Sticking Doors: A door that sticks might be due to misaligned hinges, causing friction between the door and the frame.
- Gaps in the Door Frame: Uneven gaps between the door and the frame often point to hinge problems.
- Difficult to Open/Close: A door that's hard to open or close is another clear sign of misalignment.
Tools You'll Need
Before you begin, gather these essential tools:
- Screwdriver: You'll likely need both a Phillips head and a flathead screwdriver.
- Level: A level is crucial for ensuring your door hangs straight.
- Pencil: Use a pencil to mark screw locations if necessary.
- Hammer (optional): In some cases, you might need a hammer to gently tap screws.
- Wrench (optional): Some hinges might require a wrench for adjustment.
Adjusting Your Door Hinges: A Step-by-Step Guide
The process of adjusting hinges depends on the type of hinge and the specific problem. However, here's a general approach:
1. Assessing the Problem
Carefully inspect your door and identify the specific problem areas. Is the door sagging at the top, bottom, or both? Is it sticking on one side more than the other? This assessment will guide your adjustments.
2. Tightening Loose Screws
Often, a simple solution is to tighten loose screws. Use your screwdriver to firmly tighten all screws on each hinge. If the screws are stripped, you may need to fill the holes with wood filler, let it dry, and then drill new pilot holes before inserting new screws.
3. Adjusting Hinge Screws for Vertical Alignment
If tightening screws doesn't solve the problem, you'll need to adjust the hinges themselves. For a door that's sagging:
- Sagging at the top: Loosen the screws on the top hinge. Slightly lift the door and retighten the screws.
- Sagging at the bottom: Loosen the screws on the bottom hinge. Slightly lift the door at the bottom and retighten the screws.
For a door that's sticking, you may need to adjust the hinges to create a more even gap between the door and the frame.
4. Using the Level to Check Alignment
After making adjustments, use a level to check the door's alignment. Ensure the door is plumb (vertical) and true (not leaning). Make further adjustments as needed.
5. Adjusting Hinge Screws for Horizontal Alignment
If your door is rubbing against the frame on one side, you might need to adjust the hinges horizontally. Loosen the screws on the middle hinge. Gently push or pull the door to adjust its position, and then retighten the screws. Again, use the level to check for alignment.
6. Replacing Damaged Hinges
If the hinges are severely damaged or beyond repair, replace them with new ones. Ensure the new hinges are the same size and type as the old ones.
Preventing Future Hinge Problems
To prevent future problems, consider these tips:
- Regularly inspect your door hinges. Tighten loose screws as needed.
- Use high-quality hinges. Durable hinges will last longer.
- Lubricate your hinges periodically. A few drops of oil can help prevent squeaking and ensure smooth operation.
By following these steps, you can successfully adjust your door hinges and restore your doors to their proper function. Remember safety first, and if you're unsure about any part of the process, it's always best to consult a professional.
