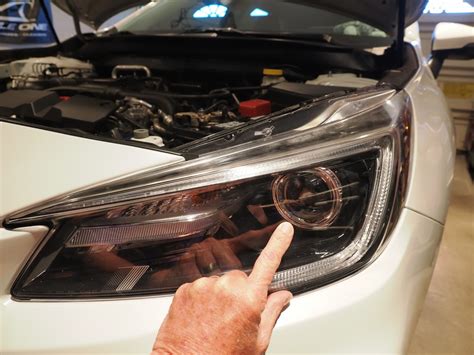
How To Adjust Your Headlights for Optimal Visibility and Safety
Proper headlight adjustment is crucial for safe night driving. Misaligned headlights can reduce visibility, leading to accidents, and can also blind oncoming drivers. This guide will walk you through how to adjust your headlights, ensuring optimal illumination and road safety. We'll cover different headlight types and provide troubleshooting tips.
Why Adjust Your Headlights?
Several factors can cause your headlights to become misaligned:
- Impact: A bump or pothole can knock your headlights out of alignment.
- Vehicle Age: Over time, the headlight adjustment mechanisms can wear down.
- Heavy Loads: Carrying a heavy load in your vehicle can affect the headlight angle.
Ignoring misaligned headlights can result in:
- Reduced Visibility: Poorly aimed headlights don't illuminate the road properly, increasing your risk of accidents.
- Glare for Oncoming Drivers: Headlights pointed too high can blind other drivers, creating a hazardous situation.
- Failing Vehicle Inspection: Many states require proper headlight alignment for vehicle inspections.
Tools You'll Need
Before you begin, gather these essential tools:
- Phillips head screwdriver (or other type as needed for your vehicle): Used to access the headlight adjustment screws.
- Measuring tape: For precise adjustment (optional but recommended).
- Flat, level surface: Essential for accurate adjustment.
- Assistant (optional): Helpful for observing the headlight beam pattern.
- Vehicle Owner's Manual: This provides specific instructions and diagrams for your car model.
How to Adjust Your Headlights: A Step-by-Step Guide
The process for adjusting headlights varies slightly depending on your vehicle's make and model. However, the general steps are similar. Always consult your owner's manual for specific instructions for your car.
Step 1: Preparation
- Park your vehicle on a flat, level surface, approximately 25 feet away from a wall or garage door.
- Turn on your headlights (low beams).
- Ensure your vehicle is properly loaded (no heavy cargo that could affect alignment).
Step 2: Locating the Adjustment Screws
- Open your hood and locate the headlight assembly.
- Most vehicles have adjustment screws located either on the back of the headlight housing or near the headlight itself. These screws usually control vertical (up/down) and horizontal (left/right) adjustments.
- Consult your owner's manual to locate the adjustment screws. They are often labeled with arrows indicating the direction of adjustment.
Step 3: Adjusting the Headlights
- Using your screwdriver, carefully adjust the vertical screws to raise or lower the headlight beam. Small adjustments make a big difference.
- Adjust the horizontal screws to move the beam left or right.
- After each adjustment, check the beam pattern on the wall.
Step 4: Checking the Beam Pattern
- The ideal beam pattern should be a relatively even, horizontal line with a slight upward inclination.
- The cutoff line (the upper edge of the beam) should be relatively straight and sharp.
Step 5: Refinement and Completion
- Repeat steps 3 and 4 until you achieve a satisfactory beam pattern.
- After adjusting, check both headlights to ensure they are aligned properly and both project the same beam pattern. Slight differences are acceptable.
- Close the hood and test your headlights on the road.
Troubleshooting
- If you cannot find the adjustment screws: Consult your owner's manual or seek professional assistance from a mechanic.
- If the headlights are still misaligned after adjustment: There might be a more significant issue with the headlight assembly or its mounting. A mechanic should inspect the system.
When to Seek Professional Help
If you're uncomfortable adjusting your headlights yourself, or if you've tried adjusting them and they are still misaligned, it's best to seek professional help from a qualified mechanic or auto repair shop. They have specialized tools and expertise to properly align your headlights.
By following these steps, you can ensure your headlights are properly adjusted, enhancing your night vision and improving road safety for yourself and other drivers. Remember to always consult your owner's manual for specific instructions and never hesitate to seek professional help when needed.
