How to Create a Dropdown in Excel: A Step-by-Step Guide
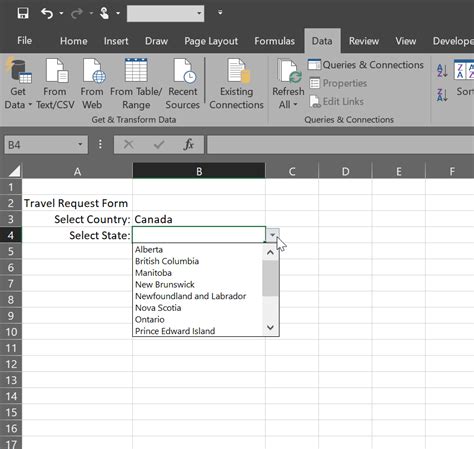
Creating dropdown lists in Excel is a simple yet powerful way to improve data entry efficiency and accuracy. Dropdowns restrict users to selecting only pre-approved values, preventing errors and ensuring consistency in your spreadsheets. This guide will walk you through the process, covering various scenarios and offering tips for optimal use.
Understanding Data Validation
The key to creating a dropdown in Excel lies in using Data Validation. This feature allows you to control the type of data entered into a cell, and dropdowns are one of its most useful applications.
Step 1: Identifying Your Dropdown Values
Before you begin, determine the values you want to appear in your dropdown list. These could be:
- A simple list: e.g., "Yes," "No," "Maybe"
- Data from a range of cells: This is ideal for larger lists or when you need to easily update the dropdown options.
- A named range: Assigning a name to your range of data makes it easier to manage and reuse across your workbook.
Creating Your First Dropdown
Let's walk through creating a simple dropdown with a list of pre-defined values:
Step 2: Selecting the Target Cell(s)
Select the cell(s) where you want the dropdown to appear.
Step 3: Accessing Data Validation
Go to the Data tab on the Excel ribbon. In the Data Tools group, click on Data Validation.
Step 4: Configuring the Dropdown
The Data Validation dialog box will appear. Here's how to configure it for a dropdown:
-
Settings: Under the Allow dropdown, select List.
-
Source: This is where you specify your dropdown values. You can:
- Type them directly: Separate each value with a comma (e.g., "Apple,Banana,Orange").
- Select a range: Click the icon to the right of the Source box and select the range of cells containing your values.
- Use a named range: Type the name of your named range.
-
Input Message: (Optional) This allows you to add a helpful message that appears when the user selects the cell.
-
Error Alert: (Optional) This allows you to create an alert that appears if the user attempts to enter an invalid value.
Step 5: Click "OK"
Once you've configured the settings, click OK. Your dropdown list is now ready to use!
Advanced Dropdown Techniques
Using Data from Another Worksheet
You can easily create a dropdown using data from a different worksheet within the same workbook. Simply select the relevant range of cells from the other sheet in the Source field of the Data Validation dialog box. Use the sheet name followed by an exclamation mark and then the range (e.g., Sheet2!$A$1:$A$10).
Creating Dependent Dropdowns (Cascading Dropdowns)
Dependent dropdowns create dynamic lists that change based on the selection in another dropdown. This requires a bit more advanced setup using formulas and named ranges but significantly enhances the usability of your Excel sheets. This involves using INDIRECT and MATCH functions within your data validation source. A separate tutorial would be beneficial to cover this in depth.
Best Practices for Excel Dropdowns
- Keep your lists concise: Long lists can be cumbersome for users.
- Use descriptive names: Make it clear what each dropdown option represents.
- Maintain data consistency: Use dropdowns to enforce consistent data entry throughout your spreadsheets.
- Consider using named ranges: This makes your formulas easier to understand and maintain.
By following these steps and best practices, you can effectively create and utilize dropdowns in Excel to improve your data management and analysis. Remember to explore the advanced features for even greater functionality!
