How To Draw A Cat: A Step-by-Step Guide for Beginners
So you want to learn how to draw a cat? Fantastic! Whether you're a seasoned artist or just starting out, drawing a feline friend can be a rewarding experience. This guide provides a simple, step-by-step approach, perfect for beginners. We'll focus on creating a cute, cartoonish cat, but the principles can be applied to more realistic styles as well.
Gathering Your Supplies
Before we begin, let's gather our materials. You won't need anything fancy!
- Paper: Any kind of paper will do, but drawing paper or a sketchbook is ideal.
- Pencil: A regular HB pencil is perfect for sketching. You'll want something that's easy to erase.
- Eraser: A good eraser is essential for fixing mistakes.
- Sharpener: Keep your pencil sharp for clean lines.
- Optional: Pens or Colored Pencils: For adding details and color once you're happy with your sketch.
Step-by-Step Drawing Guide
Let's start drawing our adorable cat!
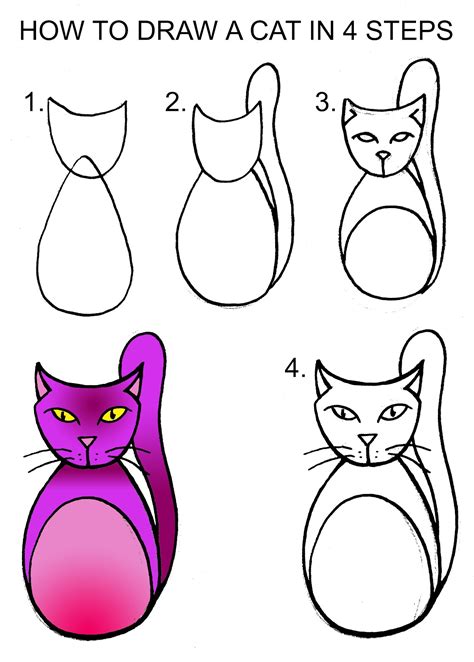
Step 1: The Head
Begin by drawing a circle. This will form the base of your cat's head. Don't worry about making it perfect; it's just a guide.
Step 2: The Ears
Add two slightly curved triangles on top of the circle for the ears. Vary their positioning slightly for a more natural look.
Step 3: The Face
Draw two smaller circles inside the larger circle, slightly lower and to the sides. These will be your cat's eyes. Add small, curved lines inside each eye for the pupils. A tiny upside-down 'U' shape under each eye creates a cute nose.
Step 4: The Body
Draw a slightly elongated oval shape connected to the bottom of the head circle. This is the cat's body. Remember, cats are flexible, so don't be afraid to experiment with different body shapes.
Step 5: The Legs and Tail
Add four short, slightly curved lines extending from the bottom of the body for the legs. Finish off with a long, slightly curved line for the tail. Play around with the tail's position - a curled tail adds character!
Step 6: Refining the Details
Now it's time to refine your drawing. Add whiskers extending from the sides of the nose. You can add a small curved line for the mouth. Give your cat a cute little tummy by adding a gentle curve to the bottom of its body. Use your eraser to clean up any unwanted lines.
Step 7: Adding Personality
This is where you can let your creativity shine! Add spots, stripes, or a unique fur pattern. Consider adding a collar or other accessories. Experiment with different expressions - a playful grin, a sleepy squint, or a curious tilt of the head.
Step 8: Inking and Coloring (Optional)
Once you're happy with your pencil sketch, you can ink it with a pen for a bolder look. Then, unleash your creativity with colored pencils, crayons, or markers to bring your cat to life with vibrant colors!
Tips for Success
- Practice Regularly: The more you practice, the better you'll become.
- Don't Be Afraid to Experiment: Try different poses, styles, and expressions.
- Observe Real Cats: Studying real cats will help you understand their anatomy and movements.
- Use Light Pencil Strokes: This makes it easier to erase and adjust your drawing.
- Have Fun! Drawing should be an enjoyable experience.
This guide provides a basic framework. Feel free to modify it and develop your own unique style. Remember to practice regularly, and soon you'll be creating your own adorable cat masterpieces! Now grab your pencils and start drawing!
