How to Draw Pokémon: A Beginner's Guide to Mastering Your Favorite Pocket Monsters
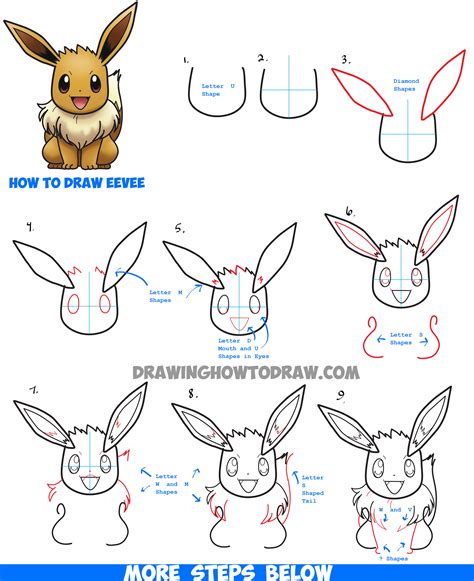
Want to unleash your inner Pokémon trainer and bring your favorite creatures to life on paper? This guide will walk you through the basics of drawing Pokémon, no matter your skill level. We'll cover essential techniques and provide step-by-step instructions to help you create amazing artwork. Get ready to become a Pokémon drawing master!
Understanding Pokémon Anatomy: The Foundation of Your Artwork
Before you start sketching, it's crucial to understand the fundamental shapes and structures that make up Pokémon. Most Pokémon are based on animals, plants, or objects, often with fantastical elements. Observing these foundational elements is key.
Breaking Down the Basics:
- Shapes: Start by identifying the basic shapes within a Pokémon's body. Is it primarily circular, square, triangular, or a combination? This initial simplification will help you establish the overall form.
- Proportions: Pay close attention to the proportions of different body parts. How long is the neck compared to the body? How big are the head, legs, and tail relative to the rest of the body?
- Features: Focus on the defining features that make each Pokémon unique. This could be their ears, eyes, claws, horns, or other distinguishing characteristics.
Step-by-Step Guide: Drawing Pikachu, the Electric Mouse
Pikachu, the iconic mascot of the Pokémon franchise, is an excellent subject for beginners. Its relatively simple design allows you to focus on fundamental drawing techniques.
Step 1: The Basic Shape
Start by sketching a large circle for Pikachu's head and attach a smaller, slightly elongated circle for its body. Connect the circles with a slightly curved line for the neck.
Step 2: Adding the Features
Draw two large, oval-shaped ears on top of the head. Add two small circles for the eyes and a small curved line for the mouth. Don't forget Pikachu's signature red cheeks! Sketch two small circles for these.
Step 3: Defining the Body
Sketch two small ovals for Pikachu's front legs and two slightly larger ones for its back legs. Add a long, thin tail that curves towards the end.
Step 4: Refining the Details
Use a darker pencil or pen to outline the final shape of Pikachu. Erase the initial sketch lines. Add details like the fur texture by using short, light strokes. Remember the lightning bolt on its tail!
Step 5: Adding Color (Optional)
Once you are happy with your line art, you can add color using colored pencils, markers, or paints. Pikachu's primary color is yellow, with black for its ears and stripes on its tail.
Beyond Pikachu: Drawing Other Pokémon
Once you've mastered drawing Pikachu, you can apply these techniques to other Pokémon. Remember to:
- Observe References: Use official artwork or screenshots as references to help you understand the details of more complex Pokémon.
- Practice Regularly: The key to improving your drawing skills is consistent practice. Try drawing different Pokémon every day.
- Experiment with Styles: Don't be afraid to experiment with different styles and techniques. You can try adding your own creative spin to your drawings.
Essential Tools for Pokémon Drawing
While you can draw Pokémon with just a pencil and paper, having the right tools can make the process easier and more enjoyable. Consider investing in:
- Drawing Pencils: A variety of pencils with different hardness levels (e.g., HB, 2B, 4B) will give you more control over line weight and shading.
- Eraser: A good quality eraser is essential for correcting mistakes.
- Sketchbook: Choose a sketchbook with paper that's suitable for your chosen medium.
By following these steps and practicing regularly, you'll be well on your way to creating stunning Pokémon artwork. Remember to have fun and let your creativity shine! Good luck, aspiring Pokémon artists!
