How to Give Someone Edit Access on Figma: A Step-by-Step Guide
Sharing your Figma designs for collaboration is crucial for effective teamwork. This guide provides a clear, step-by-step process on how to grant someone edit access to your Figma files, ensuring smooth workflow and seamless design iterations.
Understanding Figma's Access Levels
Before diving into the process, it's important to understand Figma's different permission levels:
- Can view: This permission allows users to see your designs but not make any changes. Think of it as a read-only access.
- Can edit: This permission grants users full access to edit and modify your designs. This is ideal for collaborators working on the same project.
- Can comment: This allows users to leave comments and feedback on your designs without directly editing them. This is great for feedback rounds and design reviews.
Step-by-Step Guide to Giving Edit Access
Here's how to grant edit access to your Figma file:
-
Open the Figma File: Begin by opening the file you wish to share.
-
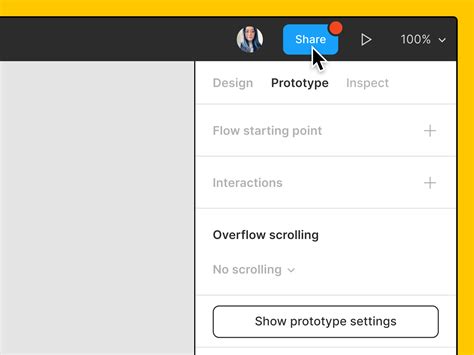
Locate the Share Button: In the top right corner of the Figma interface, you'll find a share button (usually an icon resembling a person with a plus sign). Click on it.
-
Invite People to the File: A pop-up window will appear. Here you have two main options:
- Enter Email Addresses: Type the email addresses of the people you want to invite. You can add multiple emails, separating them with commas.
- Share a Link: Alternatively, you can generate a shareable link. This allows you to share the file via other platforms such as Slack or email. Choose which method suits your workflow better.
-
Select Permission Level: For each person you invite, you'll need to specify their access level. Select "Can edit" from the dropdown menu next to their email address or the generated link. This will give them full editing capabilities.
-
Optional: Add a Message: You can include a short message with the invitation. This is a great place to provide context or instructions to your collaborators.
-
Send the Invitation: Once you've selected the appropriate permission level and added your message (if desired), click the "Send" button to invite your collaborators. They'll receive an email notification with access to the file.
Troubleshooting and Additional Tips
- Recipient hasn't received the invitation: Check your spam folder. Sometimes Figma invitations can end up there.
- Problems accessing the file: Ensure the recipient has a Figma account. If they don't, they'll need to create one to access the shared file.
- Managing Access: You can easily revoke access or change permission levels at any time by revisiting the share settings (the same share button you used initially).
- Using Teams: If you're working with a team, utilizing Figma's team features may streamline collaboration and simplify access management.
By following these steps, you can efficiently share your Figma files and ensure smooth collaboration with your team. Remember to always double-check the access level before sending the invitation to prevent unwanted edits. Happy designing!
